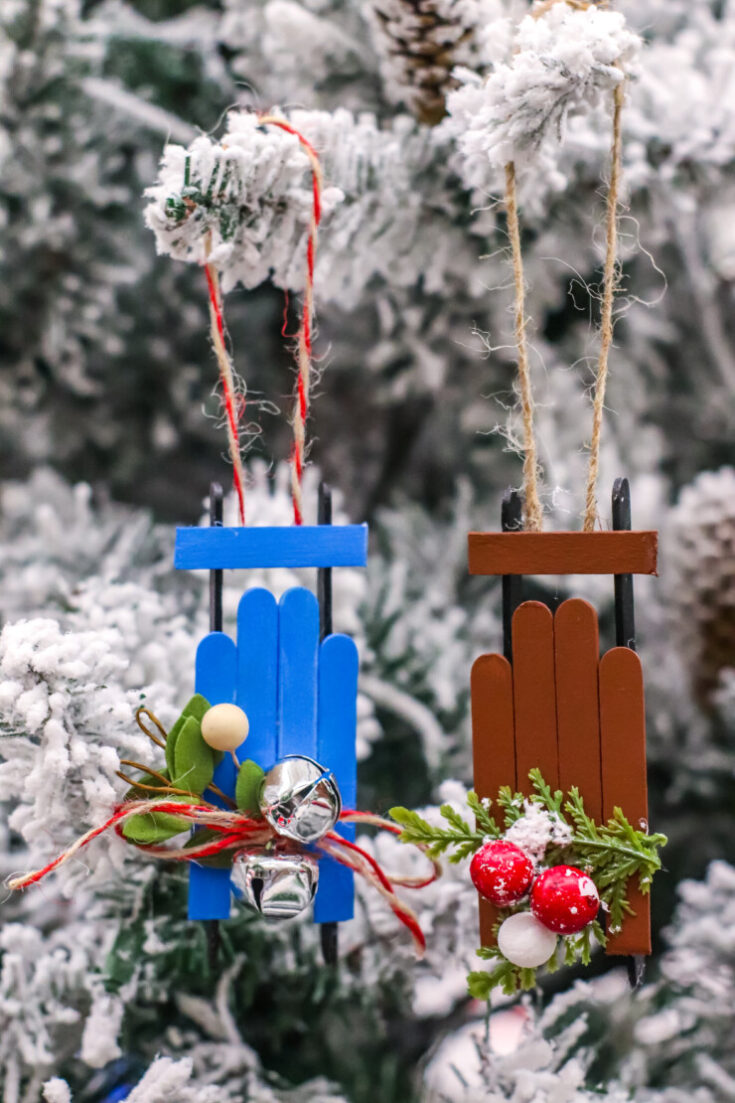
Wooden Sled Popsicle Stick Ornaments
This Wooden Sled Popsicle Stick Ornament Craft is made with craft sticks and other basic supplies for an adorable Christmas tree ornament.

This easy handmade Christmas ornament is a beautiful keepsake craft that will be treasured for years to come.

They look beautiful hanging on the Christmas tree as a decoration or attached to a Christmas gift!

Looking for more Christmas ornament crafts?
Check out some of my favourite handmade Christmas ornaments:
Candy Cane Christmas Tree Ornament

Wooden Sled Ornament Craft
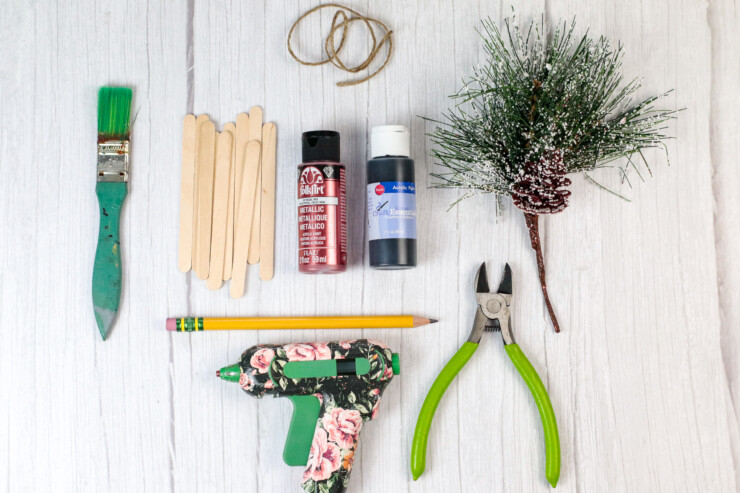
Supplies:
Craft sticks
Acrylic craft paint
paint brushes
Holiday sprigs (I got mine from Joann, but Amazon carries similar)
Ribbon or twine
Glue Gun
White school or Tacky glue
Pencil
Floral wire cutters
Craft scissors
Directions:
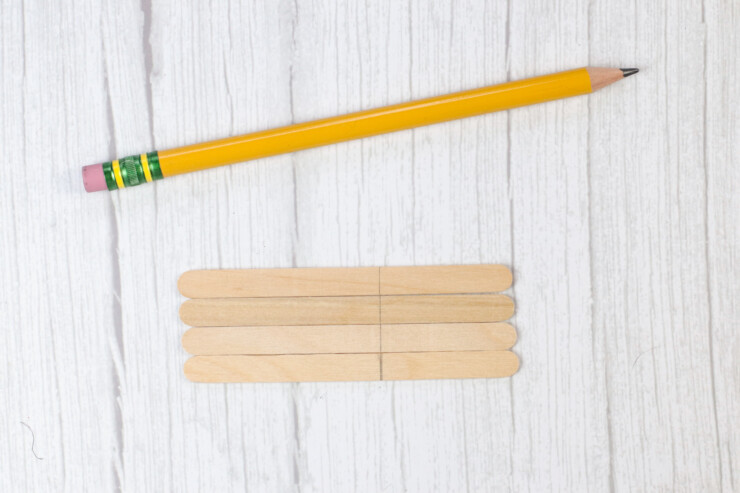
Measure and using either the floral wire cutters or craft scissors, cut your craft sticks into the following: (4)-2 ½” pieces, (2)-3 ½ cm pieces and (1)-1 ¾” piece
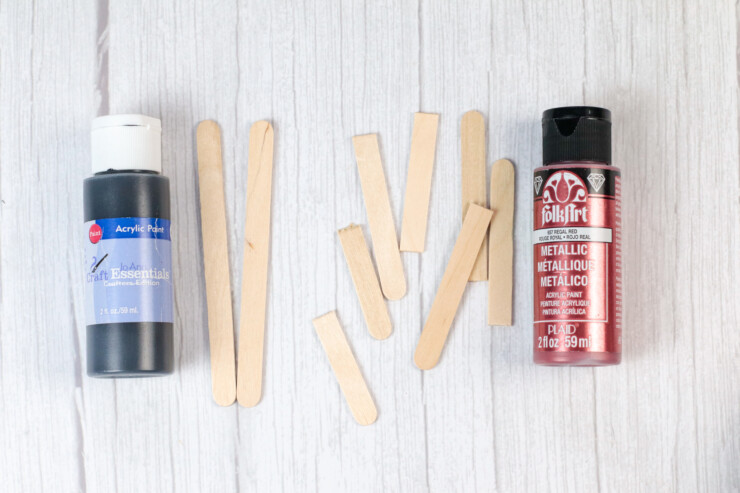
Paint your smaller pieces one colour (be sure to paint the edges) and paint 2 full size craft sticks, which will be the blades of the sled another colour and allow the paint to dry completely.
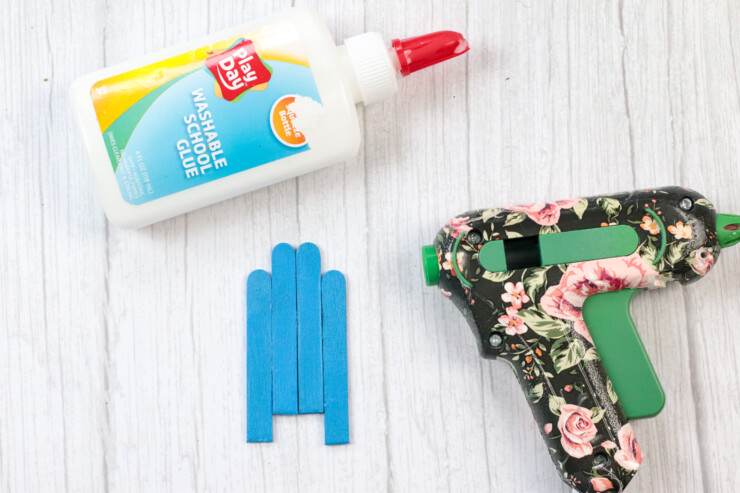
Glue the (4)-2 ½” pieces together, using either a glue gun or the White school or Tacky glue. Begin by gluing the 2 middle pieces together, joining them together in the middle and allow the glue to dry completely. (Do this for each piece(s) you glue onto each other). Glue the next 2 pieces on either side, but measure down 1 cm, so your sled doesn’t go straight across on all 4 pieces (see photo)
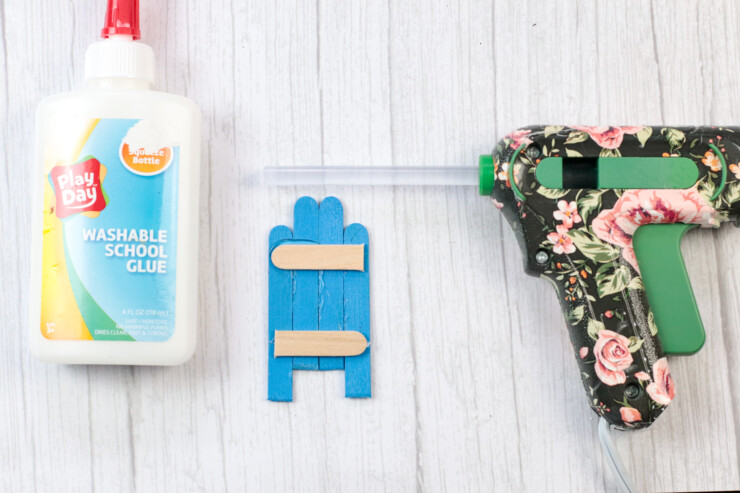
Once the 4 main pieces are totally dry, turn over. Measure down 1 ½ cm from the top and glue down one of the 3 ½ cm pieces onto the body of the sled. Measure up ½ cm from the bottom and glue the other 3 ½ cm piece.
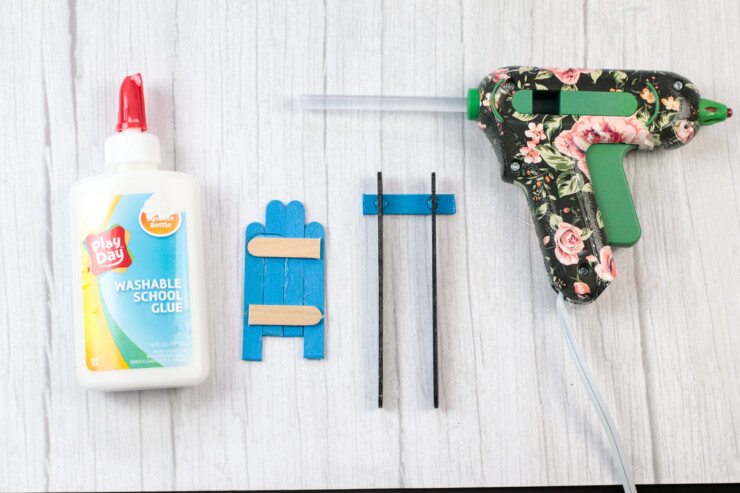
Take your 1 ¾” piece and measure in 1 ½ cm on the right side and glue on your blades. We have the tip of our blade measuring out about 1 ½ cm from where we glued it on. Repeat on the other side. Be sure your glue is totally dry, and the blades are on sturdy before moving onto the next step.
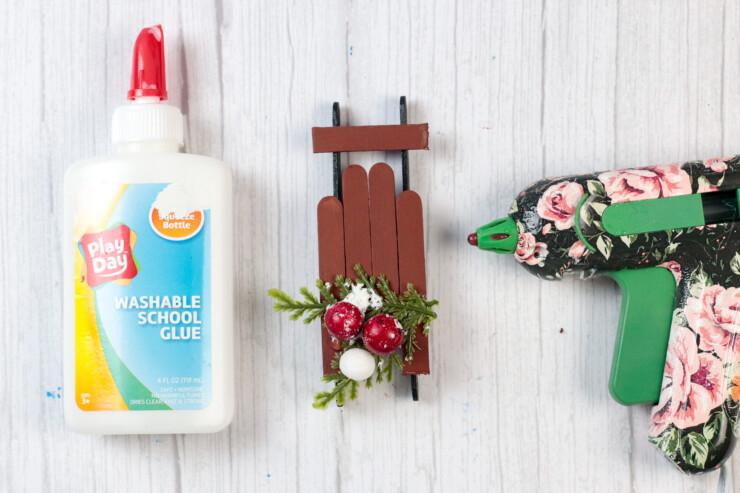
Turn the sled over and attach any embellishments or holiday greenery you like.
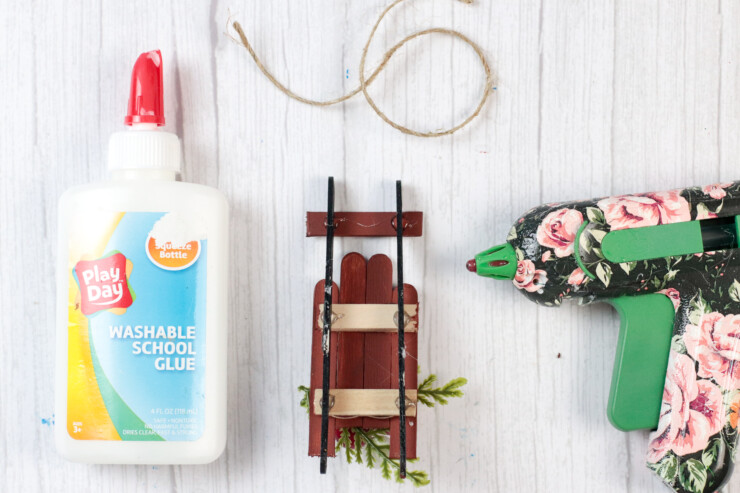
Cut a length of ribbon or twine approximately 7-8”, form a loop and tie in a small secure knot at the end. Allow to dry completely.
Hang on your tree and enjoy!

Wooden Sled Ornament Craft
This Wooden Sled Ornament Craft is made with craft sticks and a few other basic supplies for an adorable Christmas tree ornament.
Materials
- Craft sticks
- Acrylic craft paint
- paint brushes
- Holiday sprigs (I got mine from Joann, but Amazon carries similar)
- Ribbon or twine
- Glue Gun
- White school or Tacky glue
- Pencil
Tools
- Floral wire cutters
- Craft scissors
Instructions
Measure and using either the floral wire cutters or craft scissors, cut your craft sticks into the following: (4)-2 ½” pieces, (2)-3 ½ cm pieces and (1)-1 ¾” piece
Paint your smaller pieces one colour (be sure to paint the edges) and paint 2 full size craft sticks, which will be the blades of the sled another colour and allow the paint to dry completely.
Glue the (4)-2 ½” pieces together, using either a glue gun or the White school or Tacky glue.
Begin by gluing the 2 middle pieces together, joining them together in the middle and allow the glue to dry completely. (Do this for each piece(s) you glue onto each other).
Glue the next 2 pieces on either side, but measure down 1 cm, so your sled doesn’t go straight across on all 4 pieces
Once the 4 main pieces are totally dry, turn over. Measure down 1 ½ cm from the top and glue down one of the 3 ½ cm pieces onto the body of the sled.
Measure up ½ cm from the bottom and glue the other 3 ½ cm piece.
Take your 1 ¾” piece and measure in 1 ½ cm on the right side and glue on your blades.
We have the tip of our blade measuring out about 1 ½ cm from where we glued it on. Repeat on the other side.
Be sure your glue is totally dry, and the blades are on sturdy before moving onto the next step.
Turn the sled over and attach any embellishments or holiday greenery you like.
Cut a length of ribbon or twine approximately 7-8”, form a loop and tie in a small secure knot at the end. Allow to dry completely.
Hang on your tree and enjoy!


