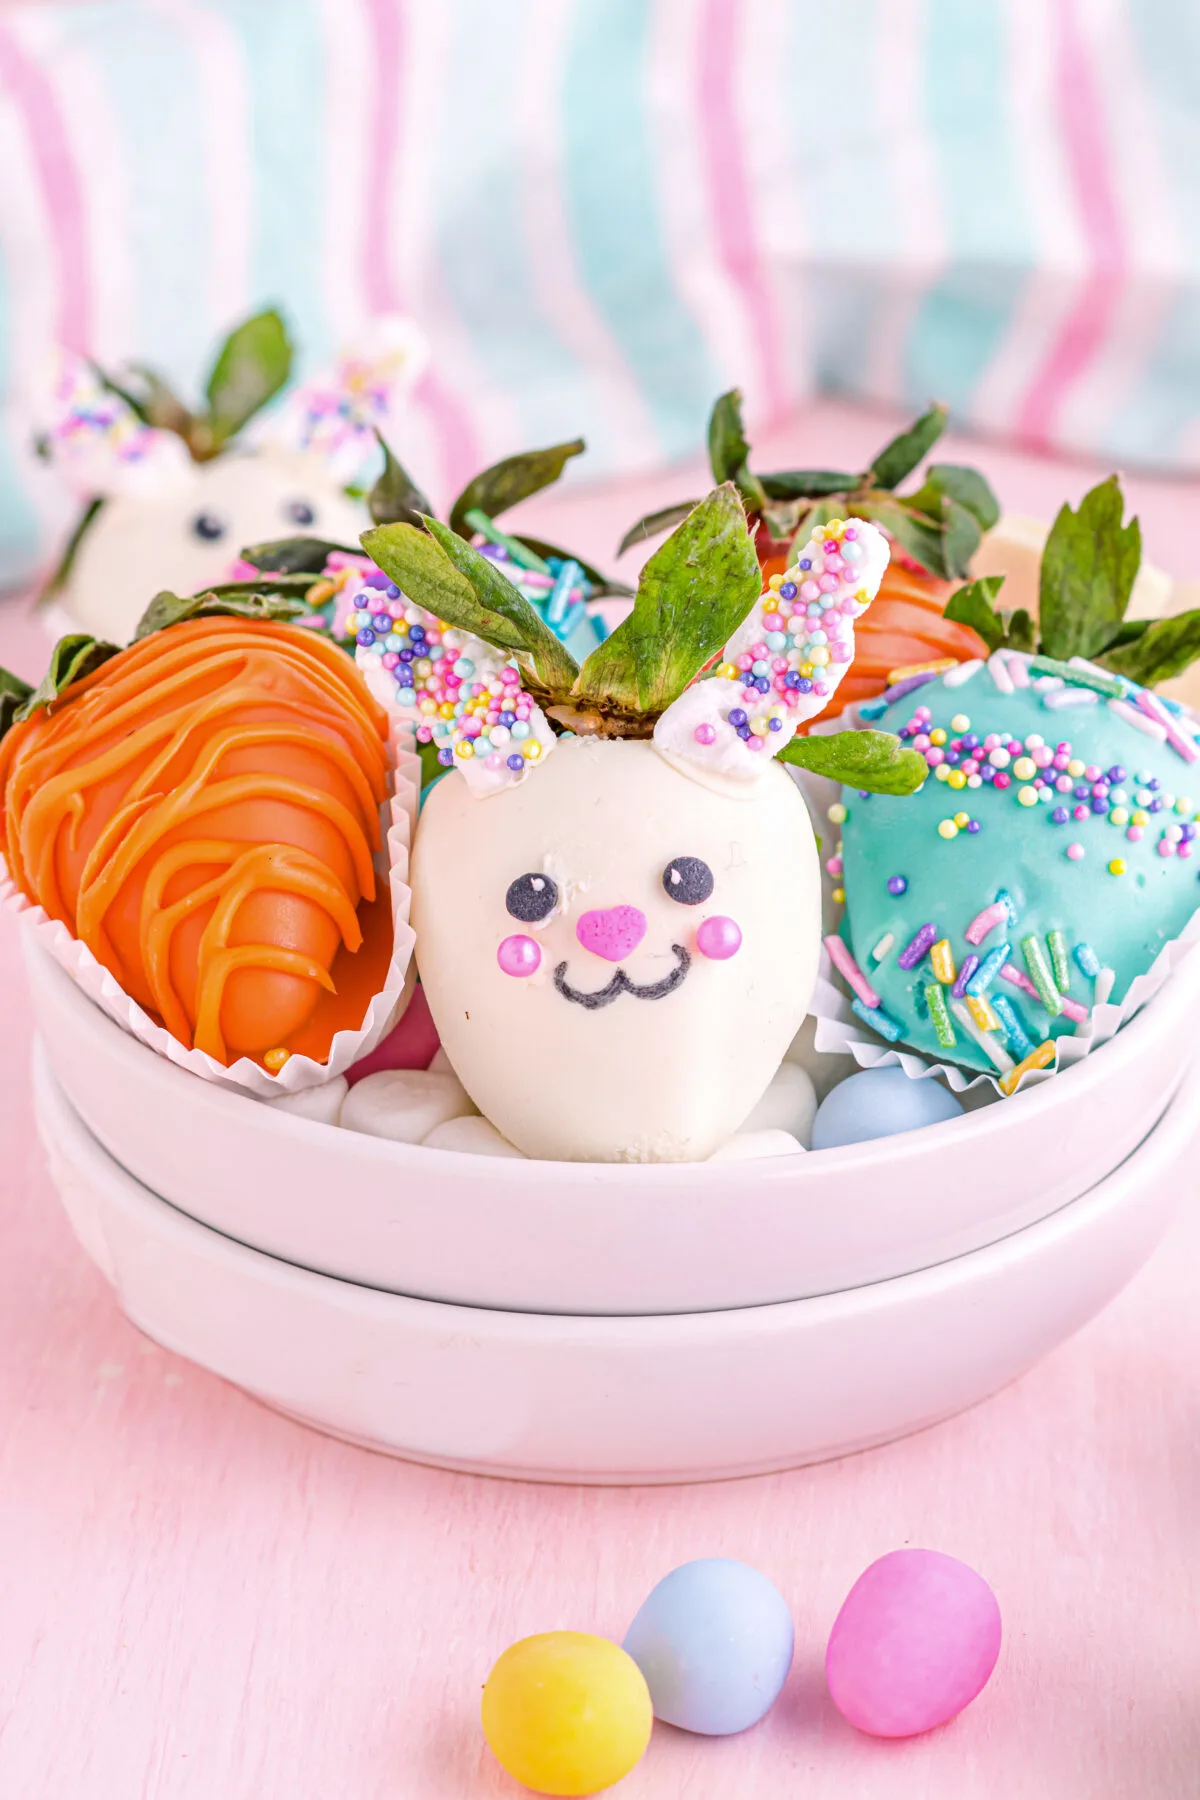
Looking for a delicious and easy Easter dessert? Check out our step-by-step guide to making Easter chocolate covered strawberries.

When it comes to Easter desserts, you can’t go wrong with a classic recipe like Chocolate Covered Strawberries.
Whether you’re aiming for fancy celebration fare or just something special and fun, these lovely little treats are the perfect way to make the day extra special!
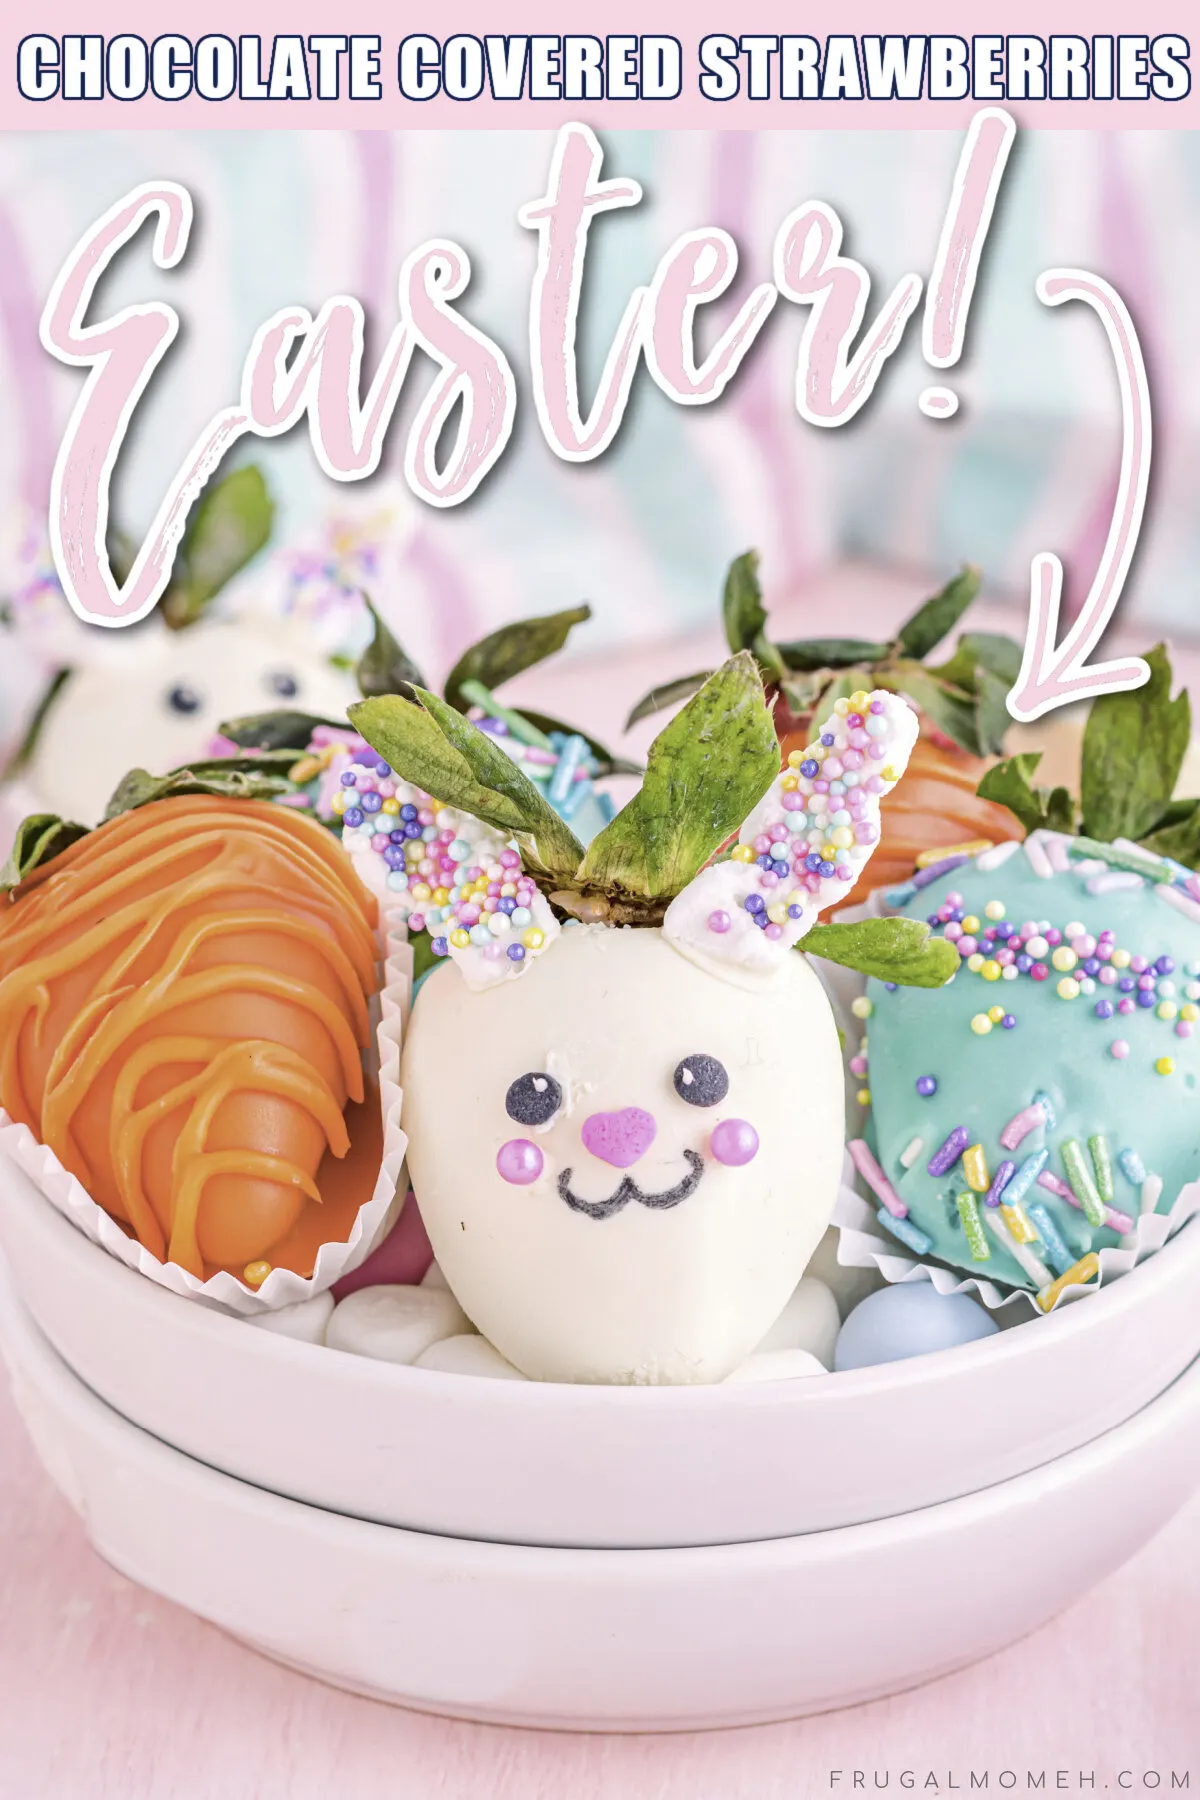
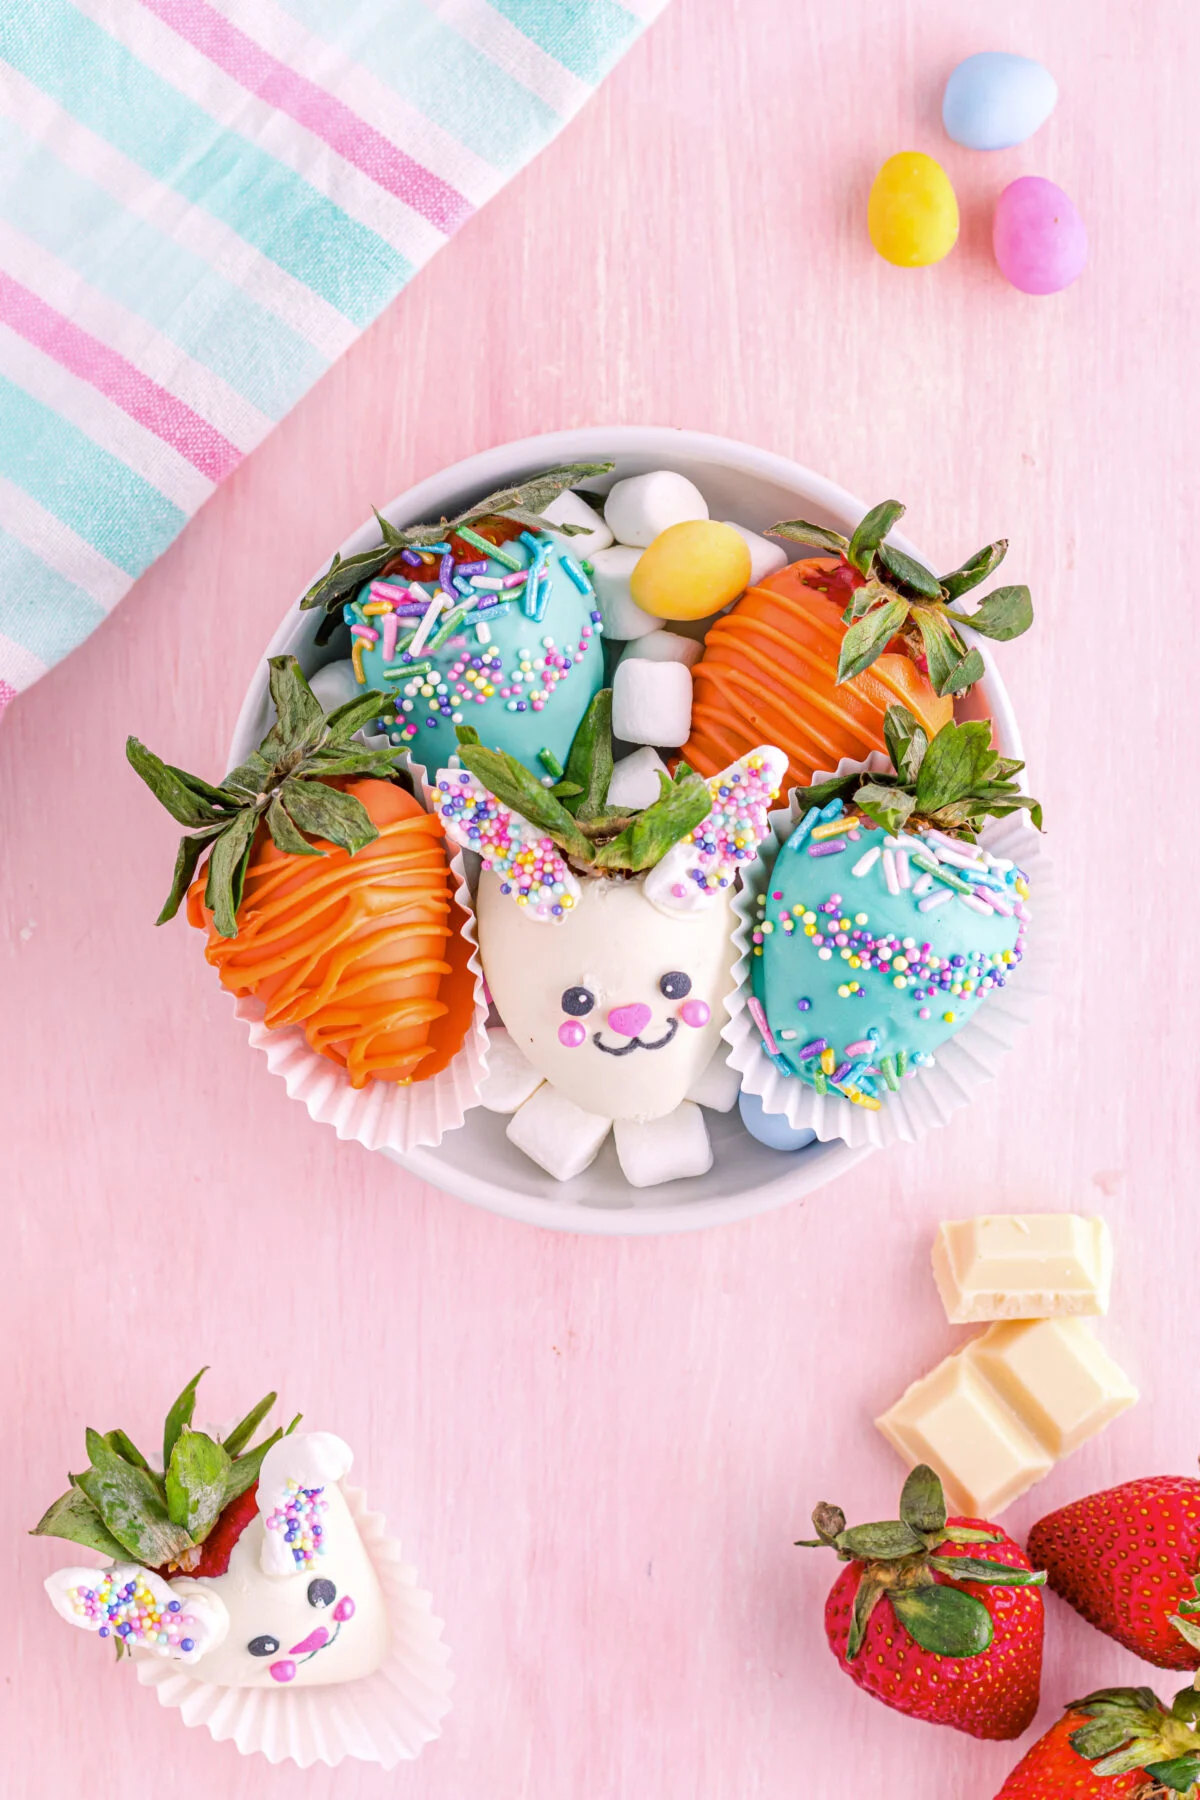
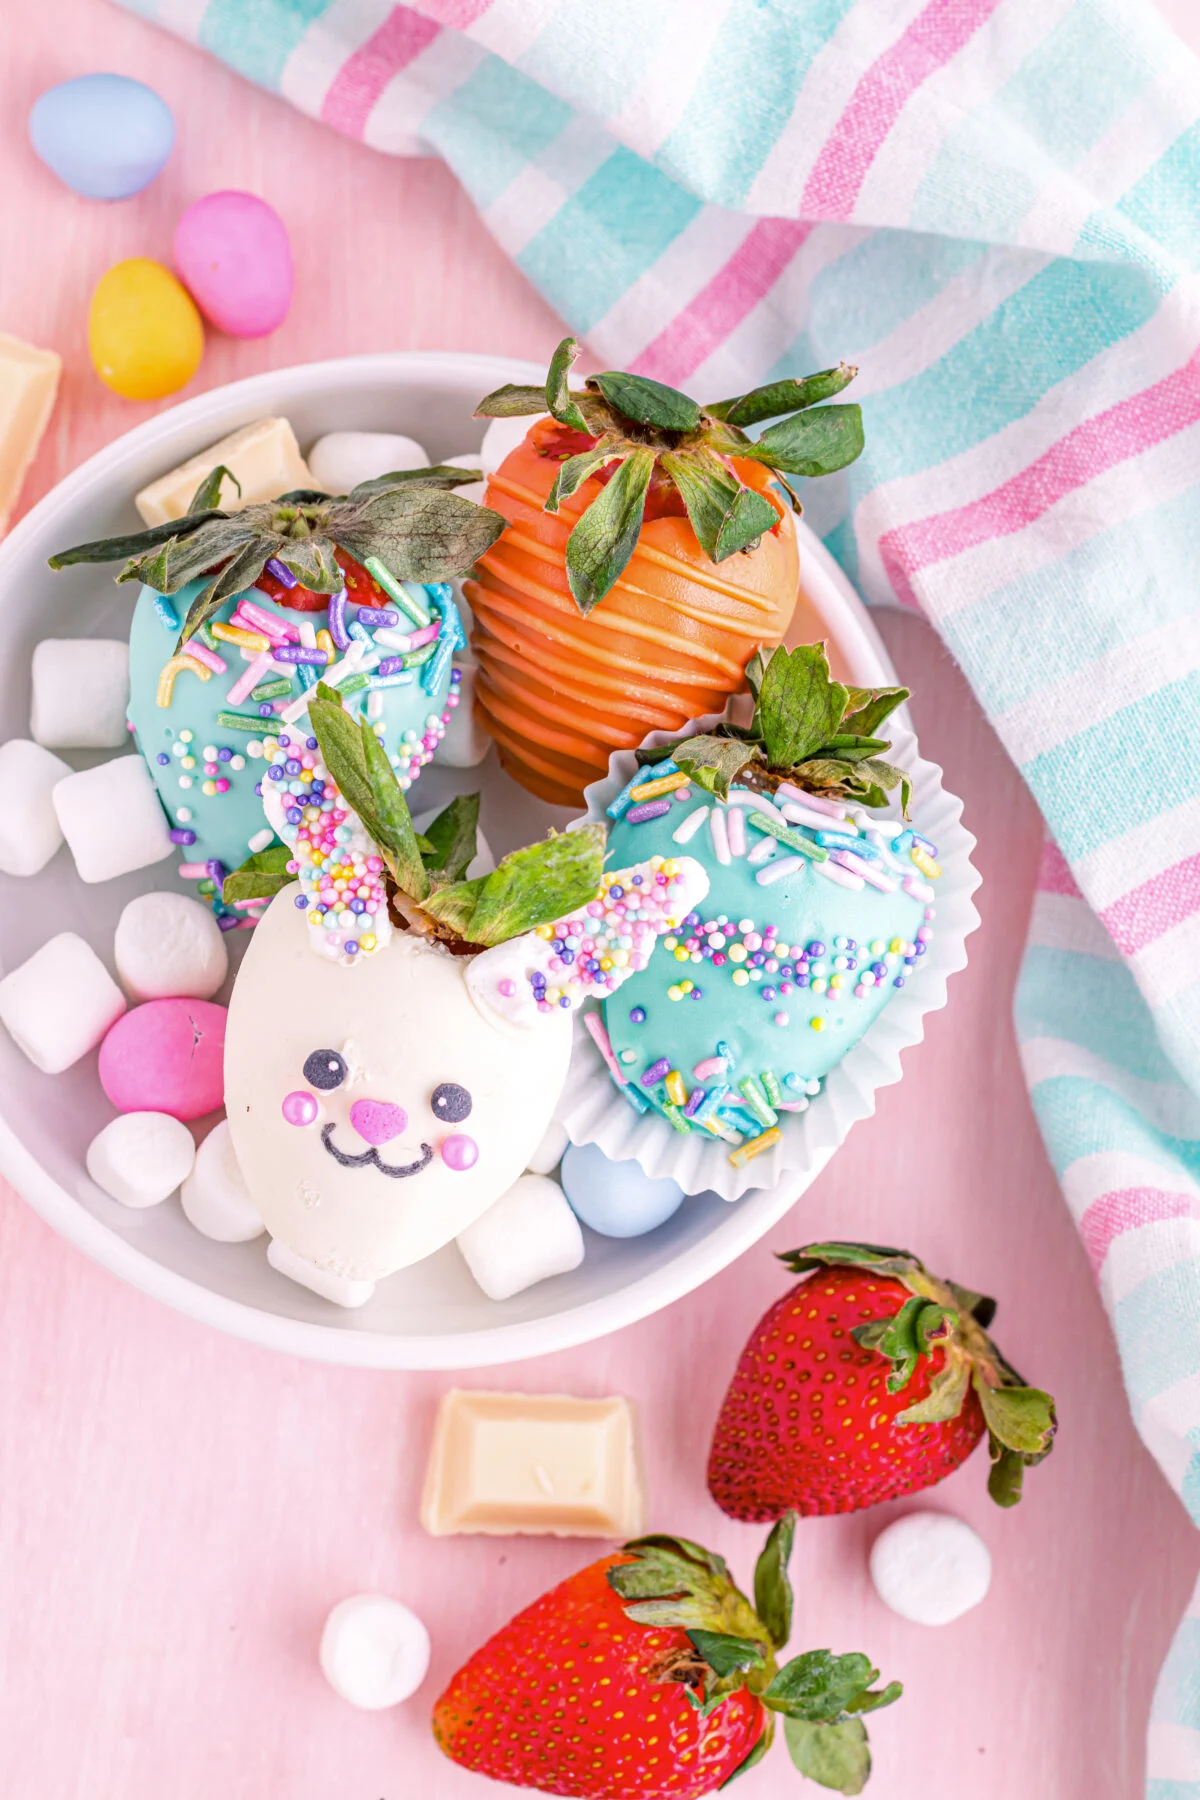
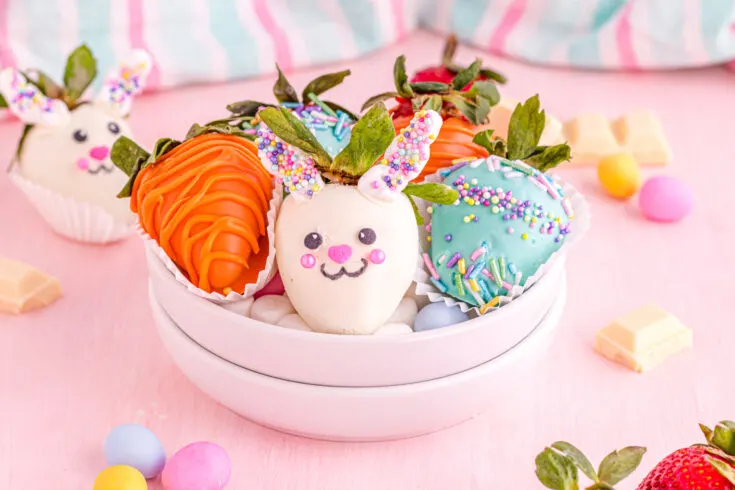
Not only are they easy to prepare but they also create an undeniably adorable presentation that will have everyone ooing and ahhing as soon as they set eyes on them. These adorable bunnies, carrots and Easter eggs are a fun and tasty addition to any Easter dessert platter.
Grab your supplies and follow along for a look at all things necessary for creating delightful Easter Chocolate Covered Strawberries!
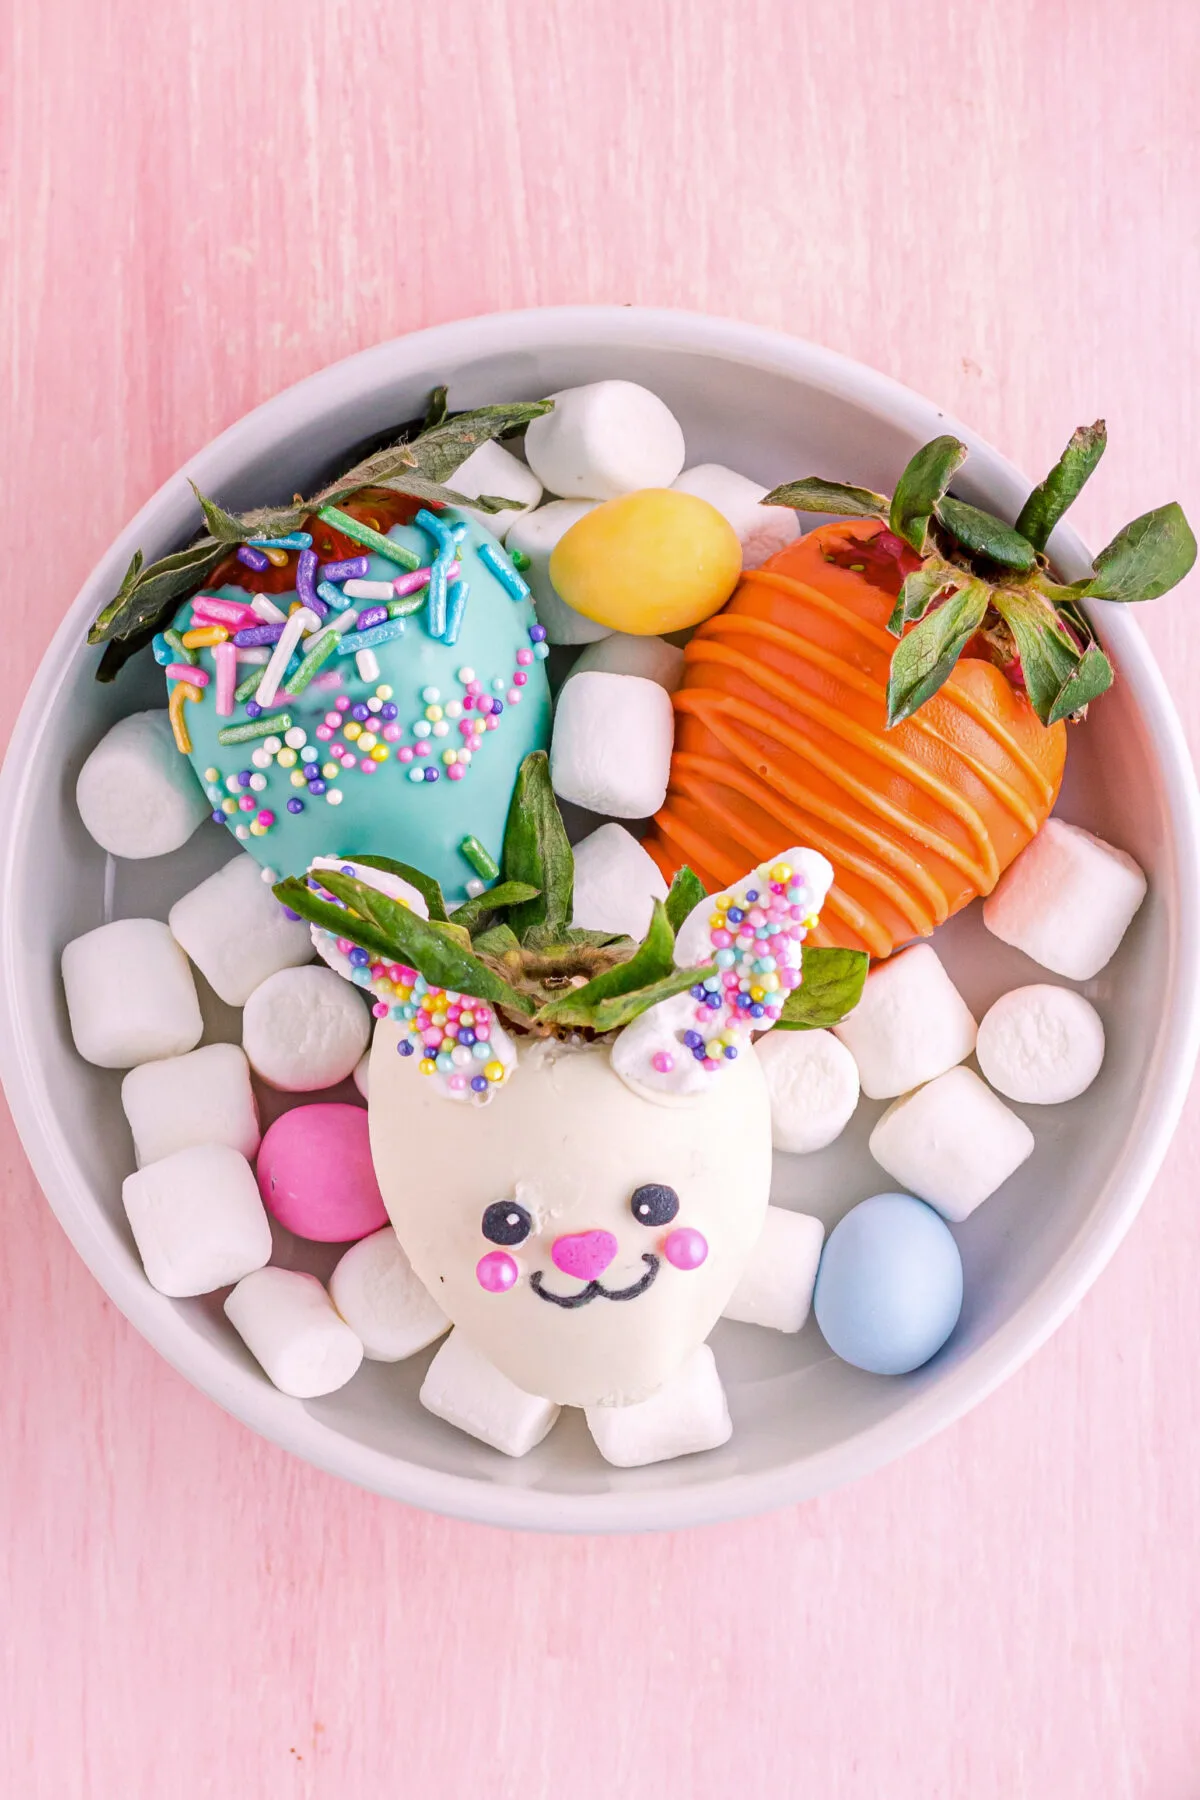
Why You Will LOVE These Easter Strawberries
- Chocolate and strawberries are a classic, a perfect match of flavours.
- Kids will love making these strawberries, especially adding the sprinkle details!
- Adorable treat for Easter dessert
- Easy to make than they look!
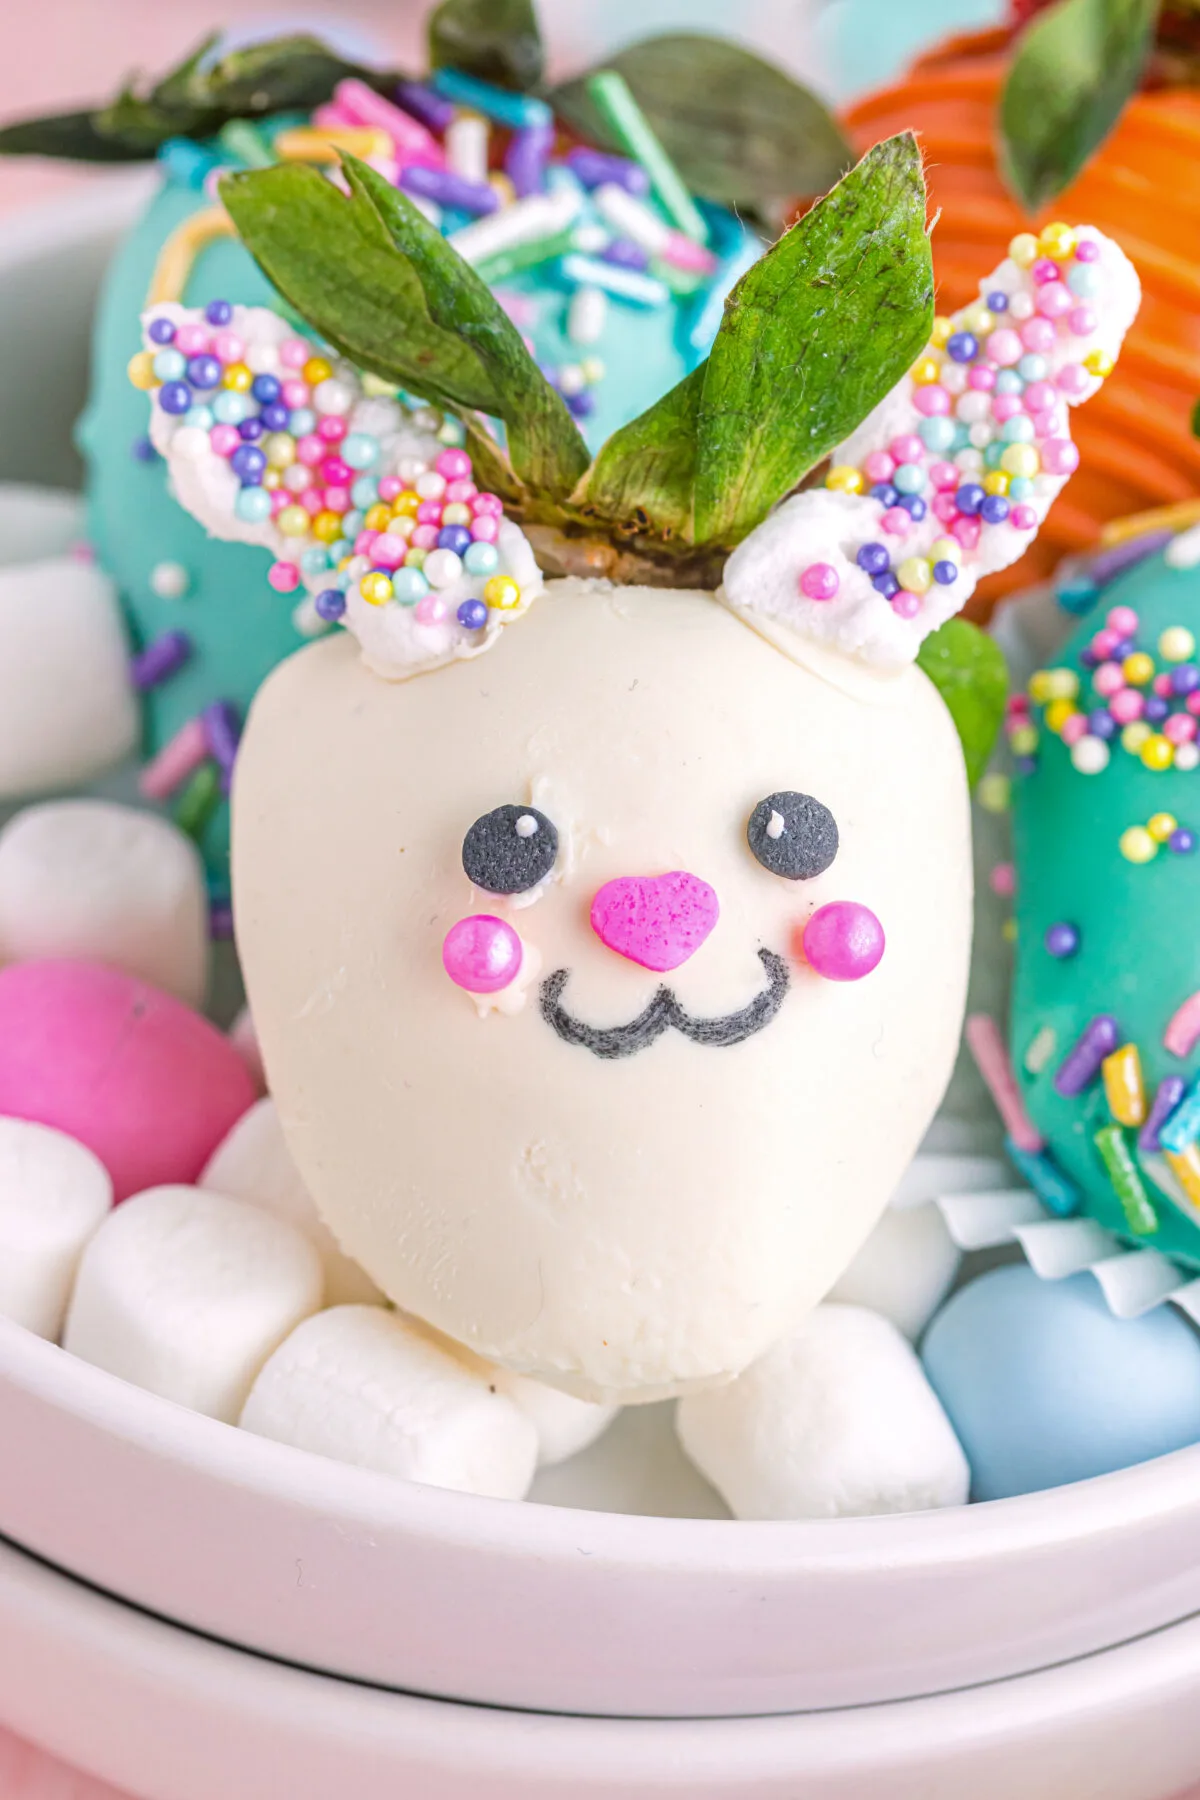
How to Make Easter Bunny Strawberries
Melt your white chocolate. Add a few drops of white candy color for a bright white if you wish.
Insert a toothpick into the top of a strawberry and dip into the melted chocolate.
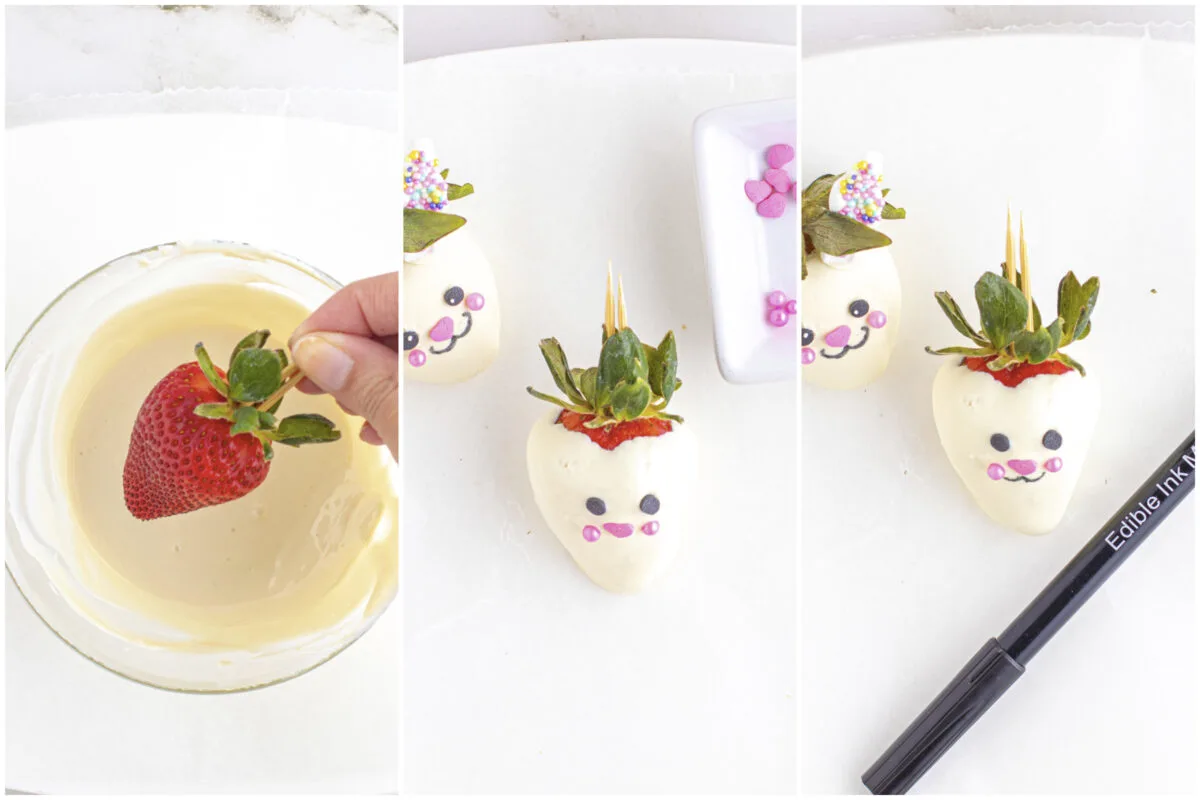
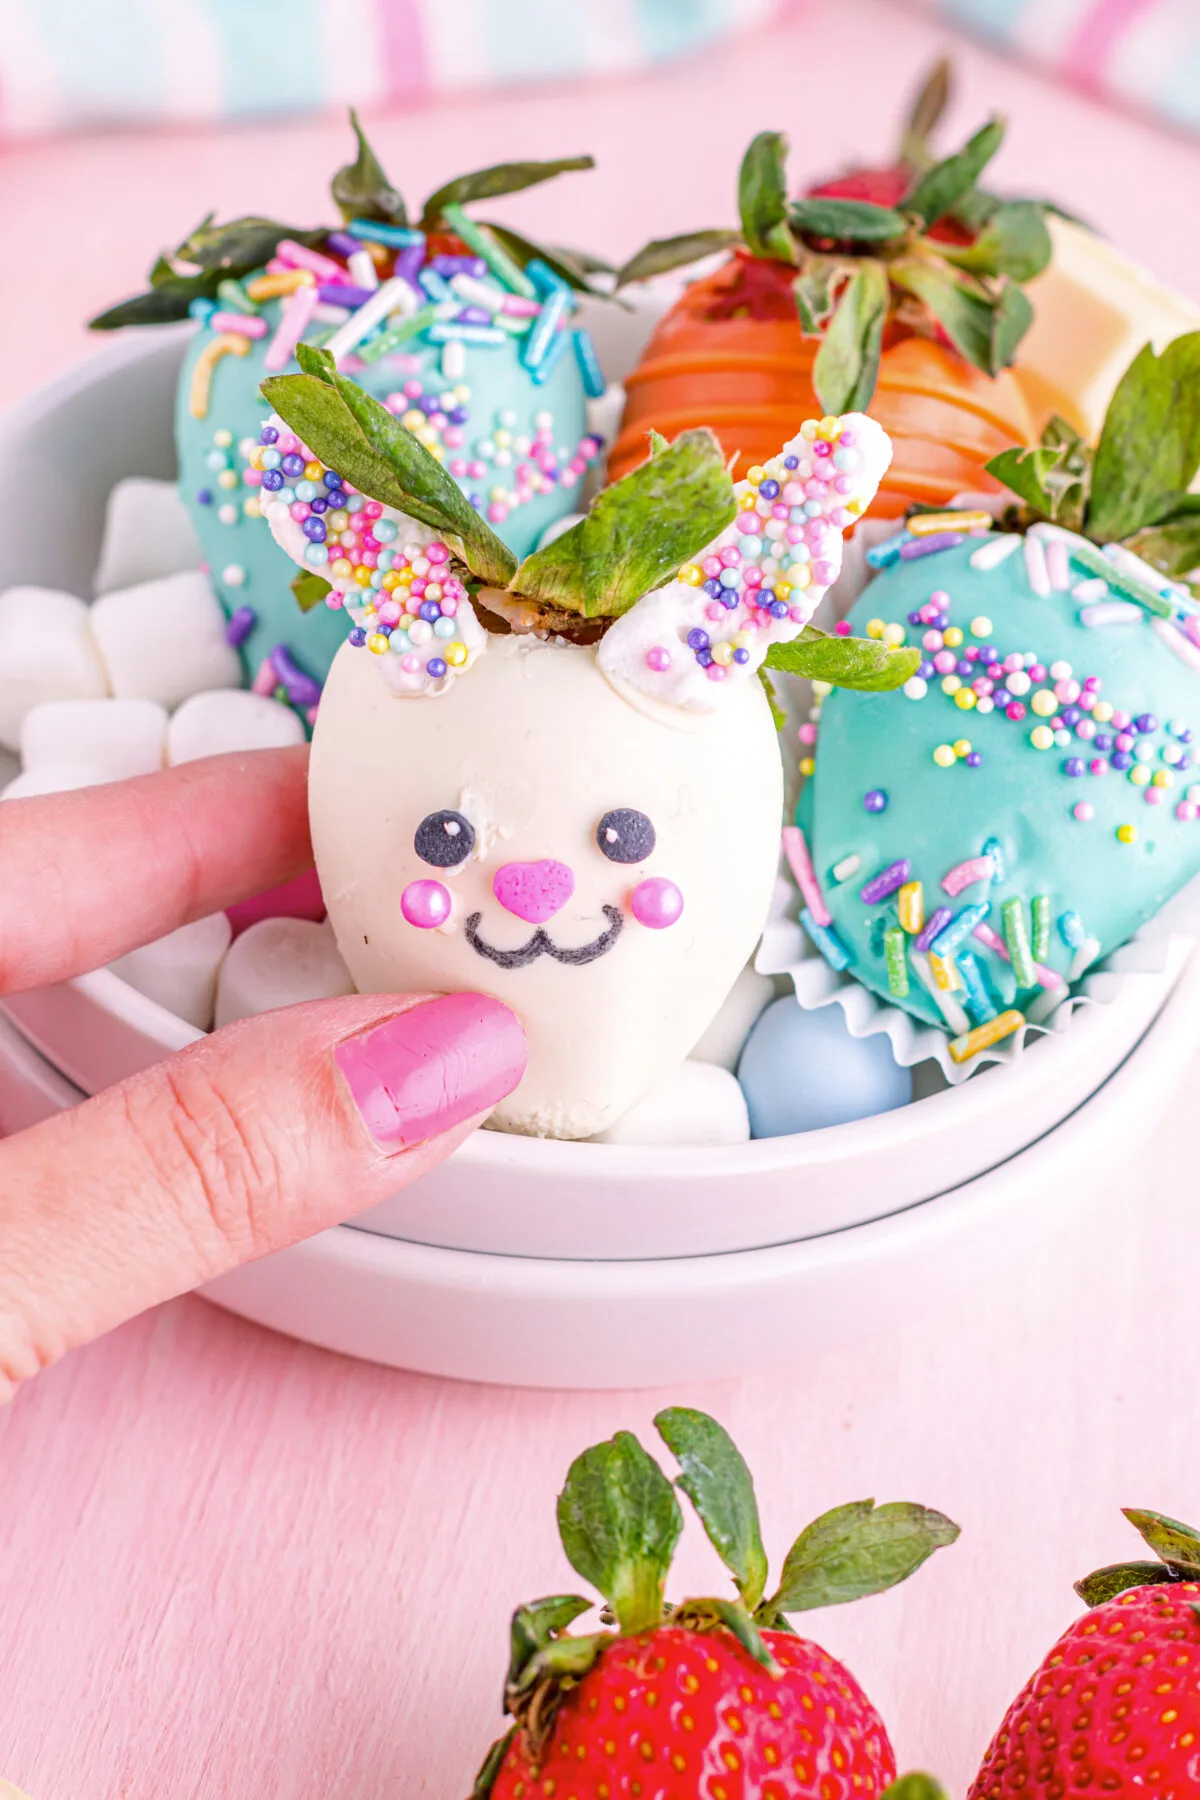
Add a heart-shaped sprinkle for the nose, 2 round black sprinkles for the eyes, and two small pink pearl sprinkles to form cheeks.
Draw the mouth with an edible black food marker.
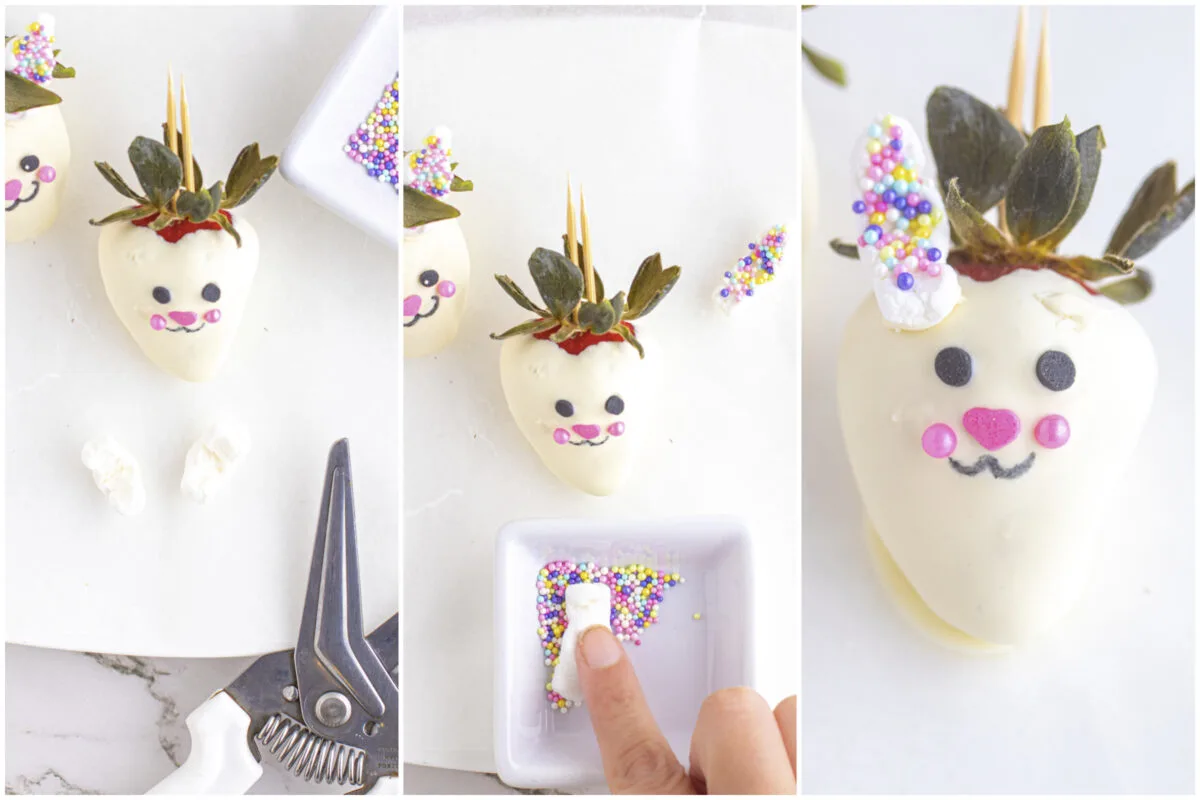
Make a slit in the middle of a mini marshmallow to create an ear.
Press the sticky side down into a small dish of nonpareils.
Using melted chocolate and a toothpick, attach the ears to the top of the bunny’s head.
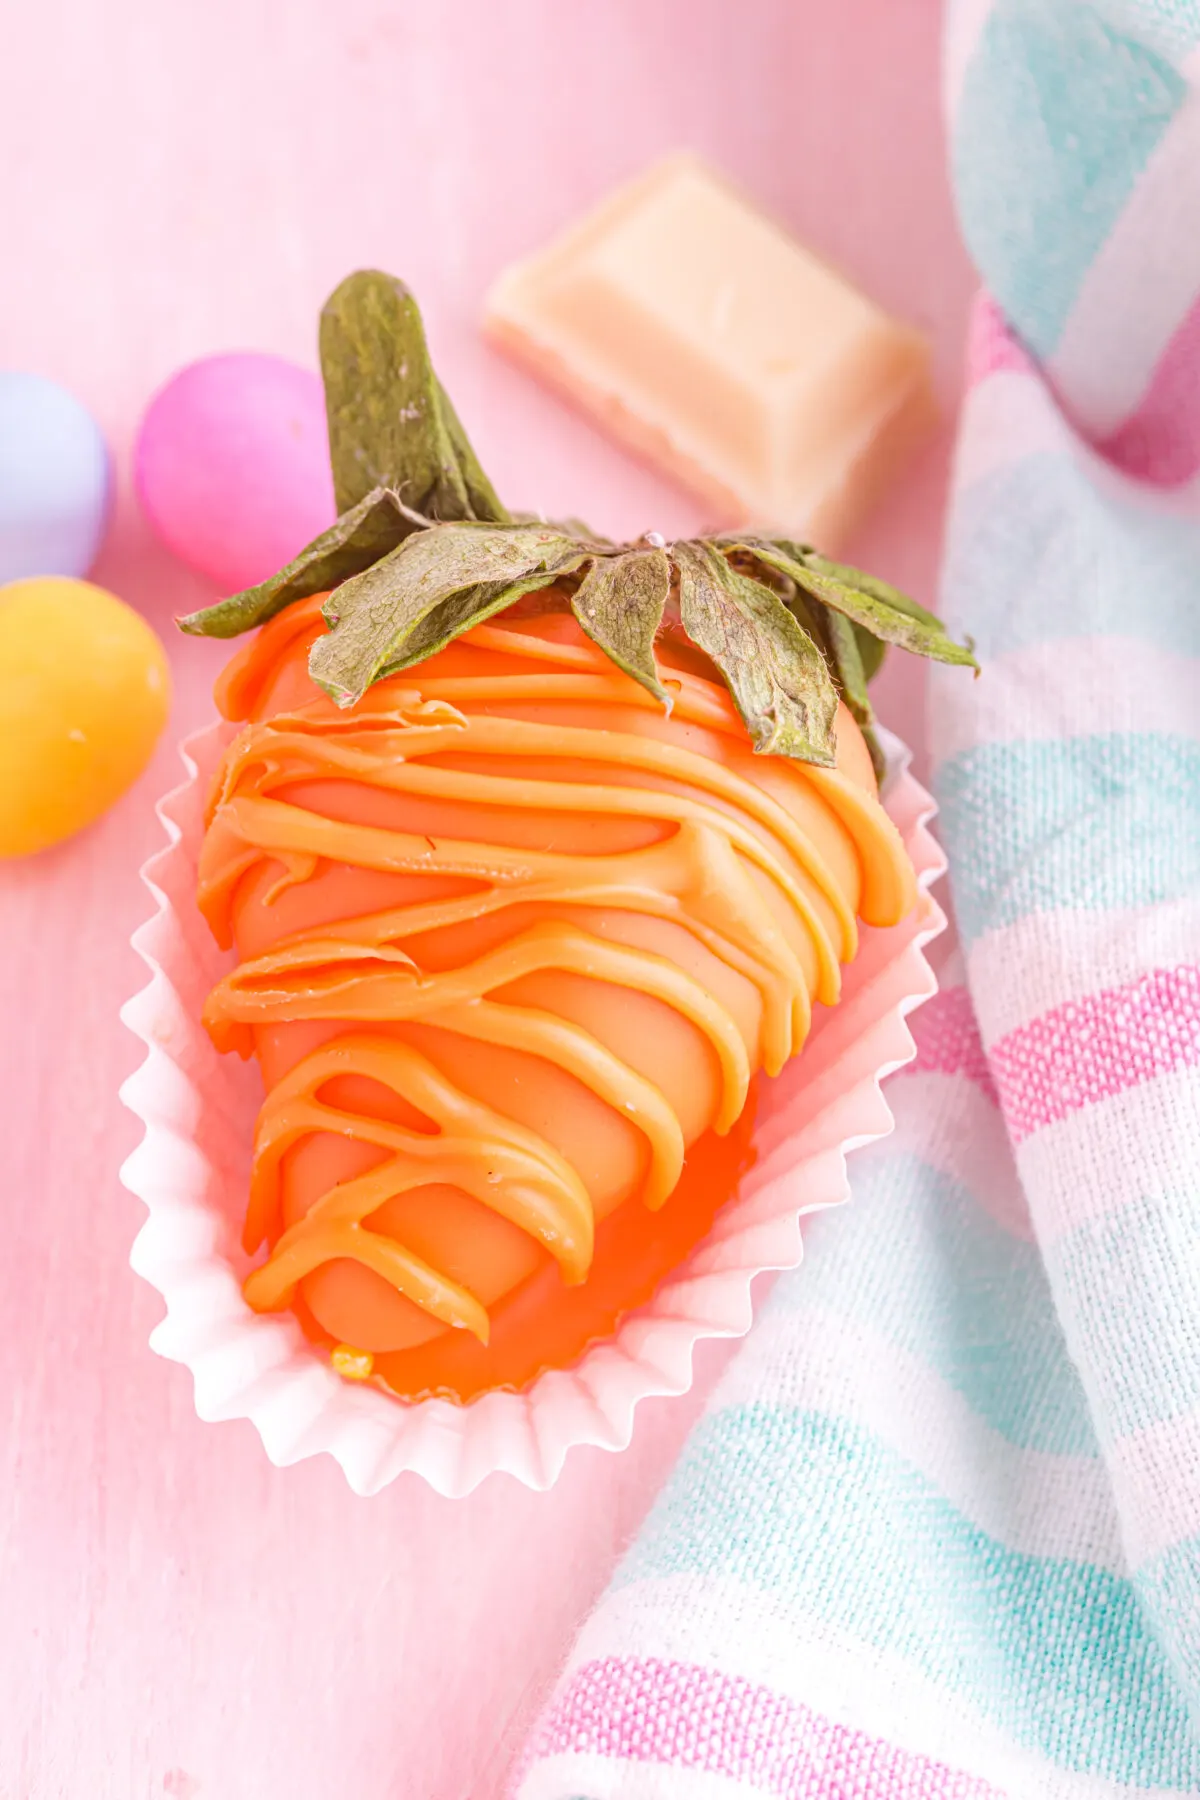
How to Make Carrot Strawberries
Melt white chocolate, and add a few drops of orange candy colour.
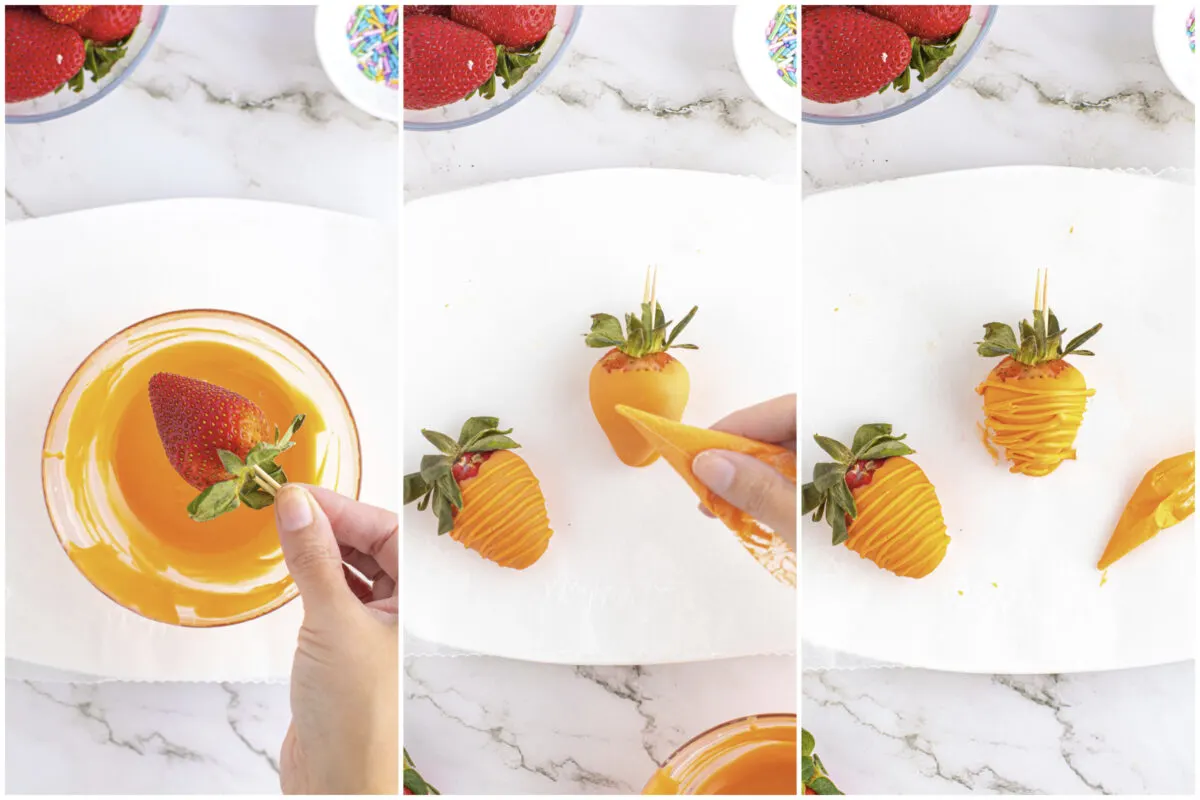
Insert a toothpick in the strawberry and dip it into the orange chocolate.
Pipe lines with remaining melted orange chocolate on the carrot.
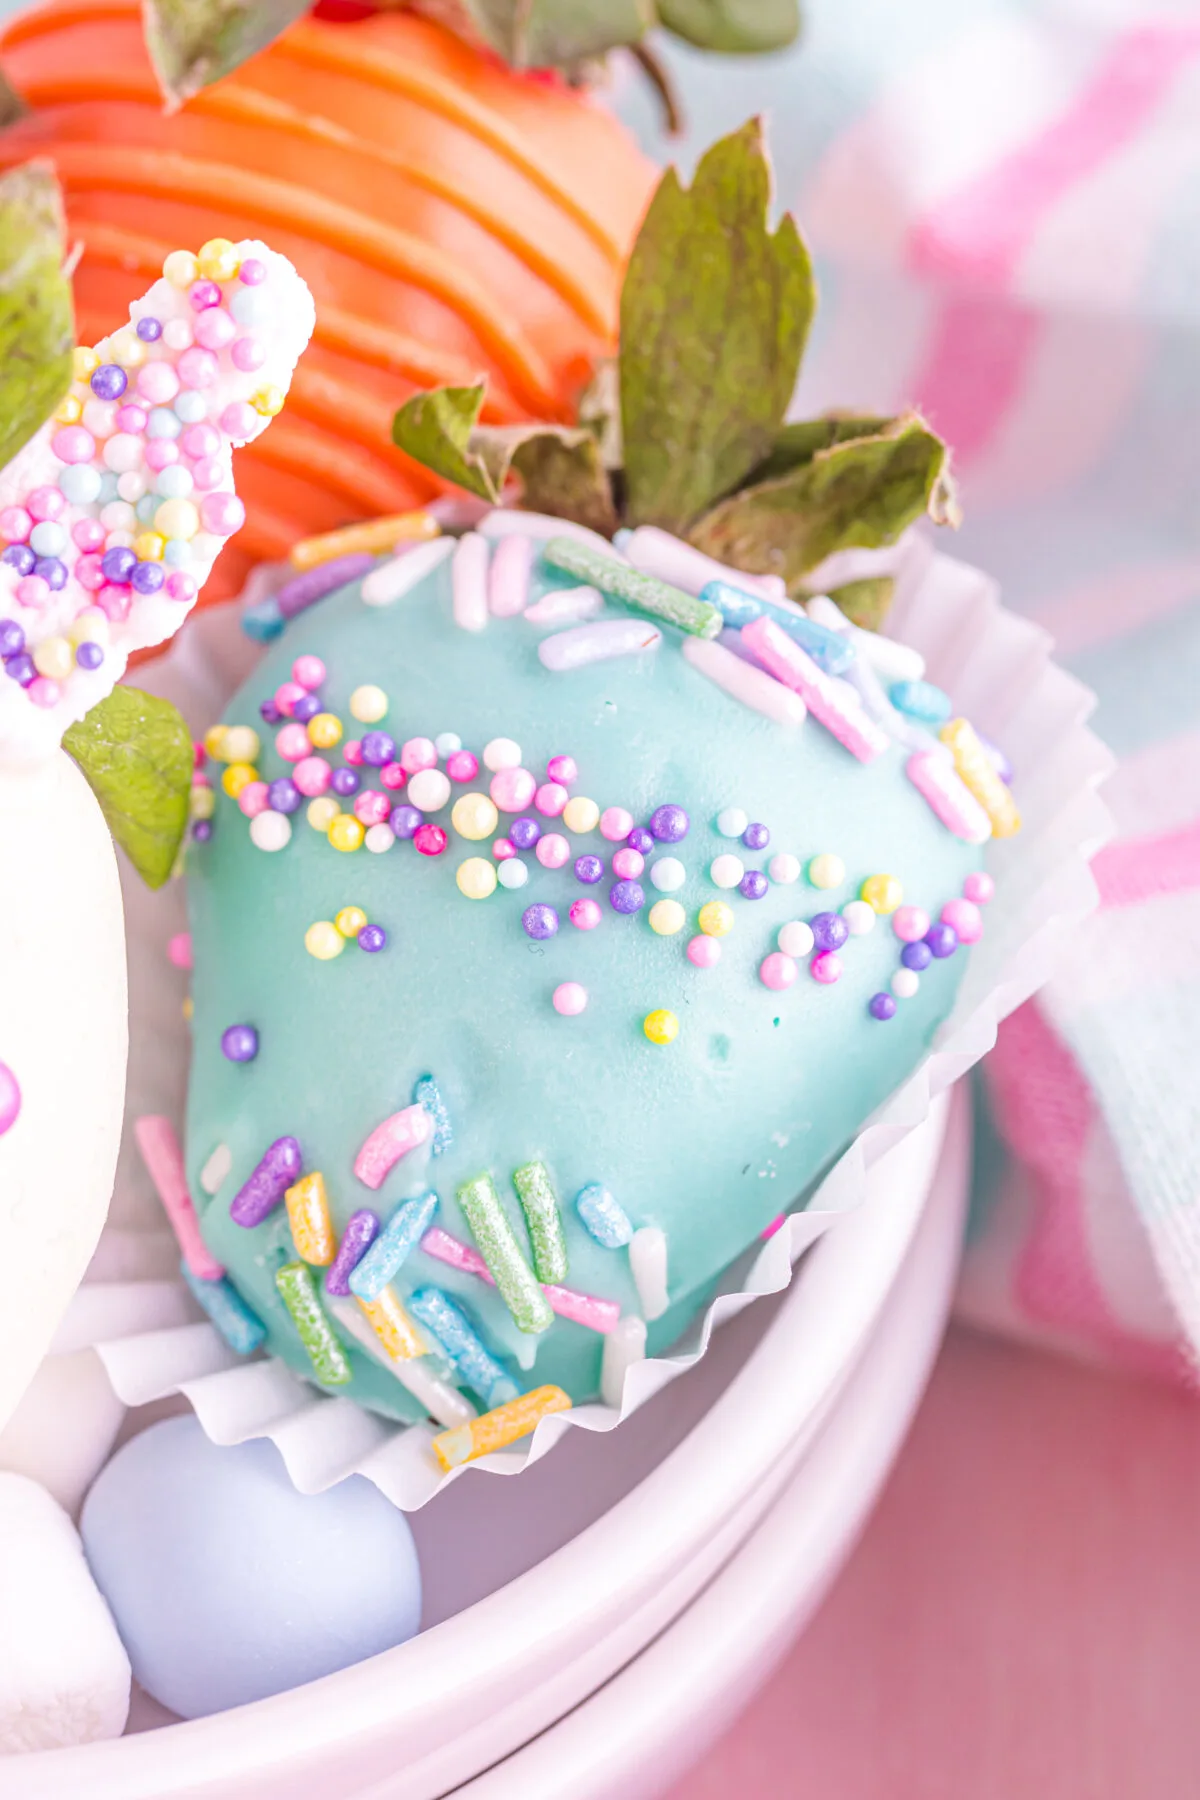
How to Make Easter Egg Strawberries
Melt white chocolate, and add a few drops of blue candy color.
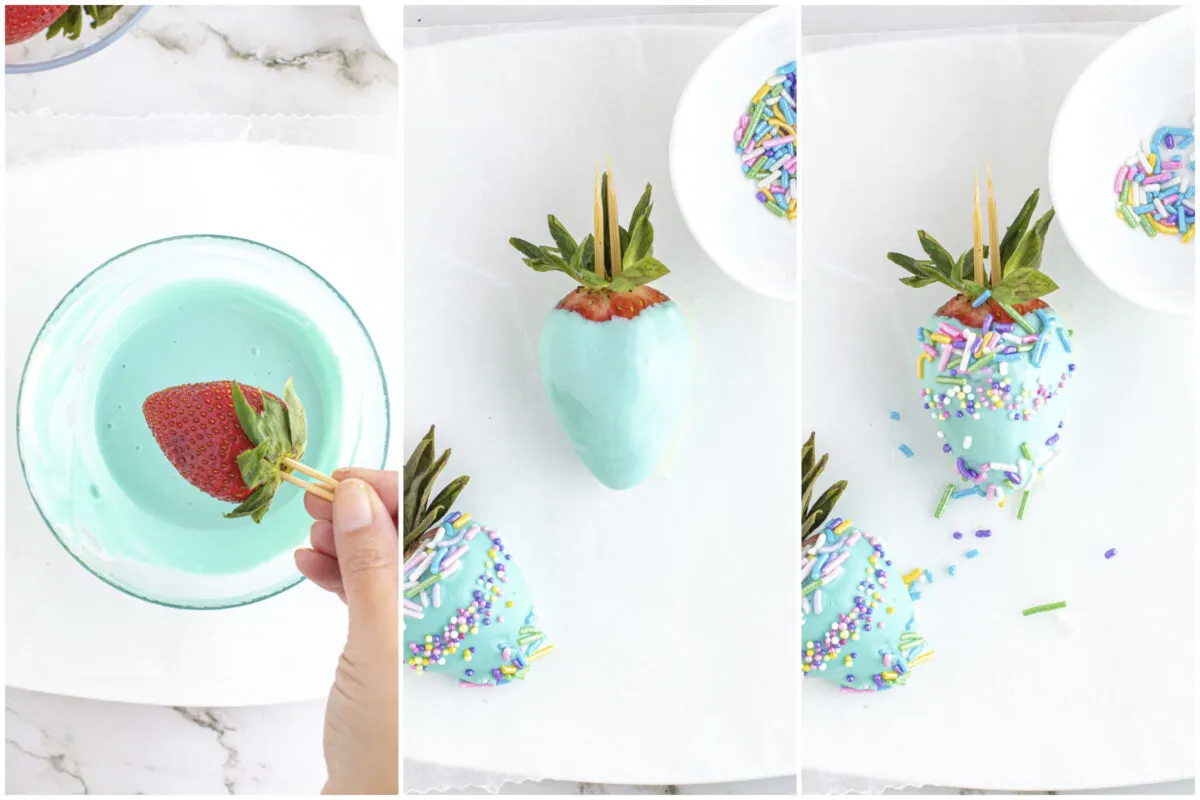
Insert a toothpick in the strawberry and dip it into the blue chocolate.
Garnish with sprinkles of your choice in a line pattern of your choice!
Tips for Making the BEST Chocolate Covered Strawberries
- Be sure to stir chocolate in between warming in the microwave to avoid scorching and
burning. - If your chocolate or candy melts do seize you can save it by stirring in a little shortening. This will thin out the chocolate slightly so add a teaspoon at a time until smooth.
- Candy melts can be used in place of white Belgian chocolate if you prefer. This will save time
as no colouring would be required. - If you are tinting your chocolate use only oil-based candy coloring otherwise you may get
uneven colour and/or streaking. - Make sure you use room temperature strawberries to avoid condensation forming that may lead to the chocolate separating from the strawberries.
- These strawberries will set up quickly in the freezer but keep in mind that the leaves will not be a bright green anymore. This is a good option if you are running short on time.
- Take care not to puncture the sides of the strawberries as that may release juice into the chocolate, preventing the strawberries from setting correctly.
How to Store Chocolate Covered Strawberries
These strawberries are best eaten the day they are made.
If you do need to make them in advance, or have leftovers, store them in a container lined with paper towels in a single layer at room temperature. If you need to store multiple layers of strawberries, place pieces of wax paper or parchment paper between the layers.
Do not cover them with a lid, this can lead to sweating which may ruin your designs. Instead loosely cover with plastic wrap.
They will keep stored at room temperature for one day only. If you need longer storage then prepare as above and place in the fridge. Chilled, they will last for up to 3 days. Unfortunately placing them in the refrigerator will cause them to sweat as fridges are humid by nature.
Do not freeze.

Equipment Needed for Chocolate Covered Strawberries
- Colander for washing the berries.
- Parchment paper for lining a baking sheet
- Heat safe bowl for melting the chocolate.
- Toothpicks for dipping strawberries
- Kitchen shears for cutting marshmallows
- Piping bag or resealable bag for decorating
About the Ingredients for Chocolate Covered Strawberries
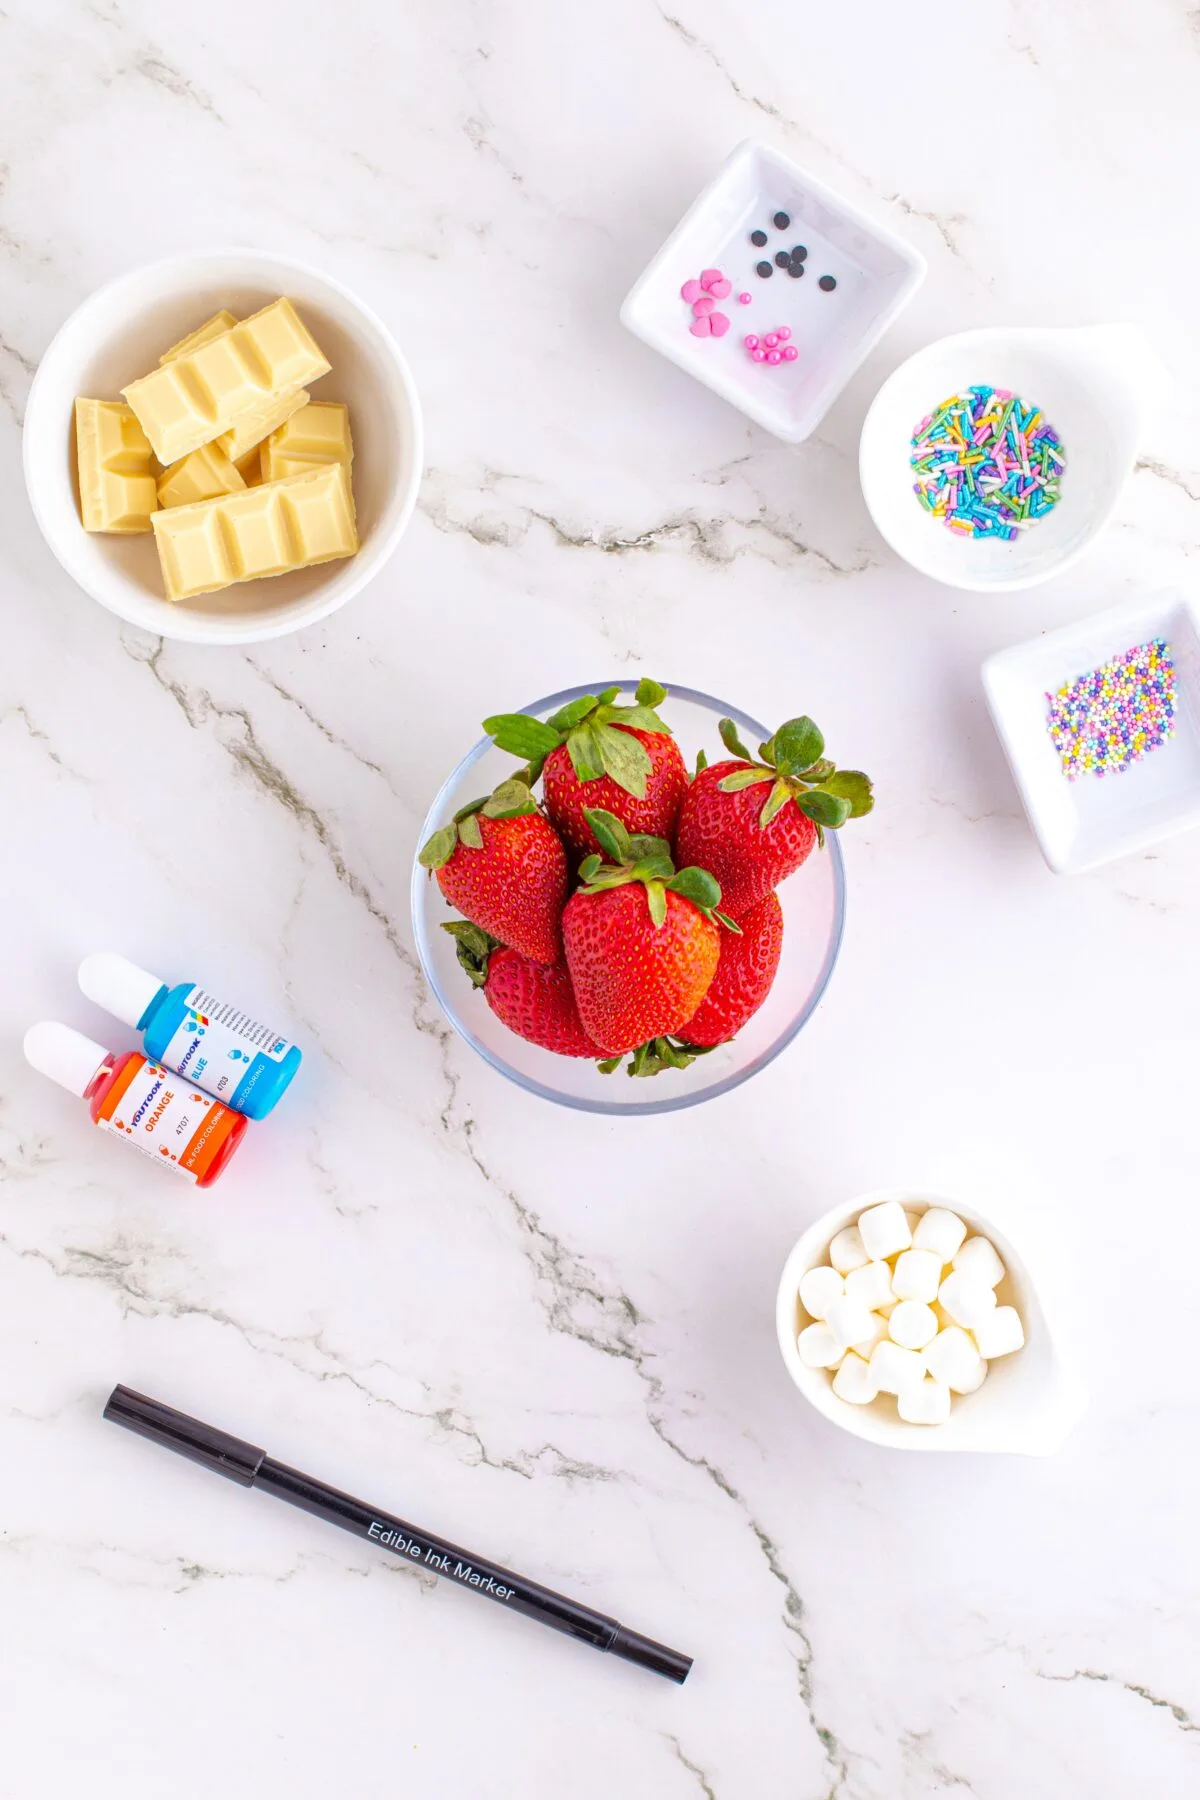
Strawberries – There should be about 15-20 medium strawberries in a pound. Wash them good, and let them dry on a paper towel before proceeding. They must be room temperature when you start.
Chocolate – You will need 8 ounces of chocolate per pound of strawberries. You can substitute the Belgian chocolate with candy melts in white, orange, and blue. The flavour won’t be as good, but it will still be tasty, and it makes the process faster.
Candy colour – Use oil-based candy colour for the best results. I used this candy colour kit to make these strawberries. You will want white candy colour if you want a true white bunny. You will need orange for the carrots, and blue for the easter egg strawberries.
Sprinkles –
- I used these Wilton spring mix sprinkles for the bunny ears and Easter eggs.
- I used these heart quins for the bunny nose.
- I used the black circles from this Wilton Halloween mix sprinkles for the bunny eyes.
Mini marshmallows – For making bunny ears.
Edible marker – You will need a black edible food marker for drawing on the bunny faces.
Looking for More Easter Dessert Recipes?
Check out more of my favourite Easter desserts!

This Instant Pot Creme Egg Cheesecake is an easy Easter dessert; rich vanilla cheesecake smothered in chocolate ganache & SO MANY CREME EGGS!
This carrot sheet cake recipe is easy to make, and looks great on a plate. It’s moist, perfectly spiced, and not to mention, it’s delicious!
Delicious chocolate dipped Easter bunny sugar cookies complete with sprinkles that are the perfect addition to your Easter dessert table.
How to Make Easter Chocolate Covered Strawberries
Yields: 20 Chocolate covered strawberries | Prep time: 30 Minutes
Ingredients:
- 20 medium strawberries, washed and dried
- 8 ounces Belgian white chocolate
- Oil-based candy colour in white, orange, and blue
- Assorted sprinkles
- Mini marshmallows
- Black edible marker
Directions:
For the Easter Bunny Strawberries:
Melt your white chocolate in a microwave-safe bowl. Melt in 20-second increments, stirring in between until melted and smooth. Add a few drops of white candy color for a bright white if you wish.
Line a baking sheet or plate with waxed paper.
Insert a toothpick or two into the top of a clean dry strawberry, taking care not to puncture the sides.
Dip the strawberry in the white chocolate allowing the excess to drip back into the bowl and place it on the prepared plate or tray.
While the chocolate is still wet, carefully add a heart-shaped sprinkle for the nose.
Next, add 2 round black sprinkles for the eyes ( for a fun detail use a toothpick dipped in a small amount of white chocolate, add a little white sparkle to each eye). Add two small pink pearl sprinkles to form cheeks.
Place the plate in the refrigerator to set for 10 minutes.
Once set, draw the mouth with an edible black food marker, using light pressure to avoid puncturing the chocolate.
Using a pair of kitchen shears or a sharp knife make a slit in the middle of a mini marshmallow, being careful not to cut all the way through. Pull open the marshmallow to create an ear. Press the sticky side down into a small dish of nonpareils. Repeat with another marshmallow for the second ear.
Using melted chocolate and a toothpick, attach the ears to the top of the bunny’s head. Allow to set (popping it back in the fridge for 10 minutes will set it faster than air drying).
For the Carrot Strawberries:
Melt white chocolate in a microwave-safe bowl. Melt in 20-second increments, stirring in between until melted and smooth. Add a few drops of orange candy color until you reach your desired shade.
Insert a toothpick in the strawberry and dip it into the orange chocolate allowing the excess to drip back into the bowl. Transfer it to the wax paper lined plate and allow it to set in the refrigerator for 10 minutes.
Add about a tablespoon of the melted orange chocolate to either a piping bag or a zip lock bag with the corner cut out. Drizzle some lines on the carrot for texture.
Allow to fully set.
For the Easter Egg Strawberries:
Melt white chocolate in a microwave-safe bowl. Melt in 20-second increments, stirring in between until melted and smooth. Add a few drops of blue candy color until you reach your desired shade.
Insert a toothpick in the strawberry and dip it into the blue chocolate allowing the excess to drip back into the bowl. Transfer it to the wax paper lined plate, Garnish with sprinkles of your choice in a line pattern or any pattern you wish!
Allow to fully set.
Notes: Use 8 oz chocolate per 1 pound of strawberries (15-20 medium)
Easter Chocolate Covered Strawberries
Looking for a delicious and easy Easter dessert? Check out our step-by-step guide to making Easter chocolate covered strawberries.
Ingredients
- 20 medium strawberries, washed and dried
- 8 ounces Belgian white chocolate
- Oil-based candy colour in white, orange, and blue
- Assorted sprinkles
- Mini marshmallows
- Black edible marker
Instructions
For the Easter Bunny Strawberries:
- Melt your white chocolate in a microwave-safe bowl. Melt in 20-second increments, stirring in between until melted and smooth. Add a few drops of white candy color for a bright white if you wish.
- Line a baking sheet or plate with waxed paper.
- Insert a toothpick or two into the top of a clean dry strawberry, taking care not to puncture the sides.
- Dip the strawberry in the white chocolate allowing the excess to drip back into the bowl and place it on the prepared plate or tray.
- While the chocolate is still wet, carefully add a heart-shaped sprinkle for the nose.
- Next, add 2 round black sprinkles for the eyes ( for a fun detail use a toothpick dipped in a small amount of white chocolate, add a little white sparkle to each eye). Add two small pink pearl sprinkles to form cheeks.
- Place the plate in the refrigerator to set for 10 minutes.
- Once set, draw the mouth with an edible black food marker, using light pressure to avoid puncturing the chocolate.
- Using a pair of kitchen shears or a sharp knife make a slit in the middle of a mini marshmallow, being careful not to cut all the way through. Pull open the marshmallow to create an ear. Press the sticky side down into a small dish of nonpareils. Repeat with another marshmallow for the second ear.
- Using melted chocolate and a toothpick, attach the ears to the top of the bunny’s head. Allow to set (popping it back in the fridge for 10 minutes will set it faster than air drying).
For the Carrot Strawberries:
- Melt white chocolate in a microwave-safe bowl. Melt in 20-second increments, stirring in between until melted and smooth. Add a few drops of orange candy color until you reach your desired shade.
- Insert a toothpick in the strawberry and dip it into the orange chocolate allowing the excess to drip back into the bowl. Transfer it to the wax paper lined plate and
allow it to set in the refrigerator for 10 minutes. - Add about a tablespoon of the melted orange chocolate to either a piping bag or a zip lock bag with the corner cut out. Drizzle some lines on the carrot for texture.
- Allow to fully set.
For the Easter Egg Strawberries:
- Melt white chocolate in a microwave-safe bowl. Melt in 20-second increments, stirring in between until melted and smooth. Add a few drops of blue candy color until you reach your desired shade.
- Insert a toothpick in the strawberry and dip it into the blue chocolate allowing the excess to drip back into the bowl. Transfer it to the wax paper lined plate, Garnish with sprinkles of your choice in a line pattern or any pattern you wish!
- Allow to fully set.
Notes
Notes: Use 8 oz chocolate per 1 pound of strawberries (15-20 medium)
Recommended Products
As an Amazon Associate and member of other affiliate programs, I earn from qualifying purchases.
Nutrition Information:
Yield:
20Serving Size:
1 strawberryAmount Per Serving: Calories: 78Total Fat: 4gSaturated Fat: 2gTrans Fat: 0gUnsaturated Fat: 2gCholesterol: 2mgSodium: 11mgCarbohydrates: 9gFiber: 0gSugar: 8gProtein: 1g
This information is provided as a courtesy and for entertainment purposes only. This information comes from online calculators. Although frugalmomeh.com attempts to provide accurate nutritional information, these figures are only estimates.

Elizabeth Lampman is a coffee-fuelled Mom of 2 girls and lives in Hamilton, Ontario. She enjoys travelling, developing easy recipes, crafting, taking on diy projects, travelling and saving money!

