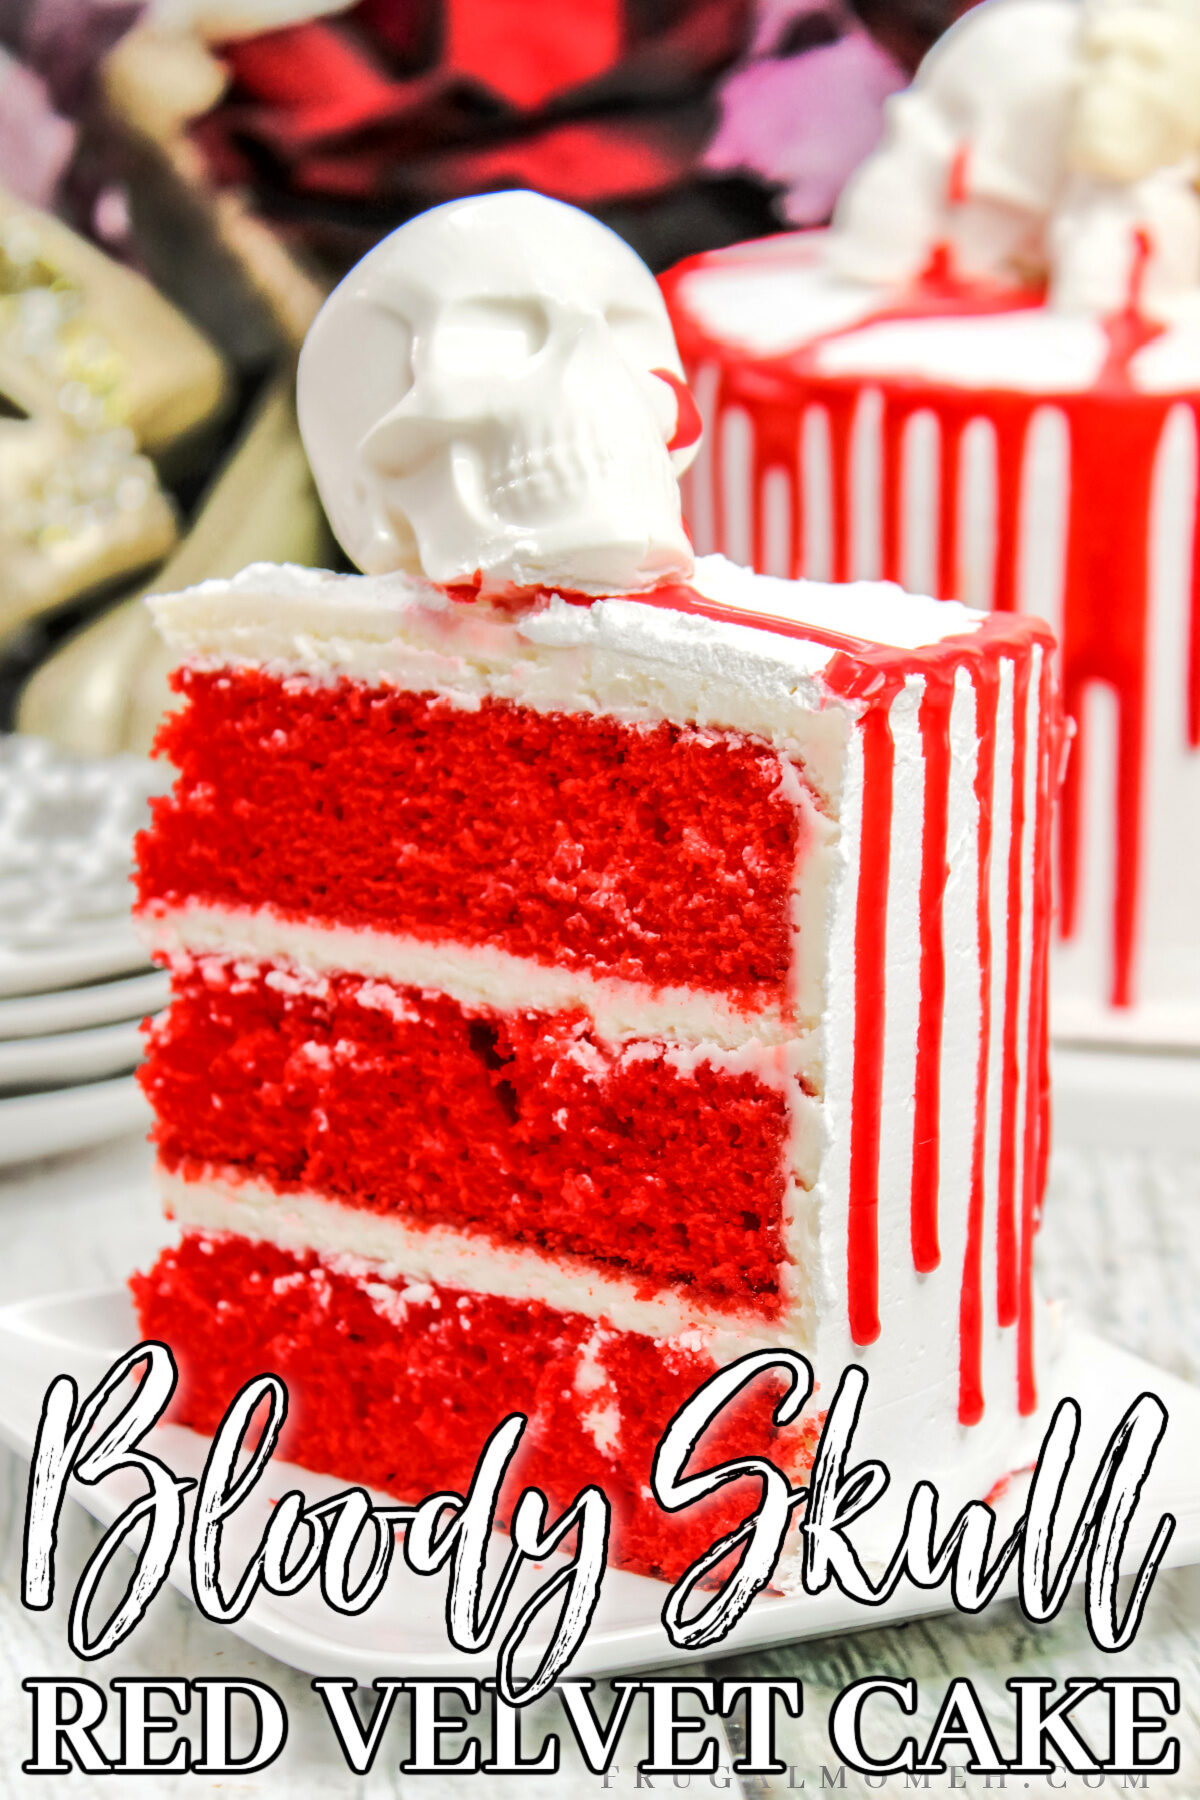
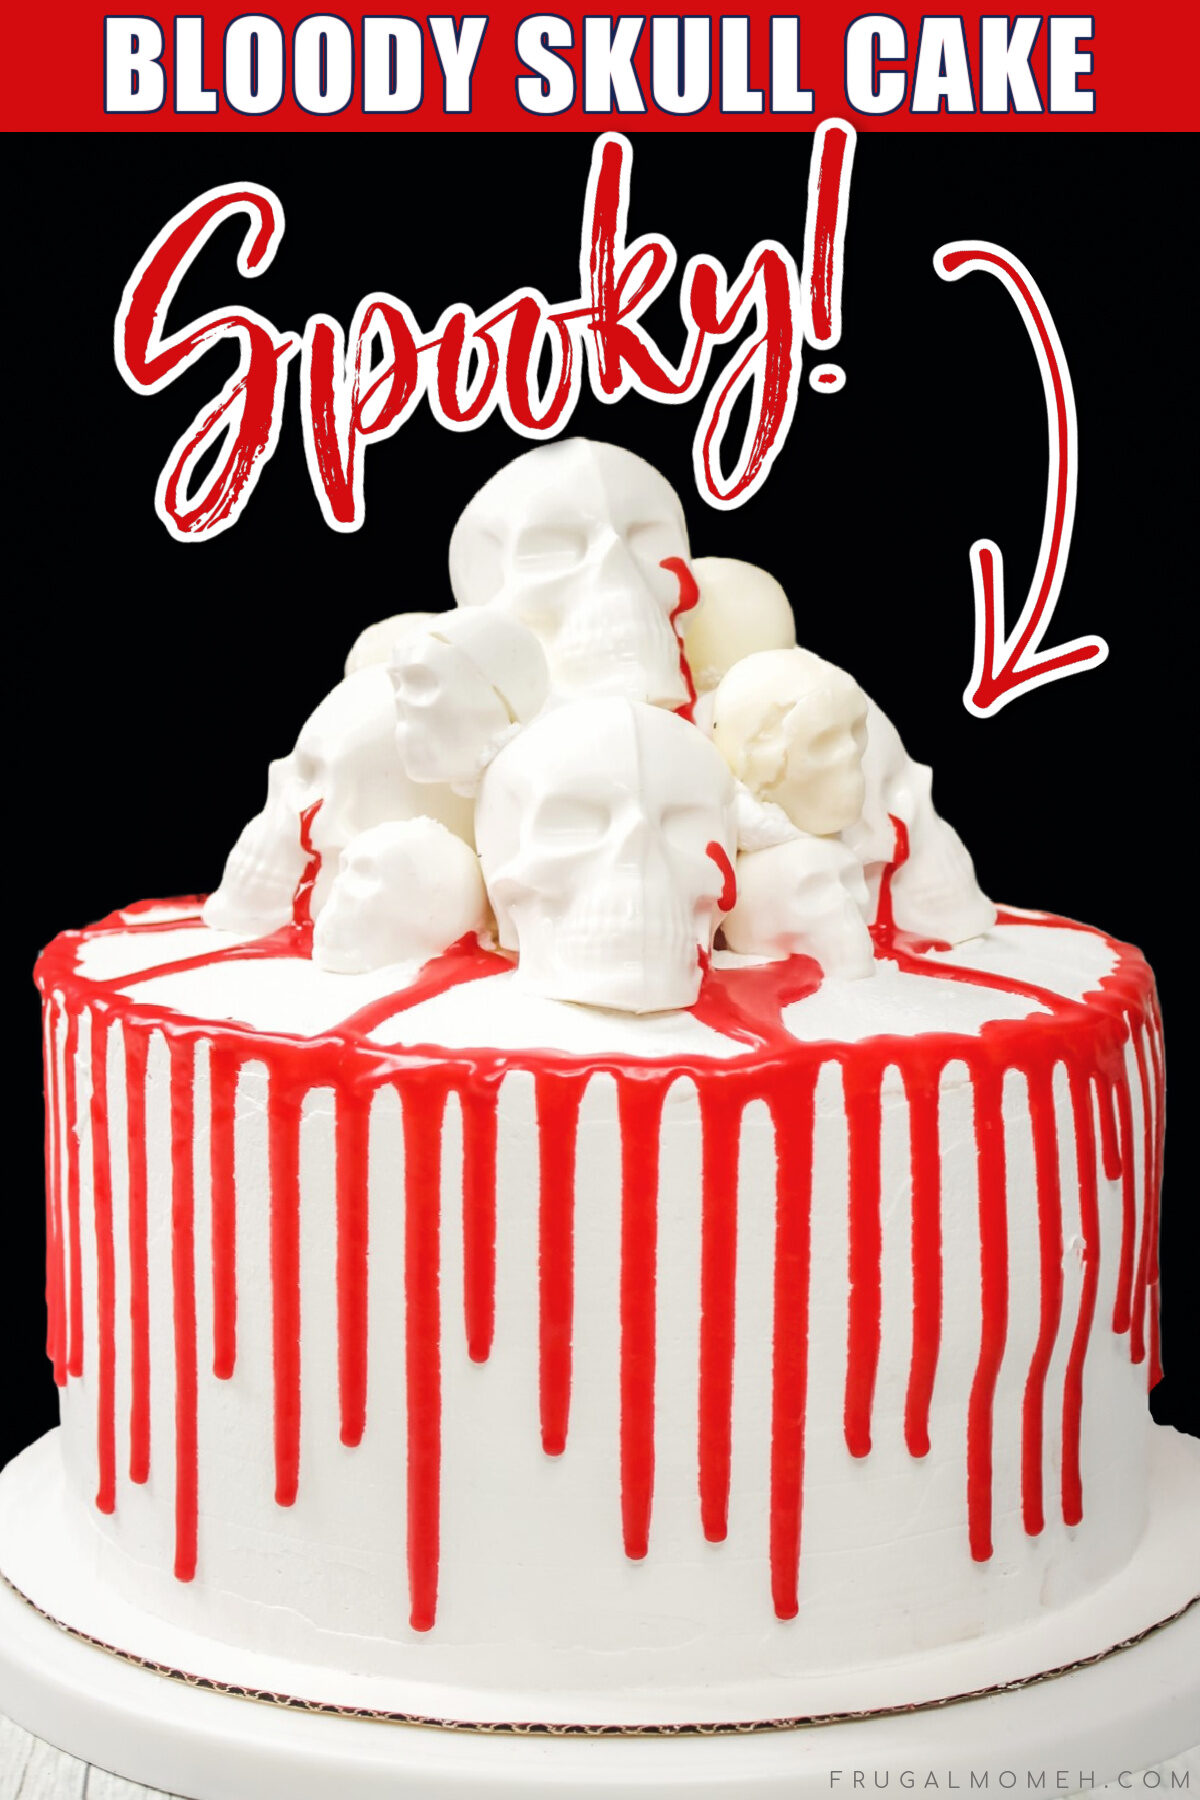
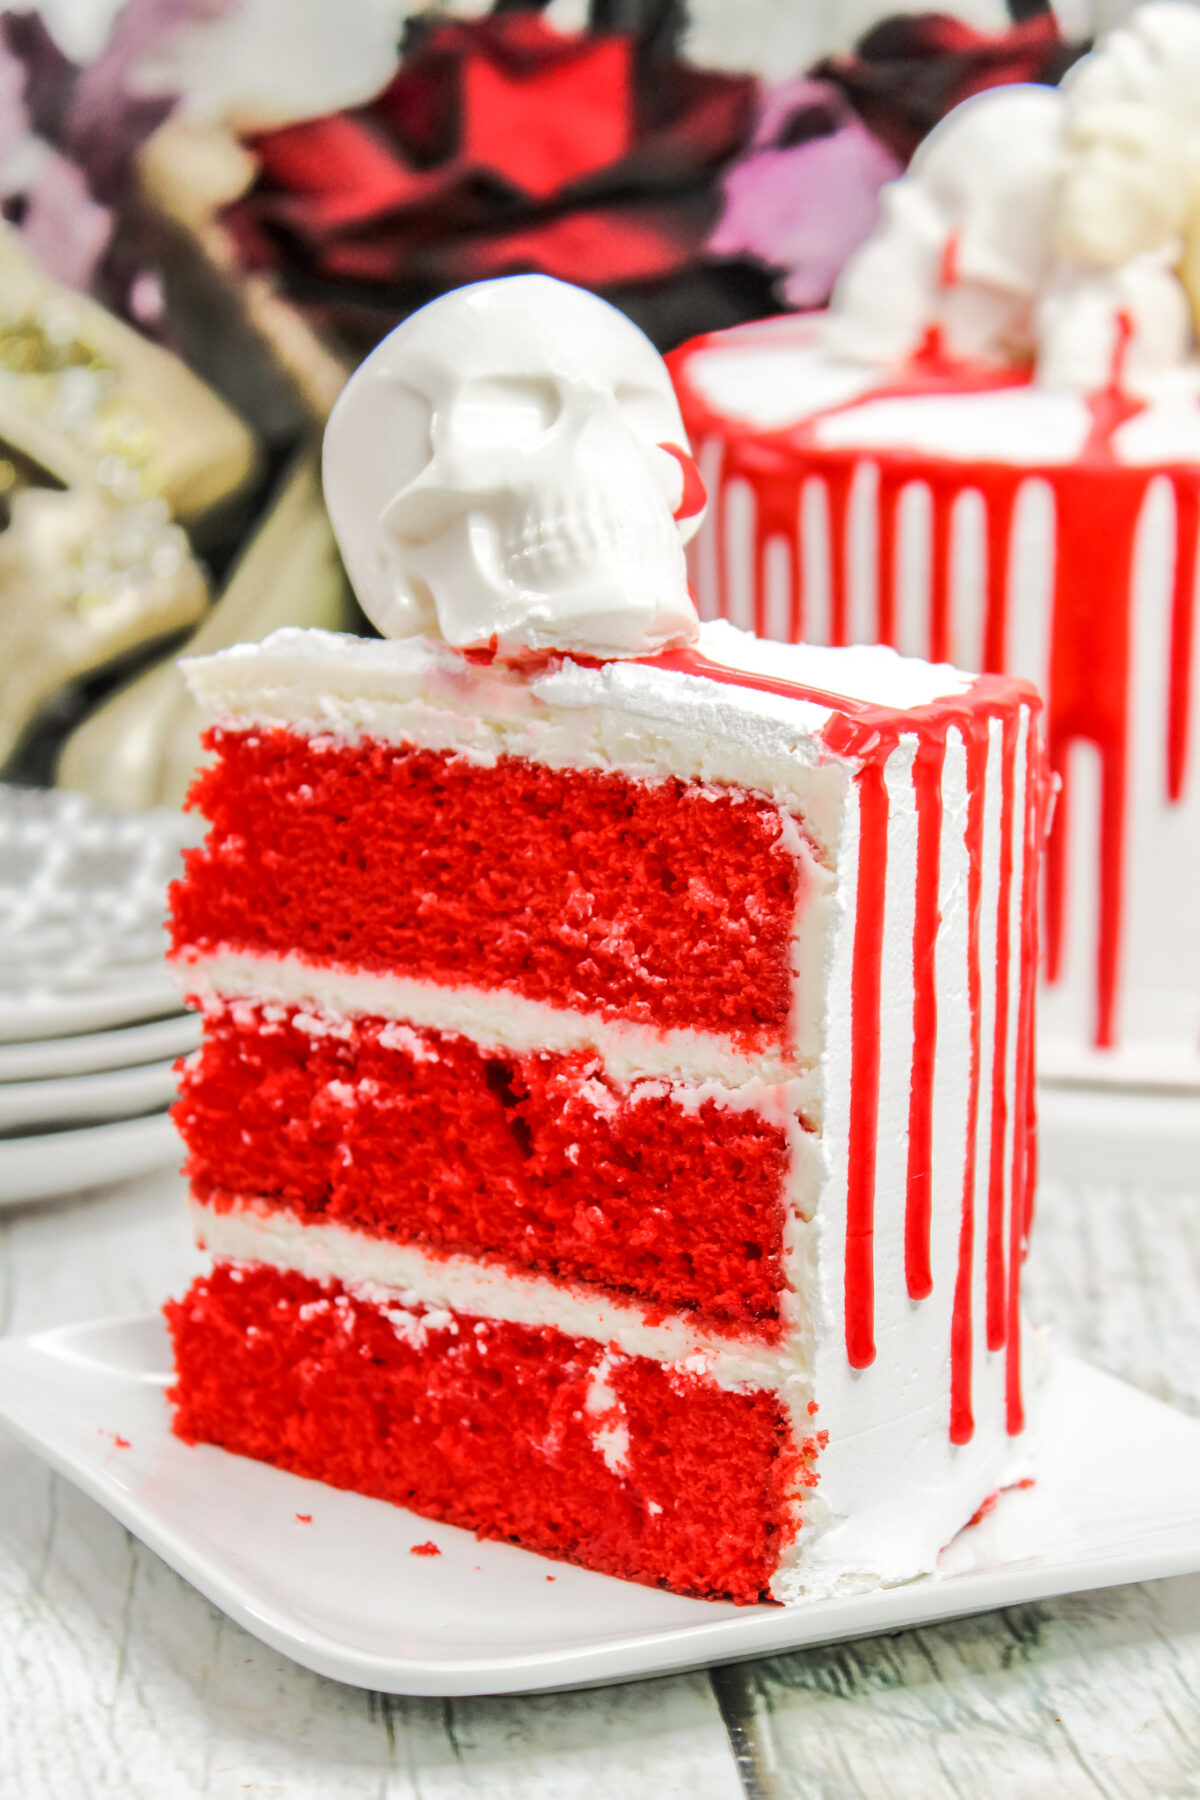
Bloody Skull Cake
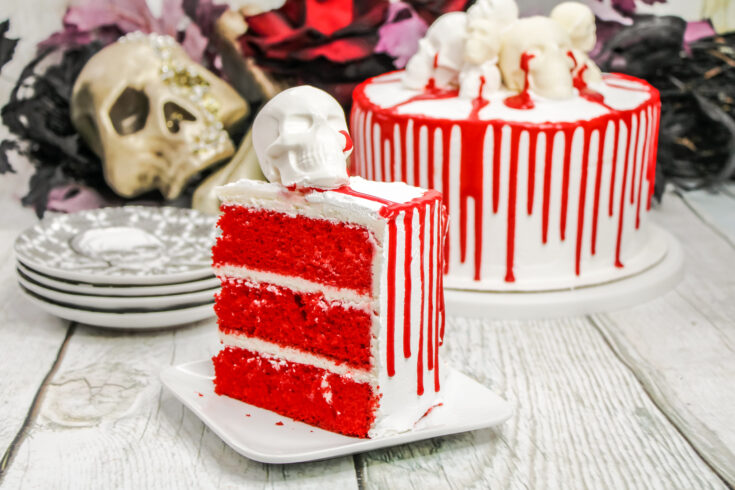
This bloody skull cake recipe is perfect for any Halloween party; pair it with some great looking gory decorations to really set the tone!
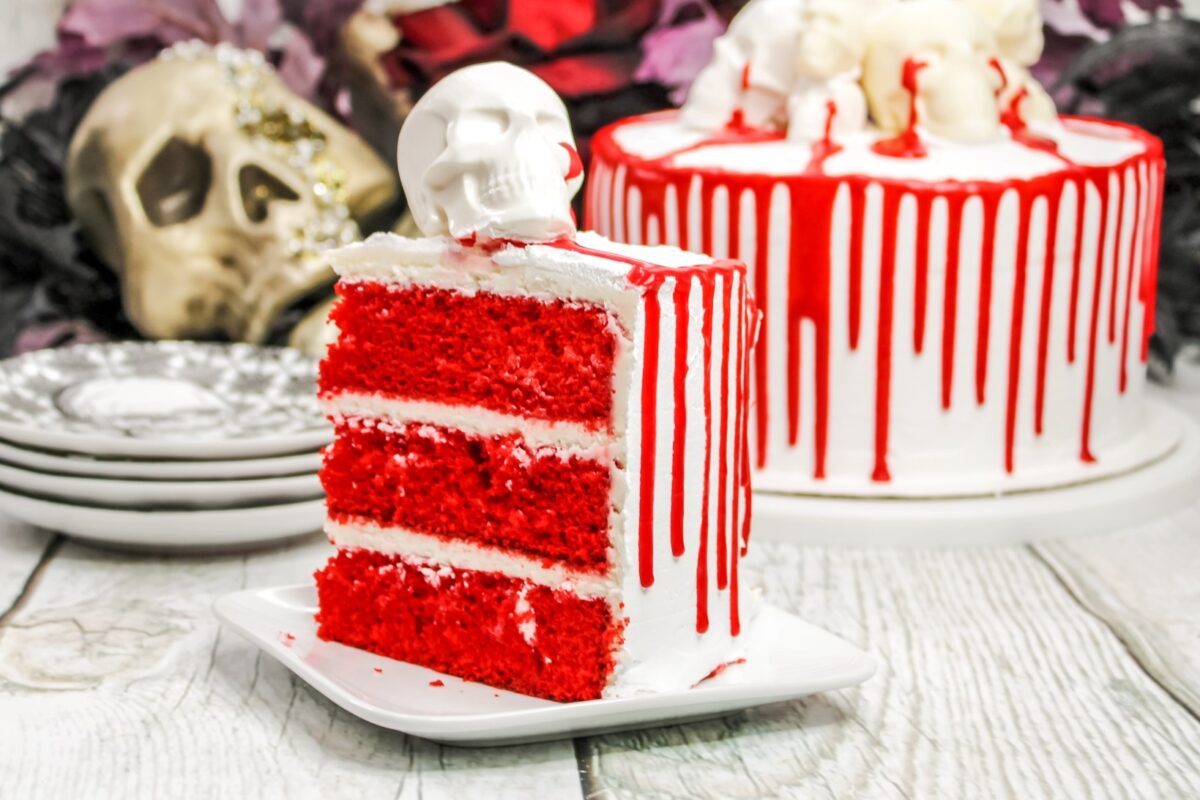
Halloween is just around the corner, and that means it’s time to start thinking about spooky treats! This Bloody Skull Cake is perfect for parties – it’s creepy and delicious all at the same time.
All you need is a few simple ingredients, a little bit of frosting, and a few chocolate skulls to create this spooky masterpiece.
Follow my step-by-step instructions to make your very own skull cake this Halloween!
Tips for Preparing Box Mix Cakes
We are using box mix here as the skulls themselves are a bit of work, and box mix is a good shortcut. When using box mixes though please keep in mind the following:
- Make sure NOT to over-mix the batter if you want a light, fluffy cake.
- For best results, use ingredients that are at room temperature.
- Do not swap the oil for butter. Butter may test better, but the cake will end up with a dry crumb.
- Don’t overfill your pans.
- Cake strips are a great tool to help your cakes rise evenly while baking.
- Do NOT open the oven door while baking until it is time to test it.
- The cake is done when a toothpick inserted into it comes out clean.
Tips for Frosting a Cake
- Allow your cakes to cool completely before frosting.
- When making the frosting, stop the mixer and scrape down the sides of the bowl with a rubber spatula. This will ensure a smooth, lump free frosting.
- Don’t skip the crumb coating if you want a bakery look.
- For exceptionally smooth frosting, run your offset spatula or bench scraper under hot water, then dry it. The warm spatula will smooth the frosting out easily by melting the butter in your frosting slightly.
Tips for Making the Chocolate Skulls
- The skulls are ready to remove from the moulds when you see the chocolate is hard and starting to come away from the moulds.
- If you use white chocolate instead of candy melts, it will need to be tempered properly. Keep in mind that the skulls will be yellowish instead of white if you go this route.
- If you use different skull moulds, be sure to follow the instructions the moulds come with for best results.
How to Store Layer Cake
To prevent this fluffy cake with its buttercream frosting from drying out, store it covered in plastic wrap or stored in an airtight container for up to 4 days on the counter.
Keep in mind that refrigerating the cake can result in the cake drying out if it is not stored in an airtight container. If kept chilled, the cake should be good for up to a week.
If you don’t plan on eating the cake within this given time frame after baking it, you can tightly wrap the cake or slices of cake, and place in an freezer safe airtight container and freeze for up to two months.
Thaw at room temperature for a few hours when you are ready to serve.

About the Equipment Needed for this Bloody Skull Cake
- Small chocolate skull moulds – I used these ones from Amazon to make the small skulls.
- Large chocolate skull moulds – I used these skull moulds from Etsy for the larger skulls.
- 9 inch round cake pans – You will need three of these.
- 10 inch round cake board – You will want one 10 inch road cake board. A second one is useful for levelling the cakes.
- Plus you will want an offset spatula, mixing bowls, and an electric mixer.
About the Ingredients for this Bloody Skull Cake
Candy melts – You will need three 8oz packages of white candy melts. You can also go with white chocolate if you prefer, but you will need to temper it.
Cake mix – Use three boxes of red velvet cake mix. You can use your own favourite red velvet cake recipe instead if you prefer. You will need 12 cups of batter for a 3 layer cake.
Milk – For the best flavour, use room temperature whole milk for making the batter. You can use non-dairy or lower fat milk if you prefer.
Oil – Do not substitute with butter or your cake will be dry, if you like you can use half melted butter and half vegetable oil so you can have the flavour of butter with the moisture of oil.
Eggs – Make sure your eggs are also room temperature.
Butter – Make sure the butter is softened for a creamy frosting.
Powdered sugar – For making the frosting.
Vanilla Extract – Use pure vanilla extract for the best flavour, but artificial is just fine too.
Heavy cream – Best for making a rich buttercream frosting but you can use butter instead.
Looking for More Halloween Party Recipes?
Check out more of my favourite Halloween recipes!
Learn how to make monster eye cookies with this recipe. Perfect for Halloween parties, these spooky treats are quick and easy to prepare!
Purple People Eater Halloween Punch is a fun and easy non-alcoholic punch recipe that kids will love for this year’s Halloween party.
These easy Devil Cupcakes are perfect for even the most novice home baker to perfect. Make them for your class Halloween party or even just for a small celebration at home
How to Make a Bloody Skull Cake
Yields: 16 Servings | Prep time: 1 hour 25 minutes | Cook time: 25 Minutes
Ingredients:
For the White chocolate skulls:
- 24 oz white candy melts
For the Cake:
- 3 boxes Red Velvet cake mix
- 6 large eggs, room temperature
- 1 ½ Cups vegetable oil
- 3 Cups whole milk, room temperature
For the Vanilla Buttercream:
- 2 Cups butter, softened
- 6 Cups powdered sugar
- 1 Tablespoon pure vanilla extract
- 7 Tablespoons heavy whipping cream
- 3 tubes of red cookie icing
Directions:
For the Chocolate Skulls:
To make the chocolate skulls, start by placing the white candy melts in a large microwave-safe bowl. Microwave the melts for 45 seconds, then stir. Heat and stir the wafers at 30-second intervals until they melt to a fluid consistency.
Allow the melts to cool slightly so the consistency is a little thicker but still fluid. For making the larger skulls, follow the instructions that come with the 3 piece mould.
For the smaller skulls, fill each cavity with the candy melts, carefully bang the mould down on a counter 2-3 times to remove any air bubbles. Scrape a knife or bench scraper around the top edges of the mould to remove excess candy coating. Place in the refrigerator for 30 minutes to set.
You will need about 15 small skulls and 6 large skulls, so repeat this process as needed.
Remove your skulls from the fridge and gently remove the hardened chocolate skull shells from the mould.
Heat a clean plate in the microwave, then place both sides of the skulls down for 1-2 seconds to just slightly melt the surface, and then press the two sides together. This process is the same for both the small and the large skulls. Set aside to set.
For the Red Velvet Cake:
Preheat oven to 350 degrees Fahrenheit. Grease and flour your cake pans, then set aside.
Using a stand mixer or hand beater, combine all the cake ingredients and beat until just combined and smooth.
Divide the cake batter evenly between the prepared cake pans, and bake for 25-28 minutes or until a toothpick comes out clean. Set aside to cool completely in the pans.
Carefully remove the cakes from the pans and onto a flat surface. Using a cake leveller or serrated knife, remove the tops of the cakes to make them even in size.
In the bowl of a stand mixer, beat the butter, powdered sugar, vanilla and heavy whipping cream until combined, creamy and stiff.
Place one cake layer on a cake board, and scoop 1 cup of frosting onto the cake layer and spread evenly.
Place a second cake layer on top and scoop another cup of frosting on the second cake layer and spread evenly.
Place the last cake layer on top, and give the cake a crumb coat by spreading a very thin layer of frosting over the whole cake using an offset spatula. Then give your cake a quick chill in the fridge, for about 15-20 minutes, to set the frosting.
After your crumb coat is set, use the remaining frosting and an offset spatula to frost the top of the cake, starting from the centre. A bench scraper works really well for the sides if you have one, otherwise the offset spatula will do.
Once cake has been frosted, place into the fridge for a few hours to allow the frosting to set completely.
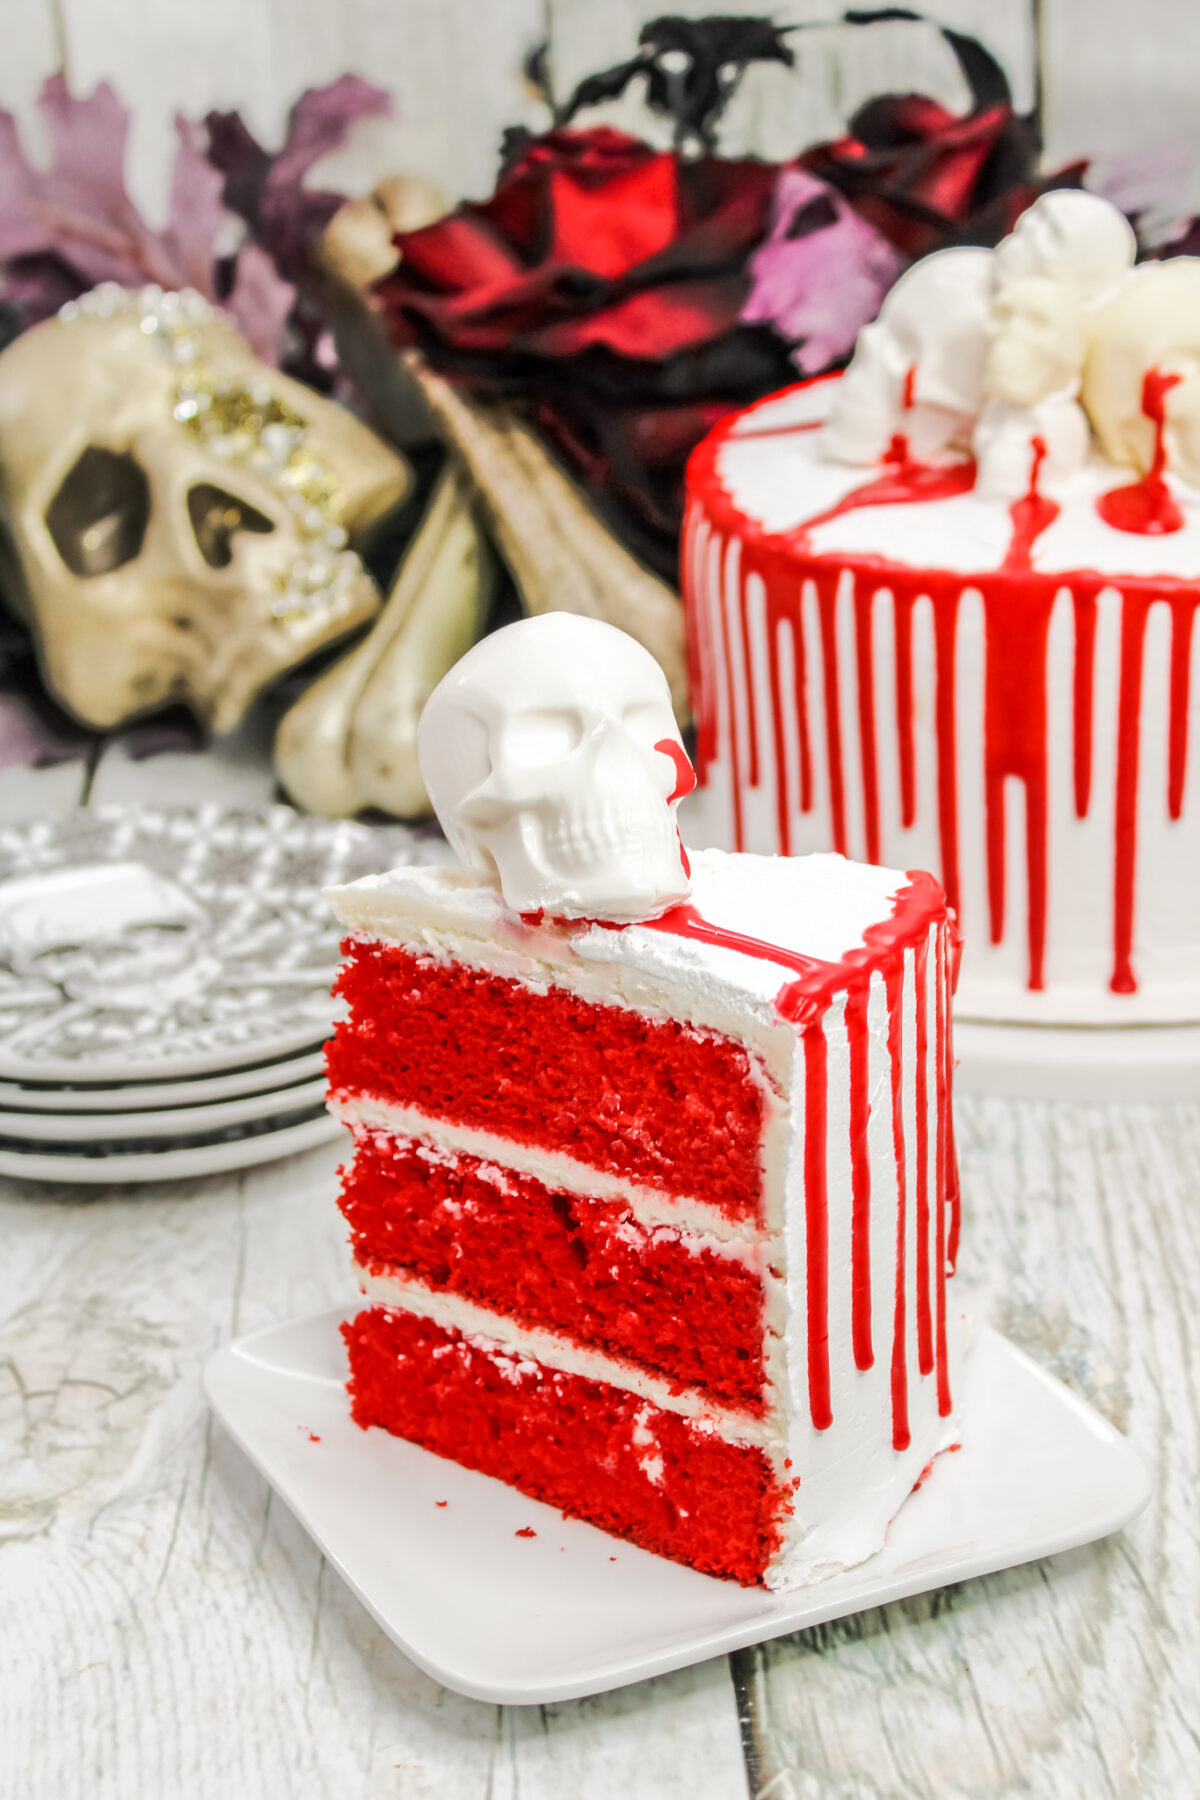
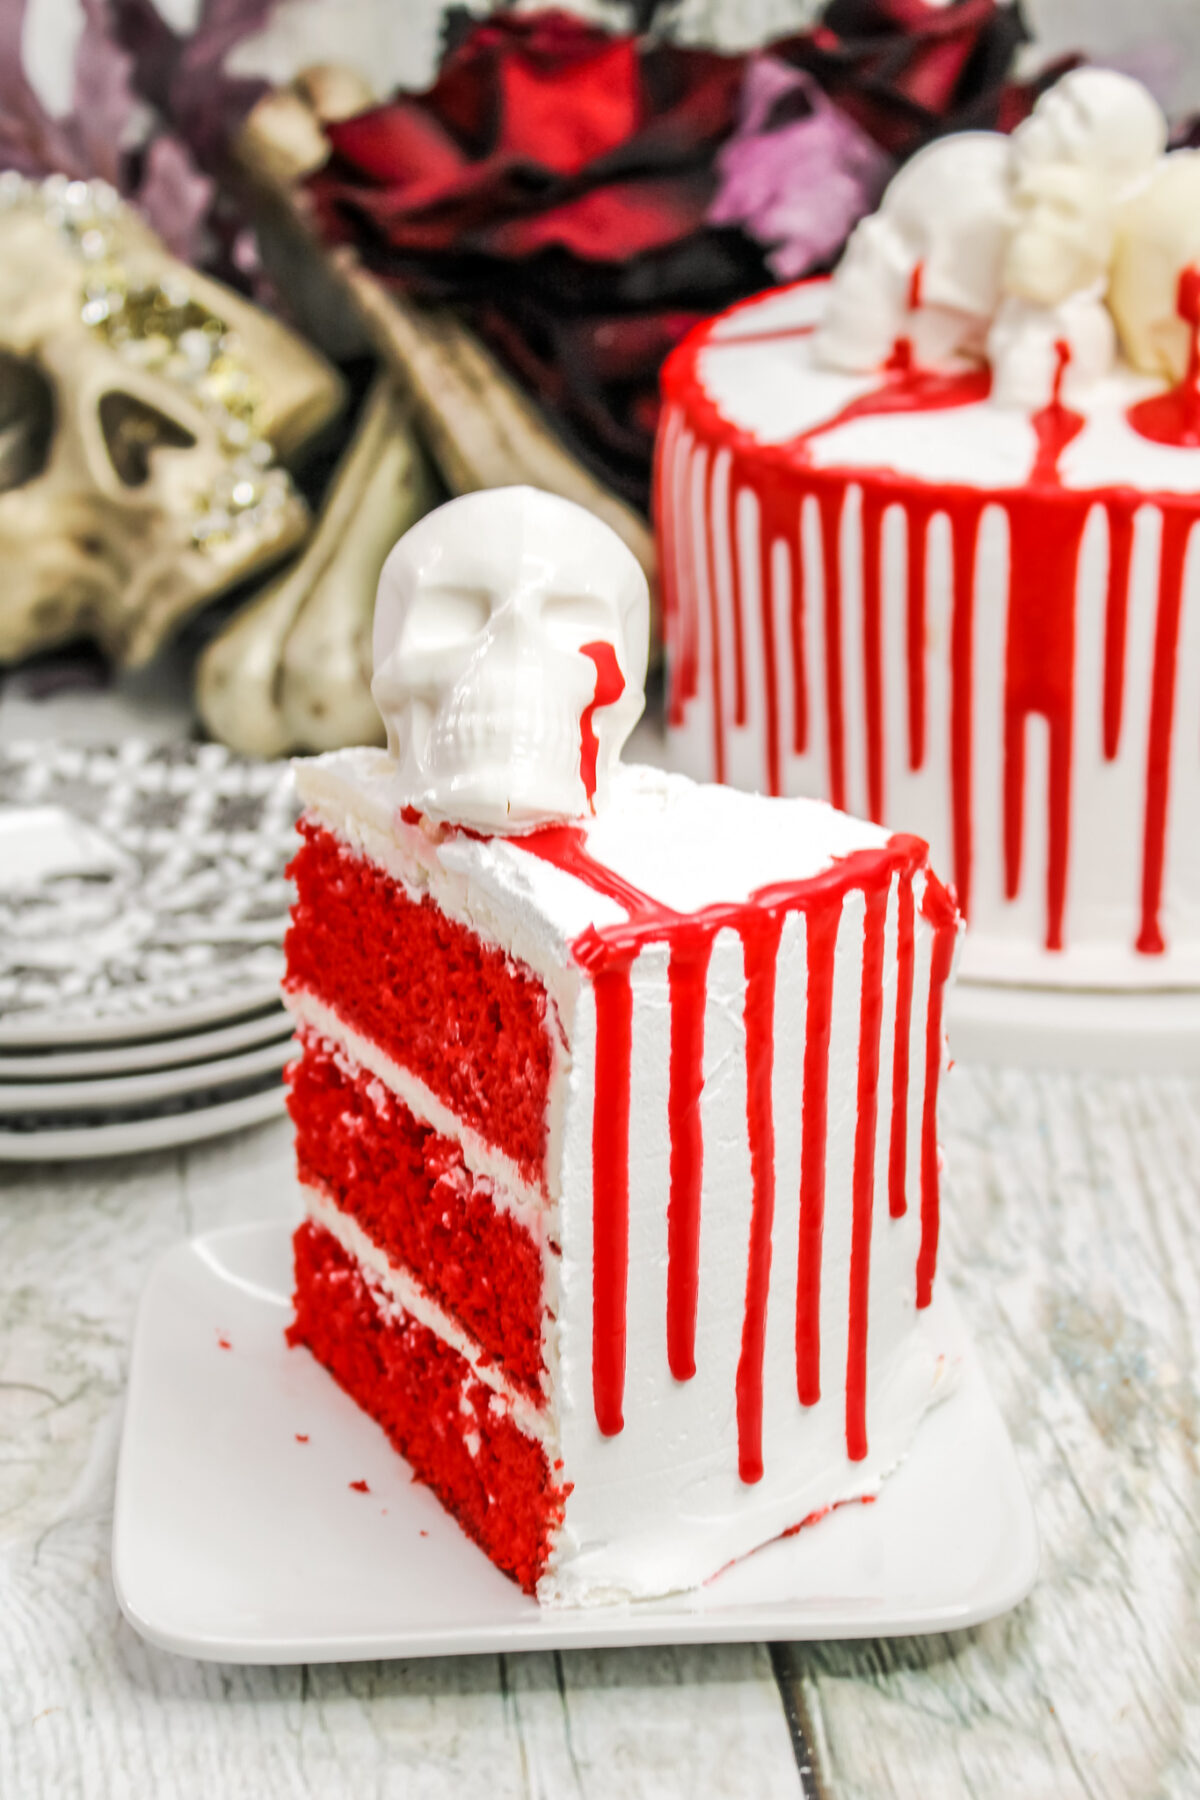
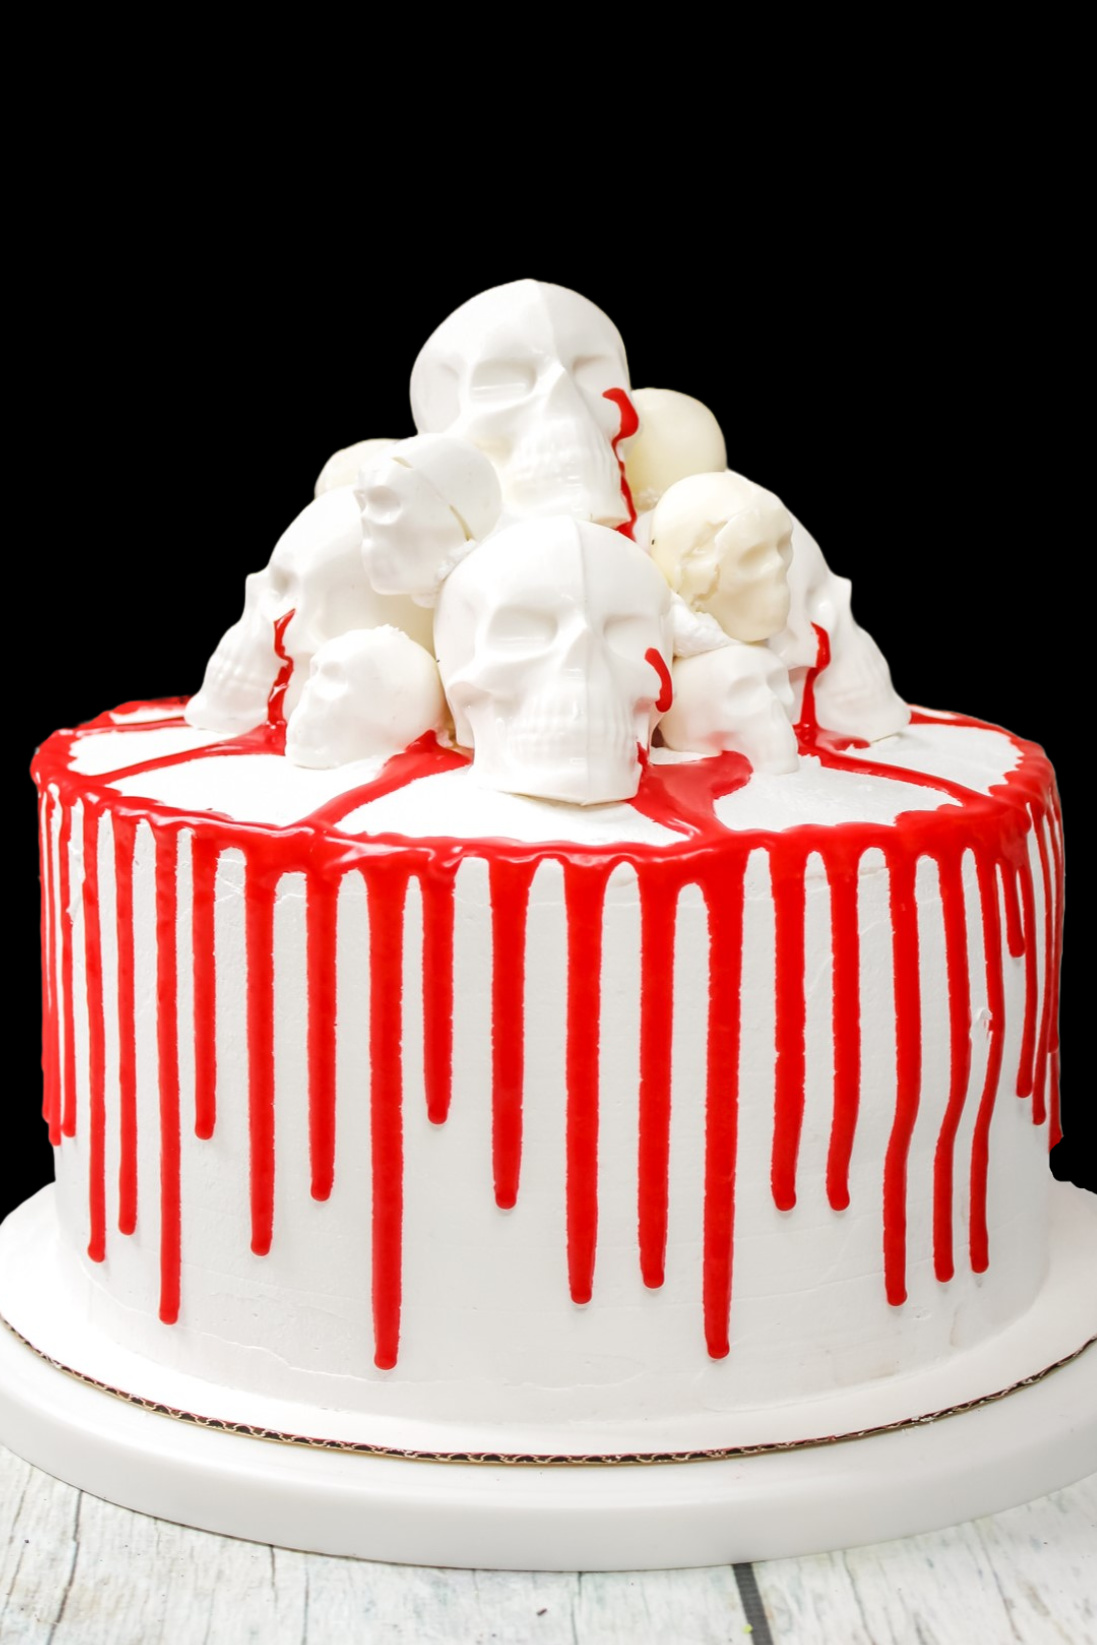
Once the cake is cold, using the red icing, create a drip effect by squeezing the red icing around the top edge of the cake.
Build a mound of skulls in the centre of your cake, using any remaining frosting as a glue for the
skulls to stack on top of each other.
Enjoy!
Bloody Skull Cake
This bloody skull cake recipe is perfect for any Halloween party; pair it with some great looking gory decorations to really set the tone!
Ingredients
For the White chocolate skulls:
- 24 oz white candy melts
For the Cake:
- 3 boxes Red Velvet cake mix
- 6 large eggs, room temperature
- 1 ½ Cups vegetable oil
- 3 Cups whole milk, room temperature
For the Vanilla Buttercream:
- 2 Cups butter, softened
- 6 Cups powdered sugar
- 1 Tablespoon pure vanilla extract
- 7 Tablespoons heavy whipping cream
- 3 tubes of red cookie icing
Instructions
For the Chocolate Skulls:
To make the chocolate skulls, start by placing the white candy melts in a large microwave-safe bowl. Microwave the melts for 45 seconds, then stir. Heat and stir the wafers at 30-second intervals until they melt to a fluid consistency.
Allow the melts to cool slightly so the consistency is a little thicker but still fluid. For making the larger skulls, follow the instructions that come with the 3 piece mould.
For the smaller skulls, fill each cavity with the candy melts, carefully bang the mould down on a counter 2-3 times to remove any air bubbles. Scrape a knife or bench scraper around the top edges of the mould to remove excess candy coating. Place in the refrigerator for 30 minutes to set.
You will need about 15 small skulls and 6 large skulls, so repeat this process as needed.
Remove your skulls from the fridge and gently remove the hardened chocolate skull shells from the mould.
Heat a clean plate in the microwave, then place both sides of the skulls down for 1-2 seconds to just slightly melt the surface, and then press the two sides together. This process is the same for both the small and the large skulls. Set aside to set.
For the Red Velvet Cake:
Preheat oven to 350 degrees Fahrenheit. Grease and flour your cake pans, then set aside.
Using a stand mixer or hand beater, combine all the cake ingredients and beat until just combined and smooth.
Divide the cake batter evenly between the prepared cake pans, and bake for 25-28 minutes or until a toothpick comes out clean. Set aside to cool completely in the pans.
Carefully remove the cakes from the pans and onto a flat surface. Using a cake leveller or serrated knife, remove the tops of the cakes to make them even in size.
In the bowl of a stand mixer, beat the butter, powdered sugar, vanilla and heavy whipping cream until combined, creamy and stiff.
Place one cake layer on a cake board, and scoop 1 cup of frosting onto the cake layer and spread evenly.
Place a second cake layer on top and scoop another cup of frosting on the second cake layer and spread evenly.
Place the last cake layer on top, and give the cake a crumb coat by spreading a very thin layer of frosting over the whole cake using an offset spatula. Then give your cake a quick chill in the fridge, for about 15-20 minutes, to set the frosting.
After your crumb coat is set, use the remaining frosting and an offset spatula to frost the top of the cake, starting from the centre. A bench scraper works really well for the sides if you have one, otherwise the offset spatula will do.
Once cake has been frosted, place into the fridge for a few hours to allow the frosting to set completely.
Once the cake is cold, using the red icing, create a drip effect by squeezing the red icing around the top edge of the cake.
Build a mound of skulls in the centre of your cake, using any remaining frosting as a glue for the skulls to stack on top of each other.
Enjoy!
Recommended Products
As an Amazon Associate and member of other affiliate programs, I earn from qualifying purchases.

Nutrition Information:
Yield:
16Serving Size:
2 inch sliceAmount Per Serving: Calories: 880Total Fat: 54gSaturated Fat: 22gTrans Fat: 2gUnsaturated Fat: 29gCholesterol: 160mgSodium: 318mgCarbohydrates: 95gFiber: 0gSugar: 77gProtein: 5g
This information is provided as a courtesy and for entertainment purposes only. This information comes from online calculators. Although frugalmomeh.com attempts to provide accurate nutritional information, these figures are only estimates.