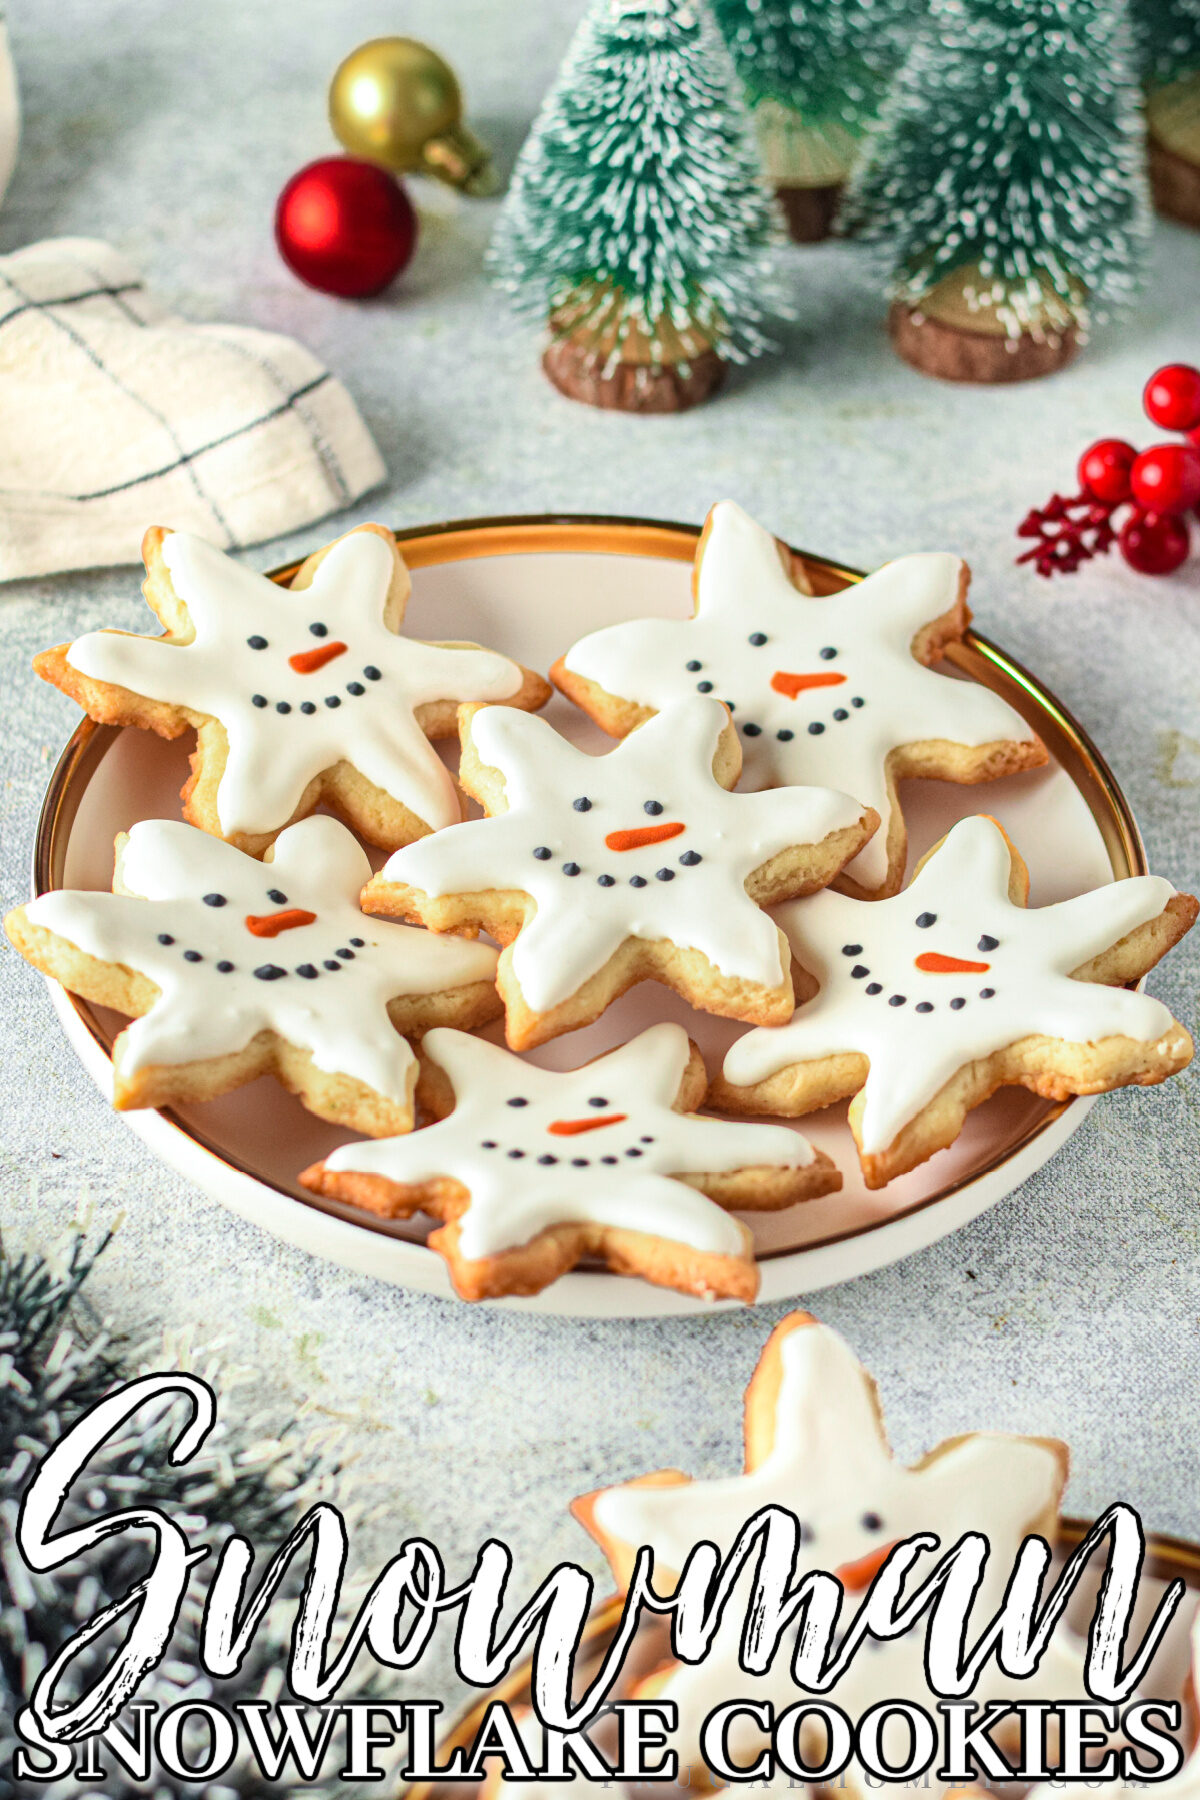
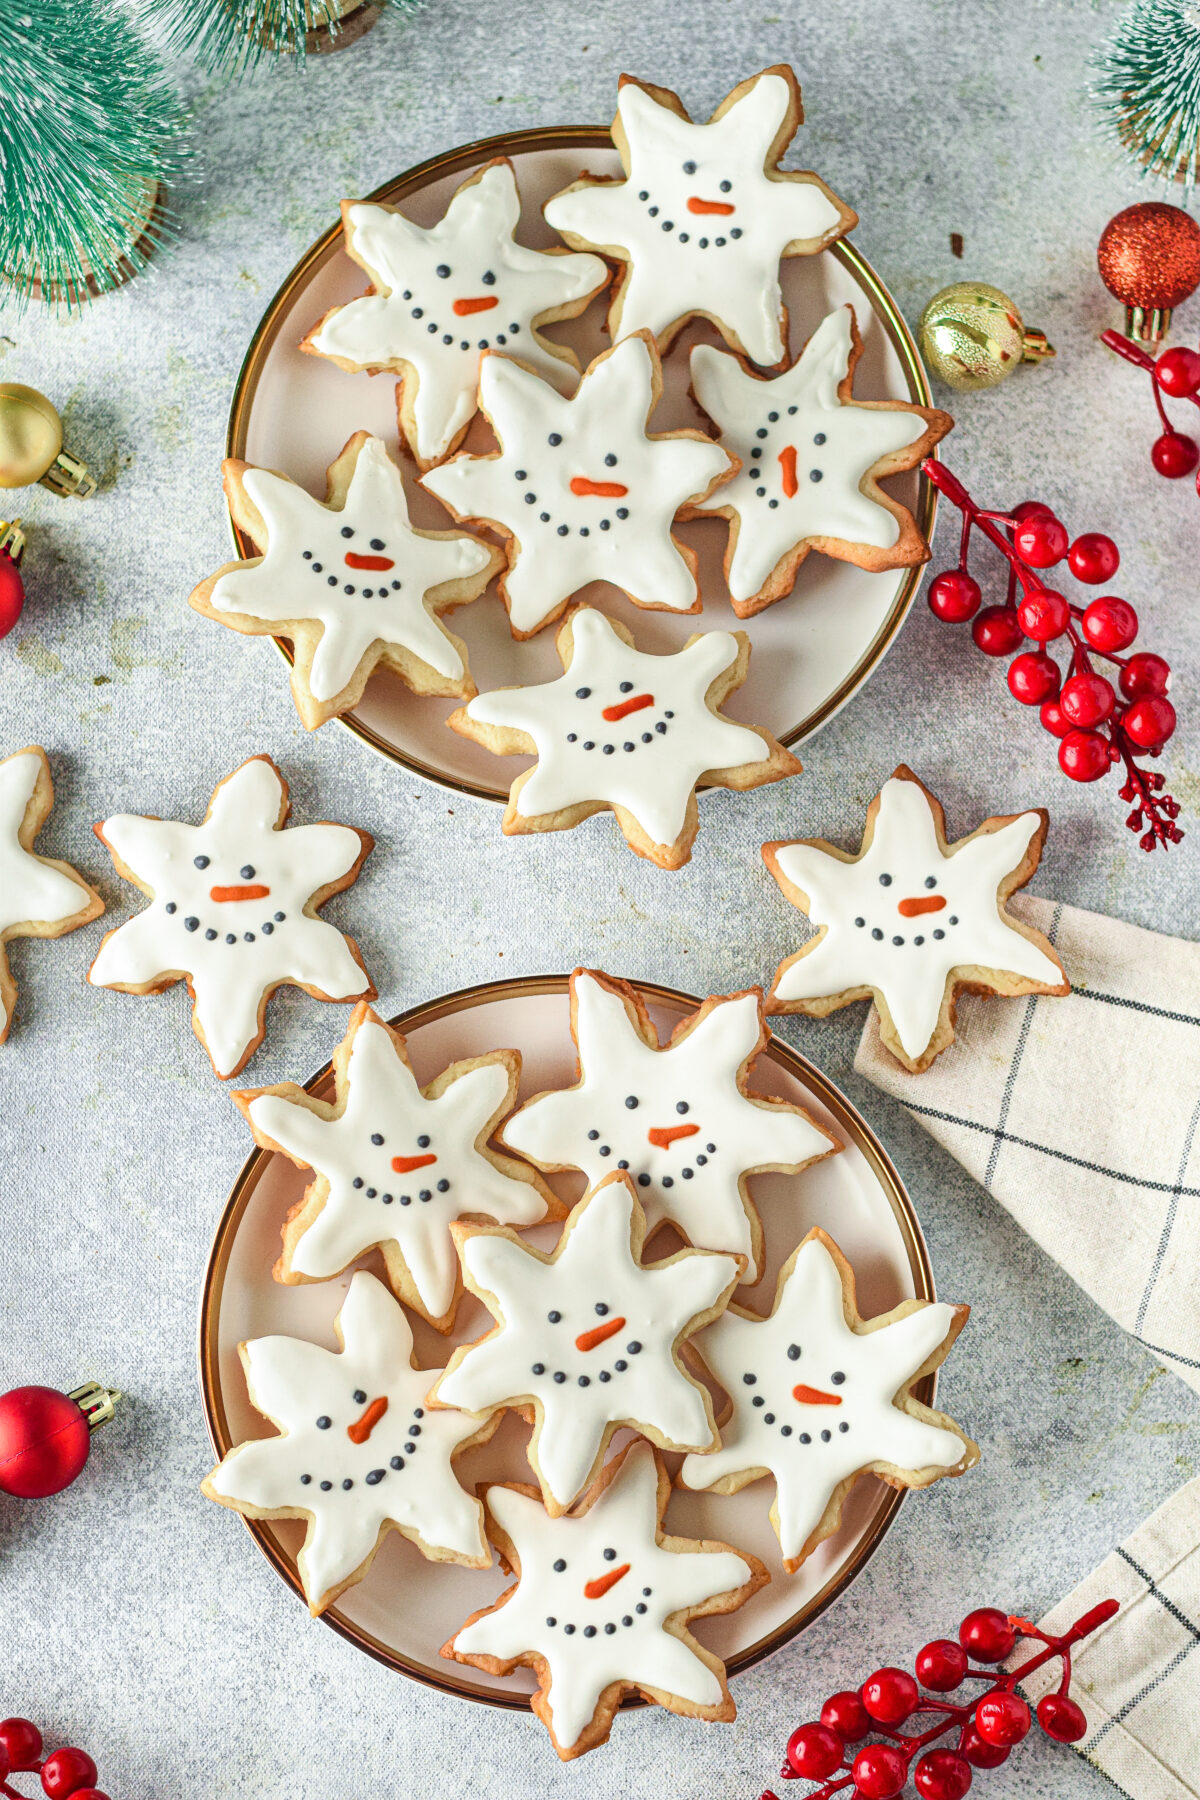
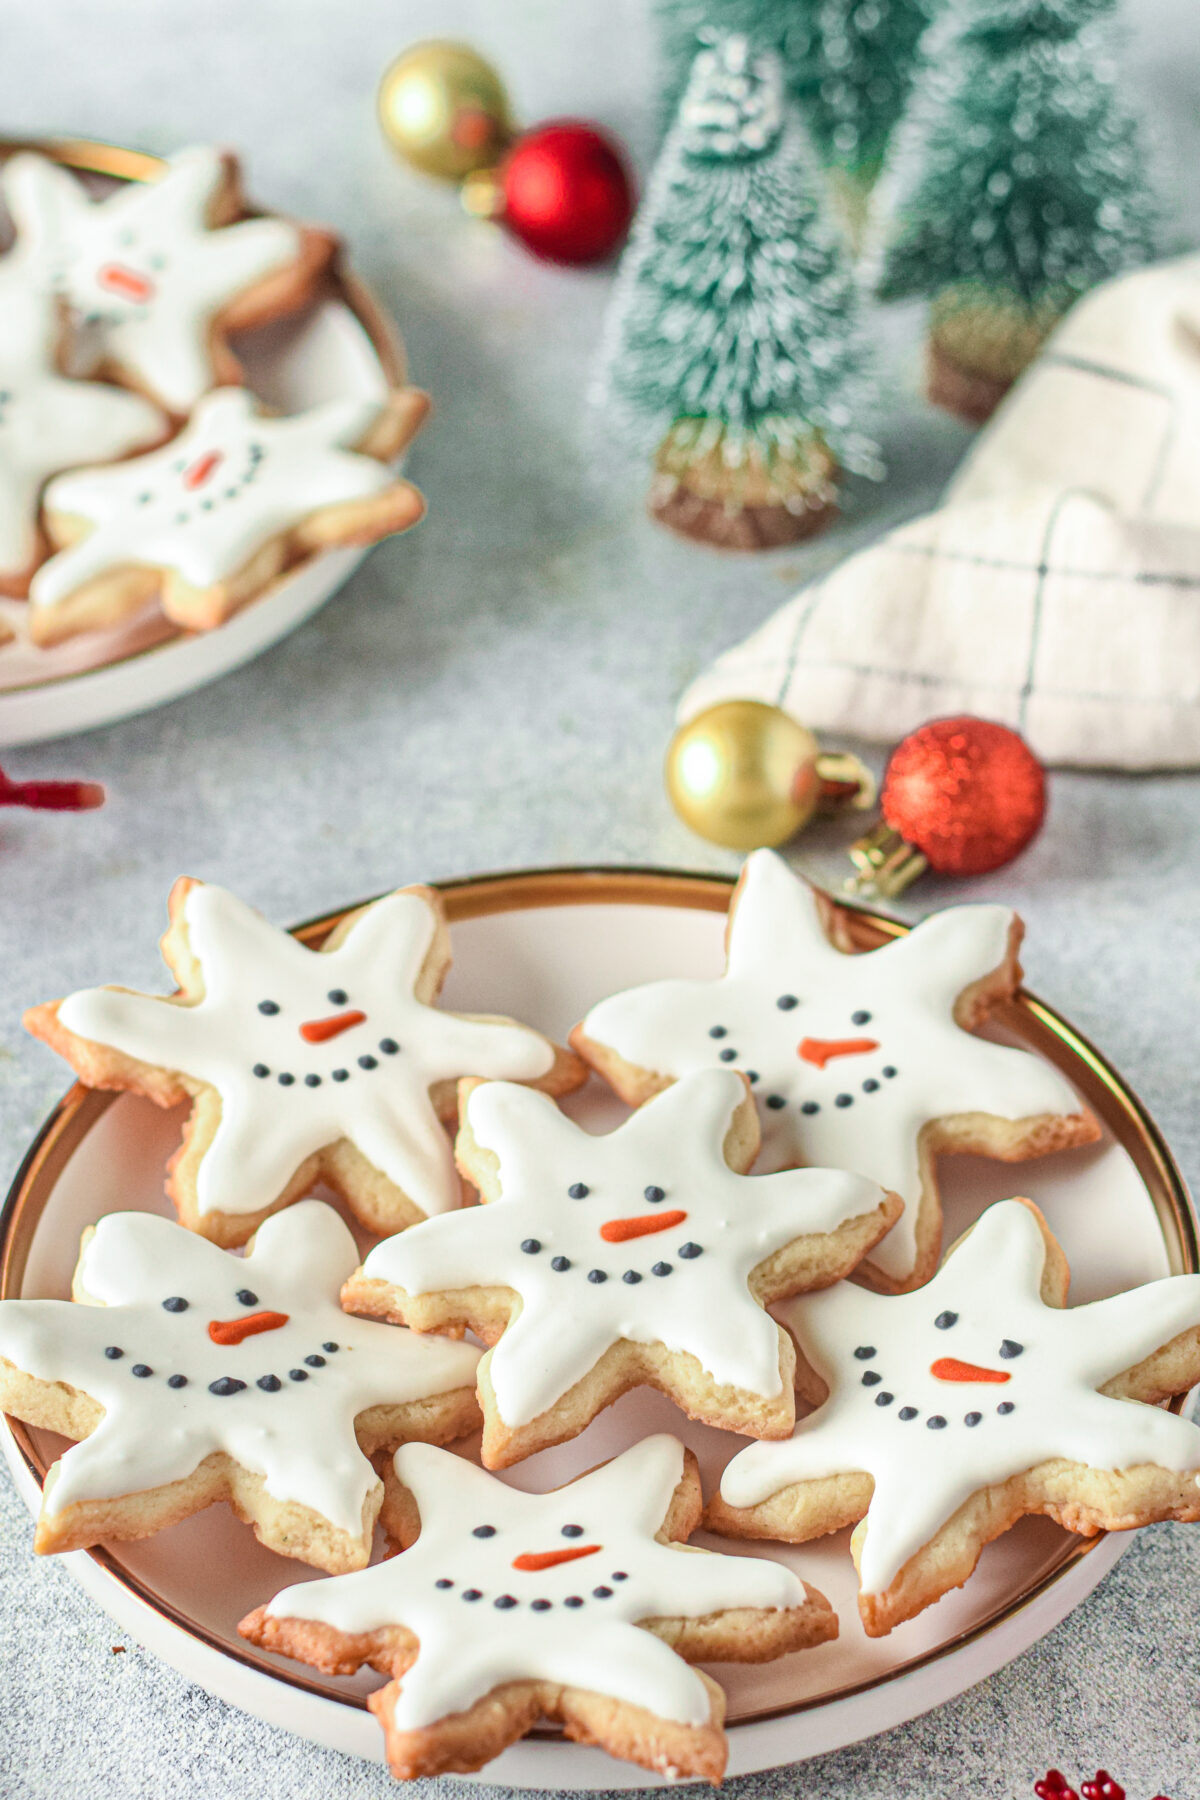
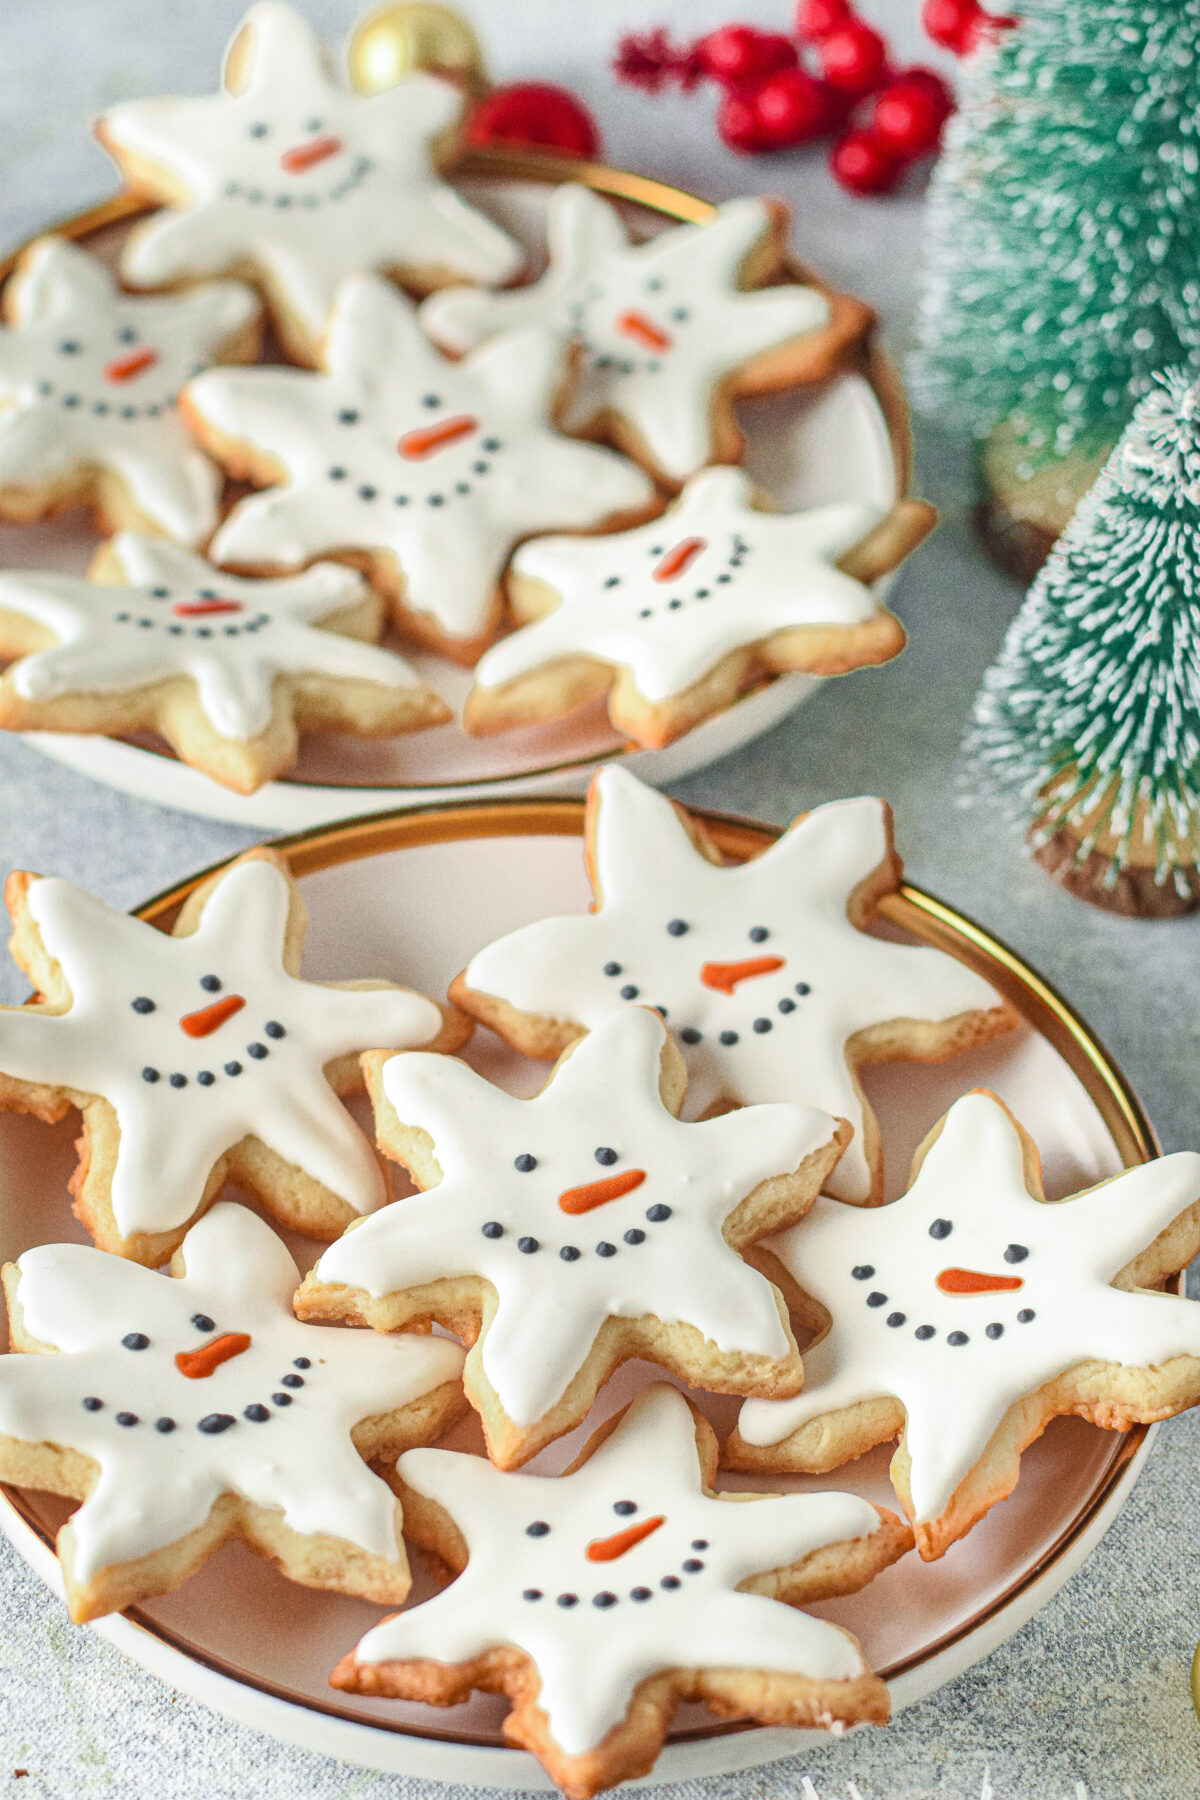
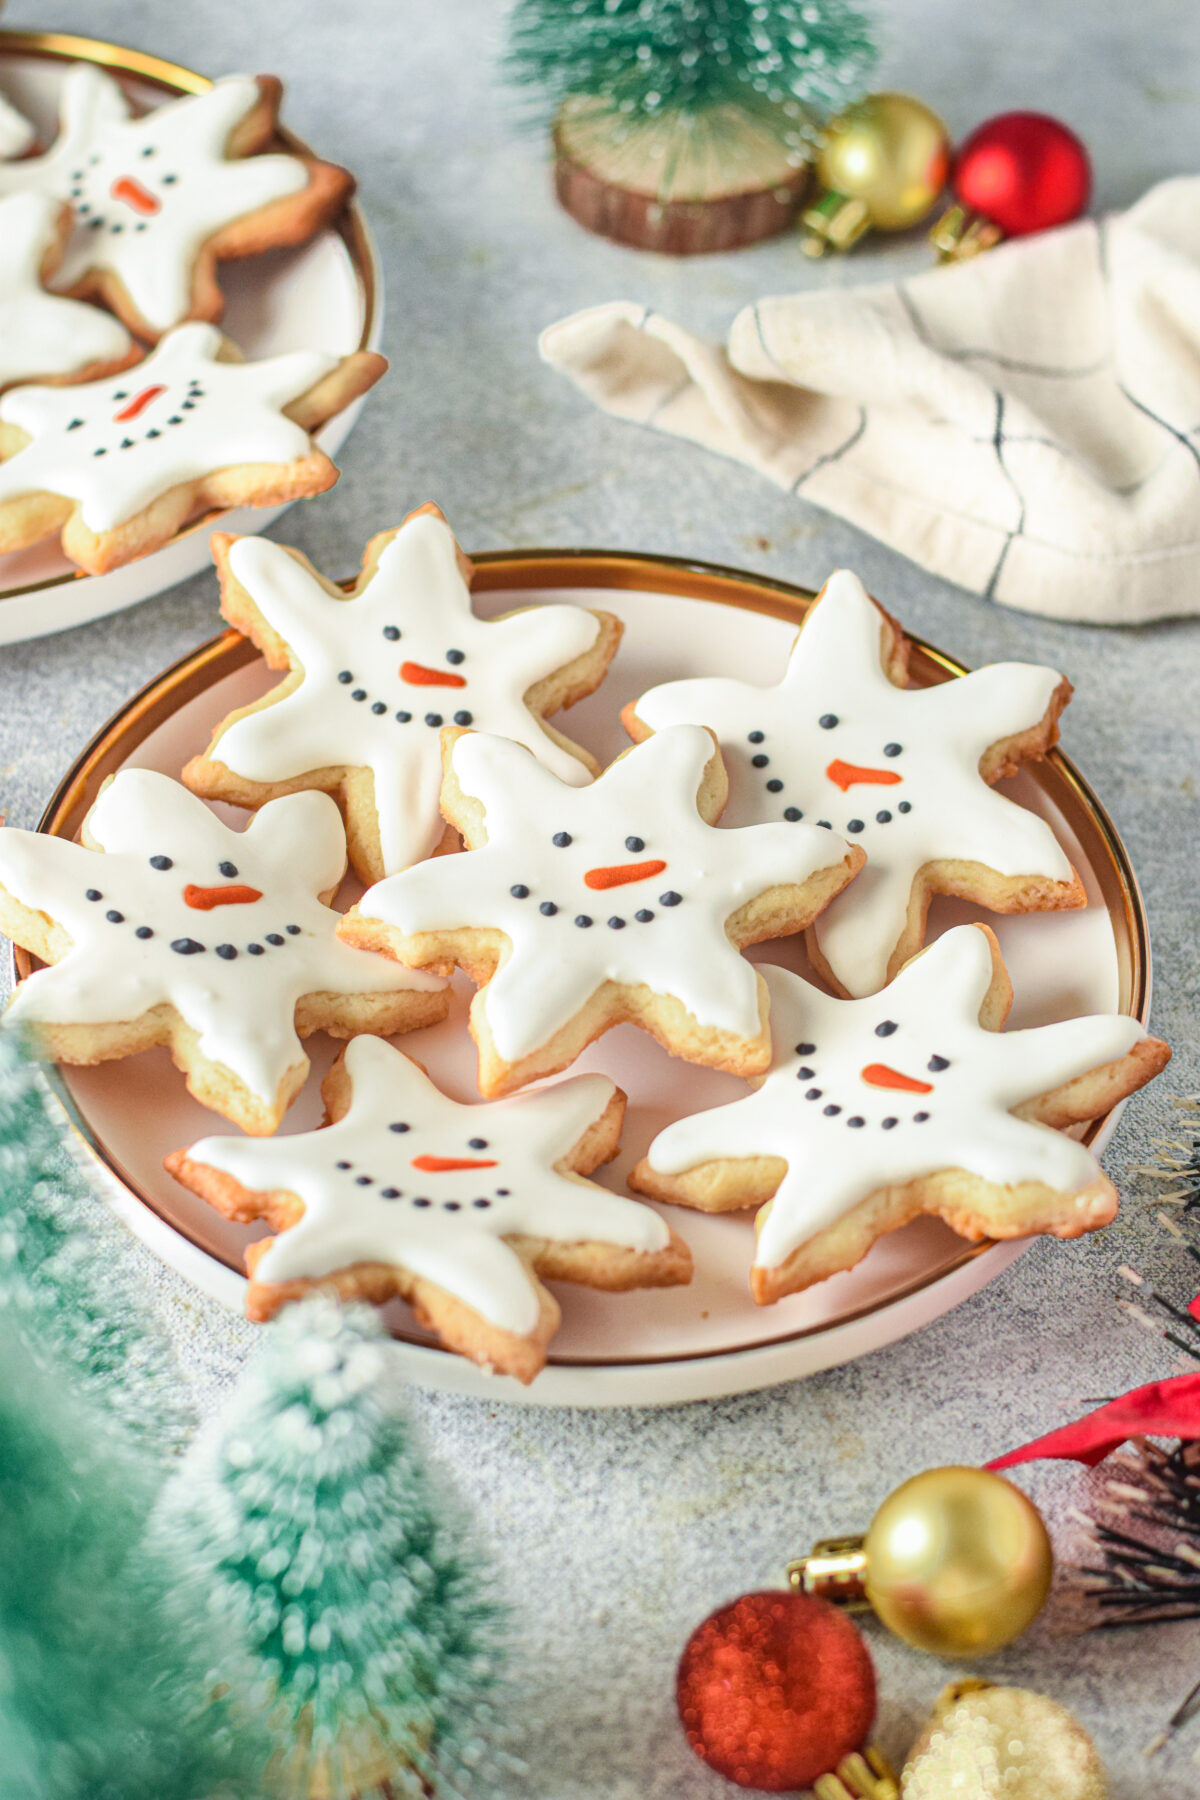
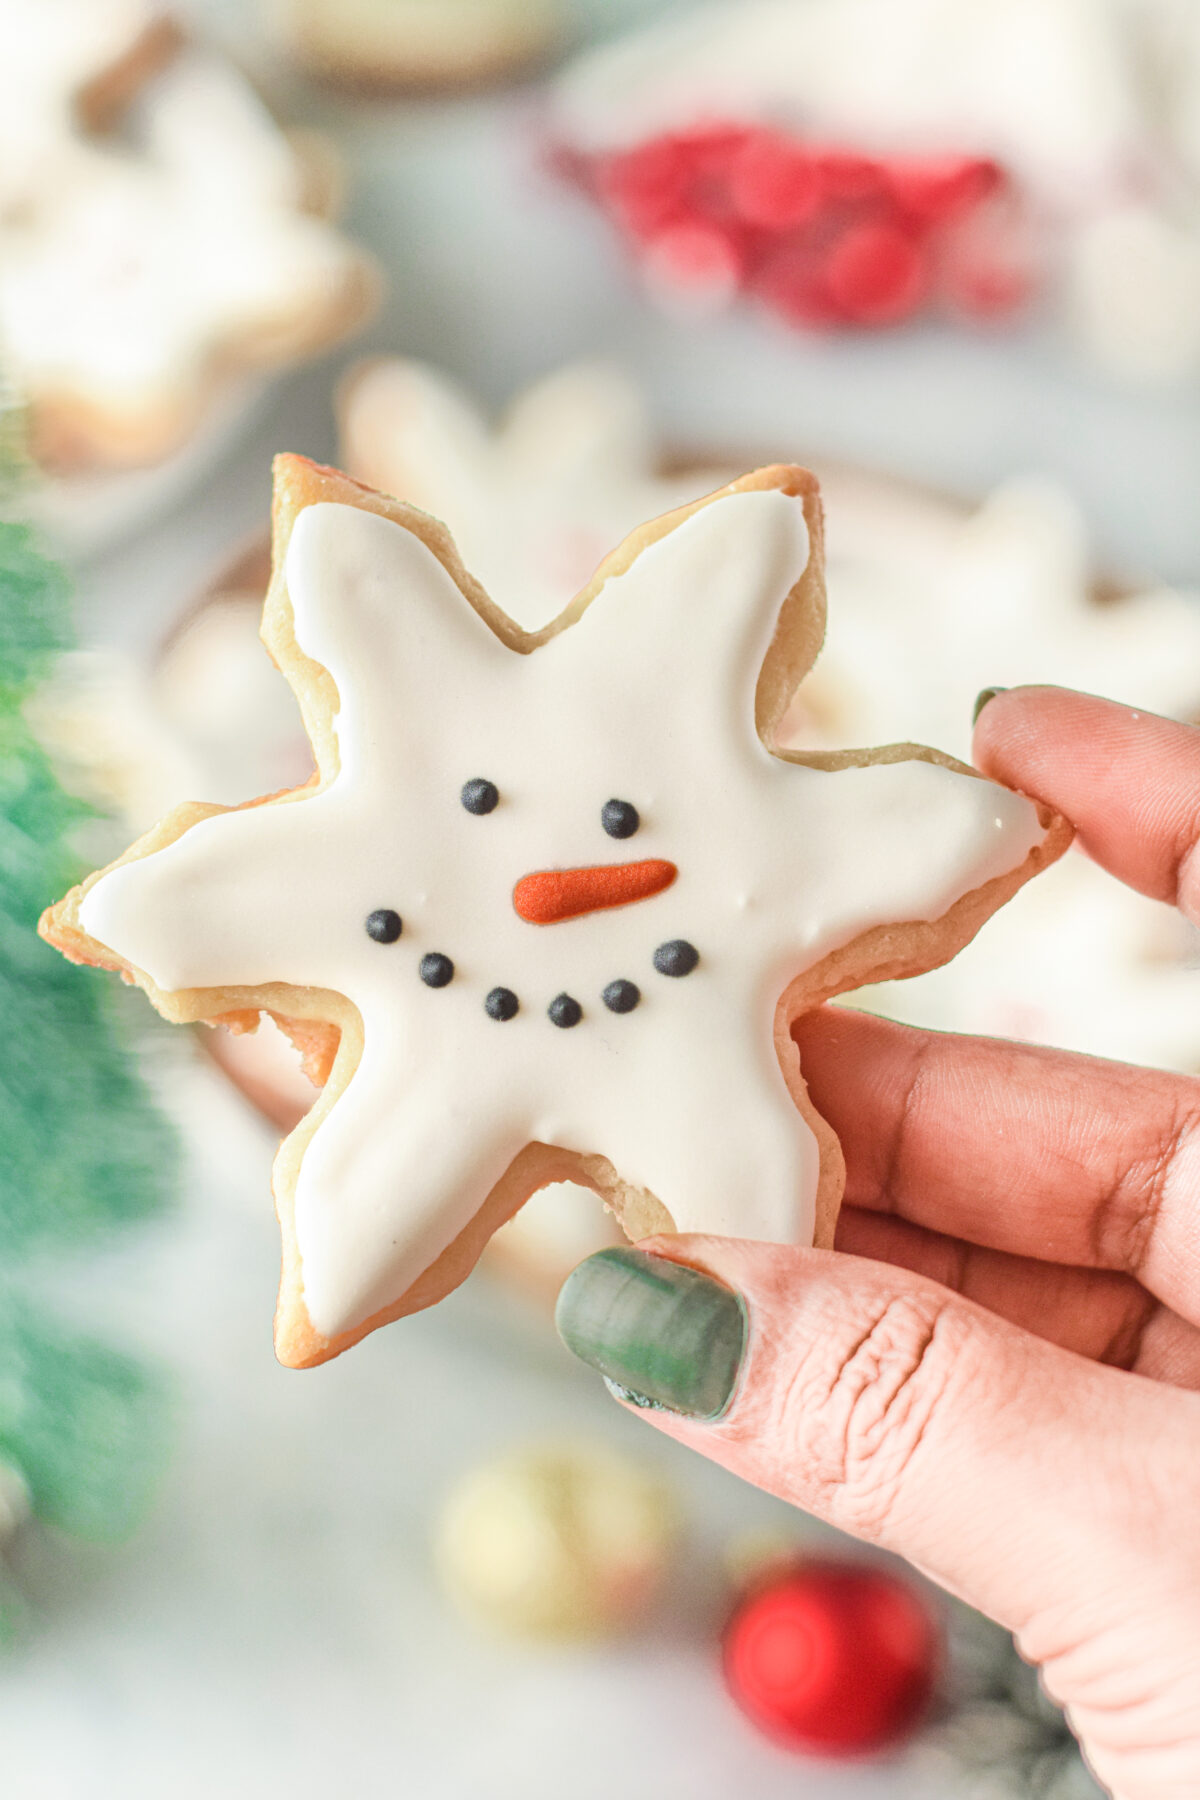
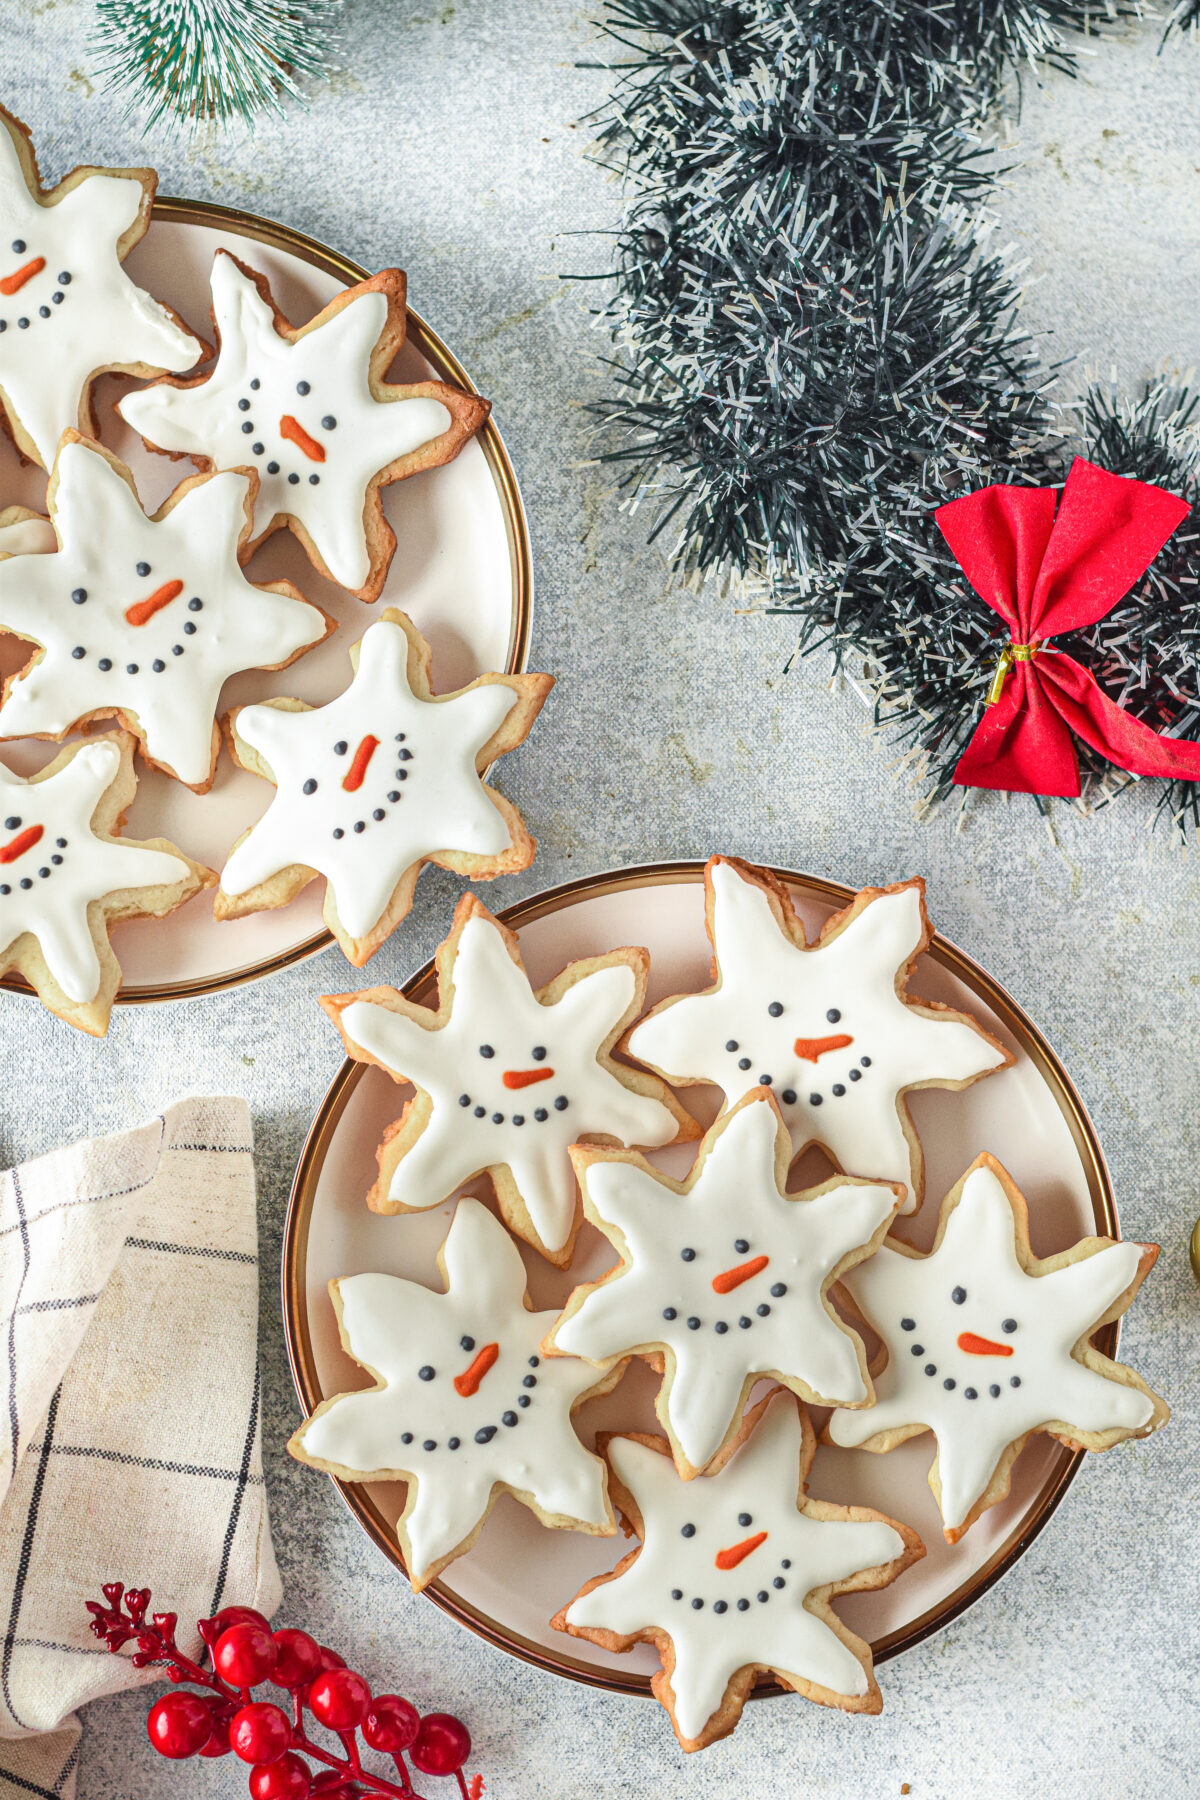
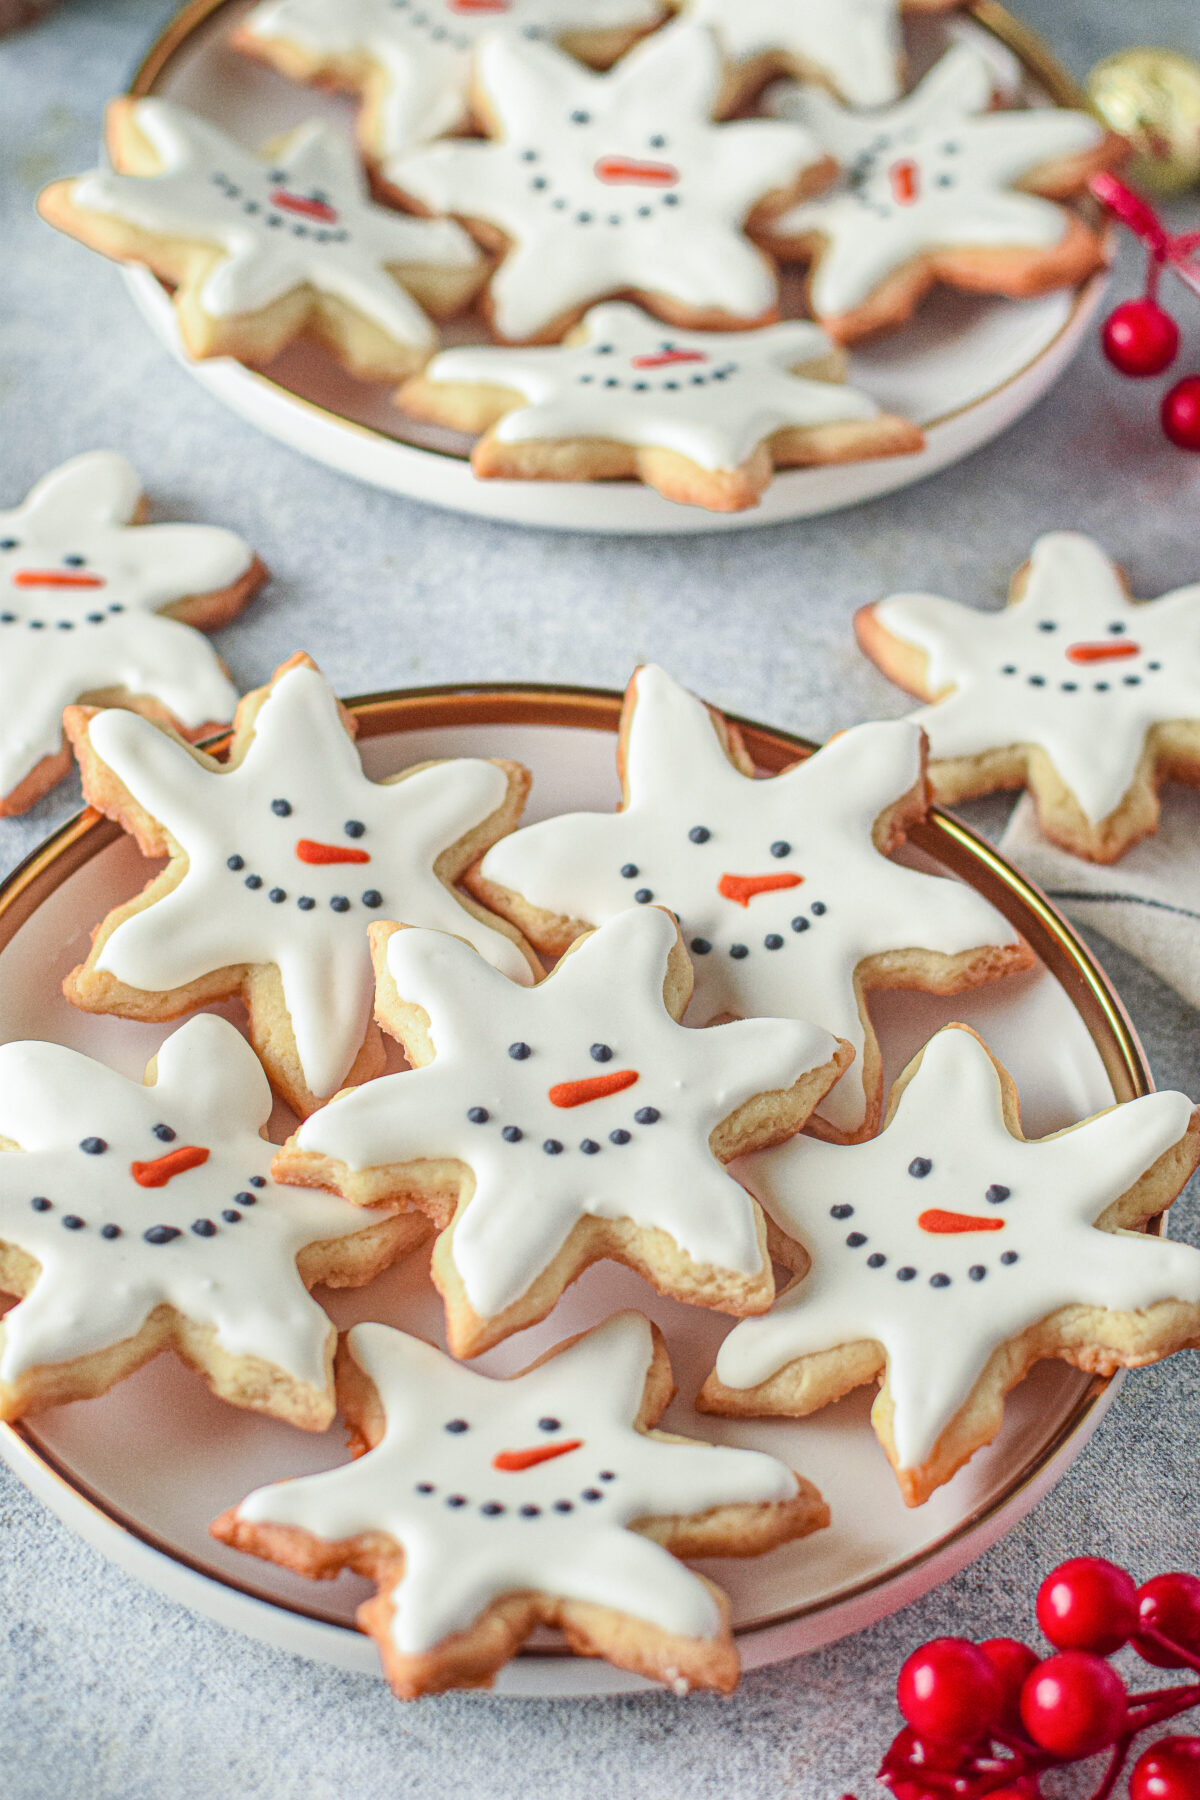
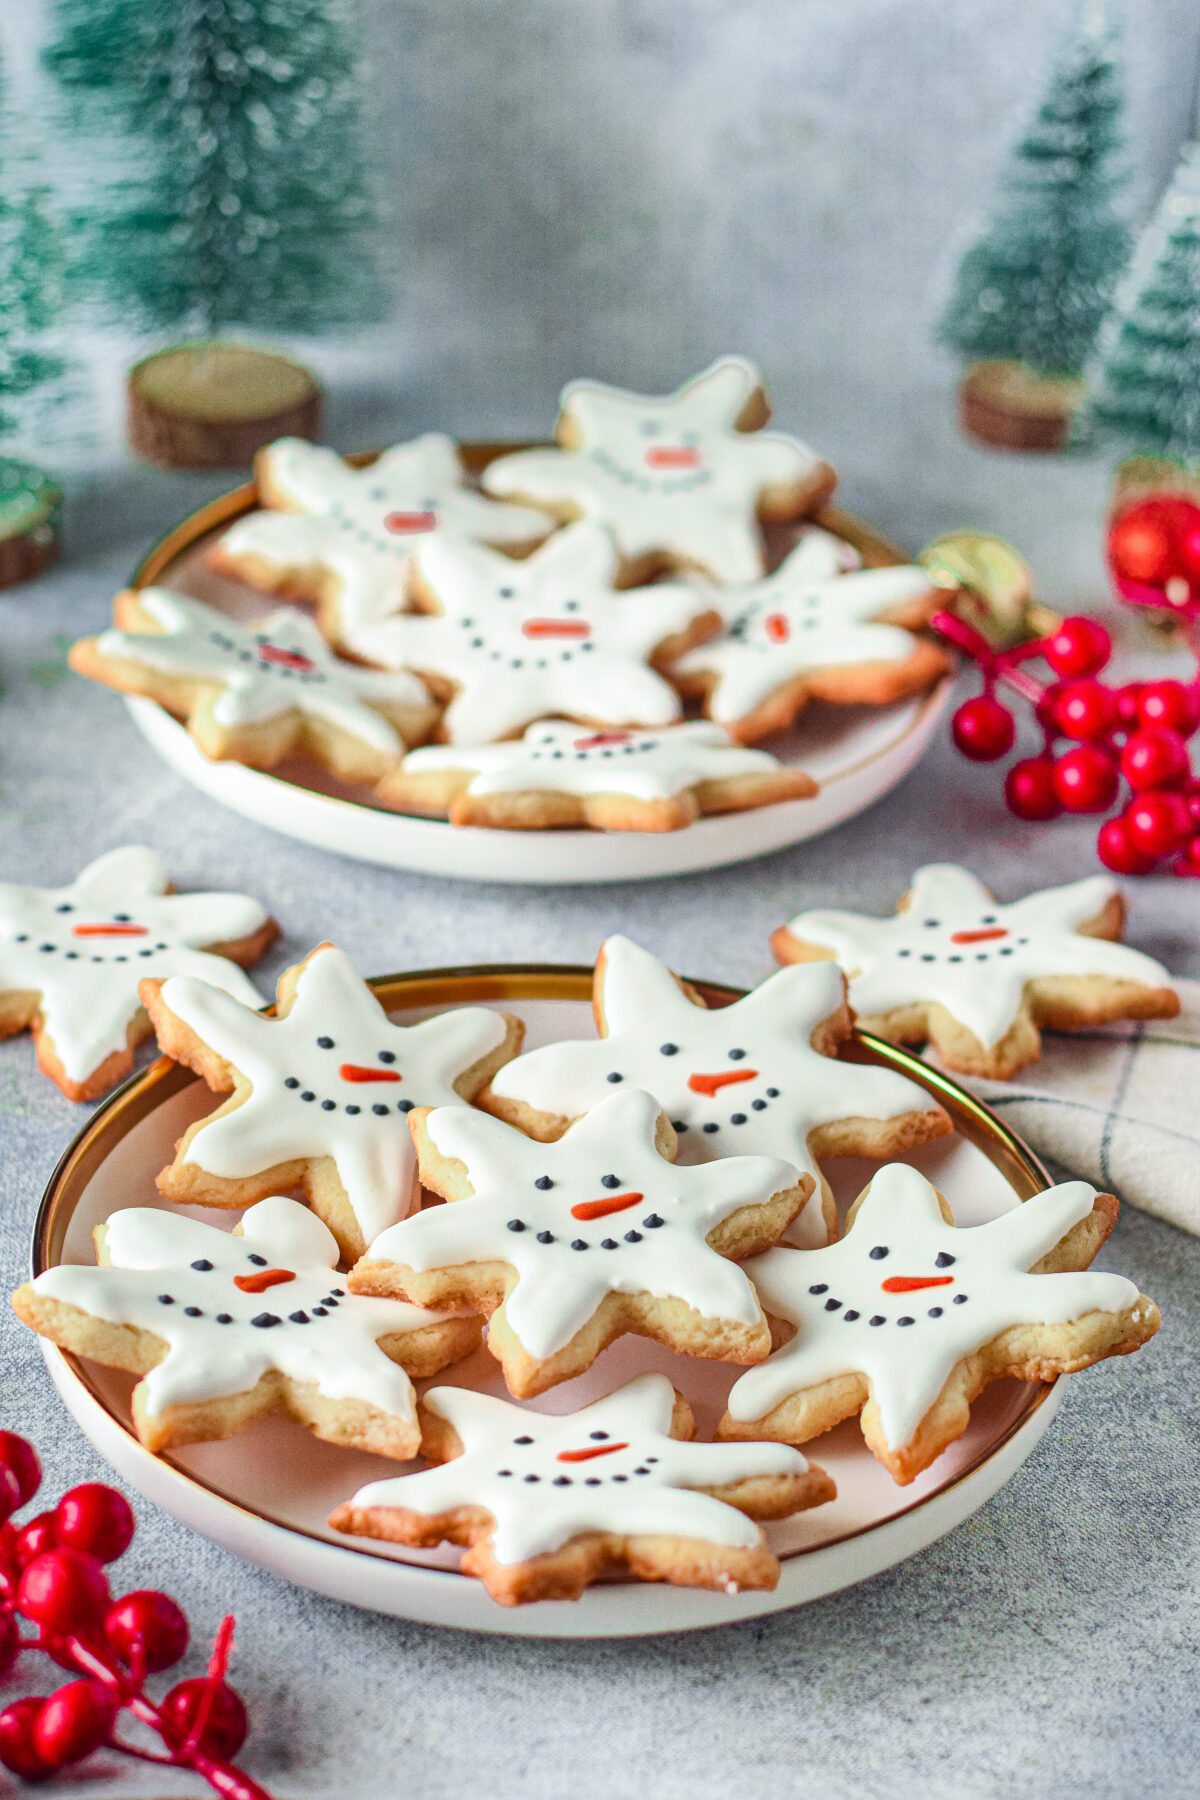
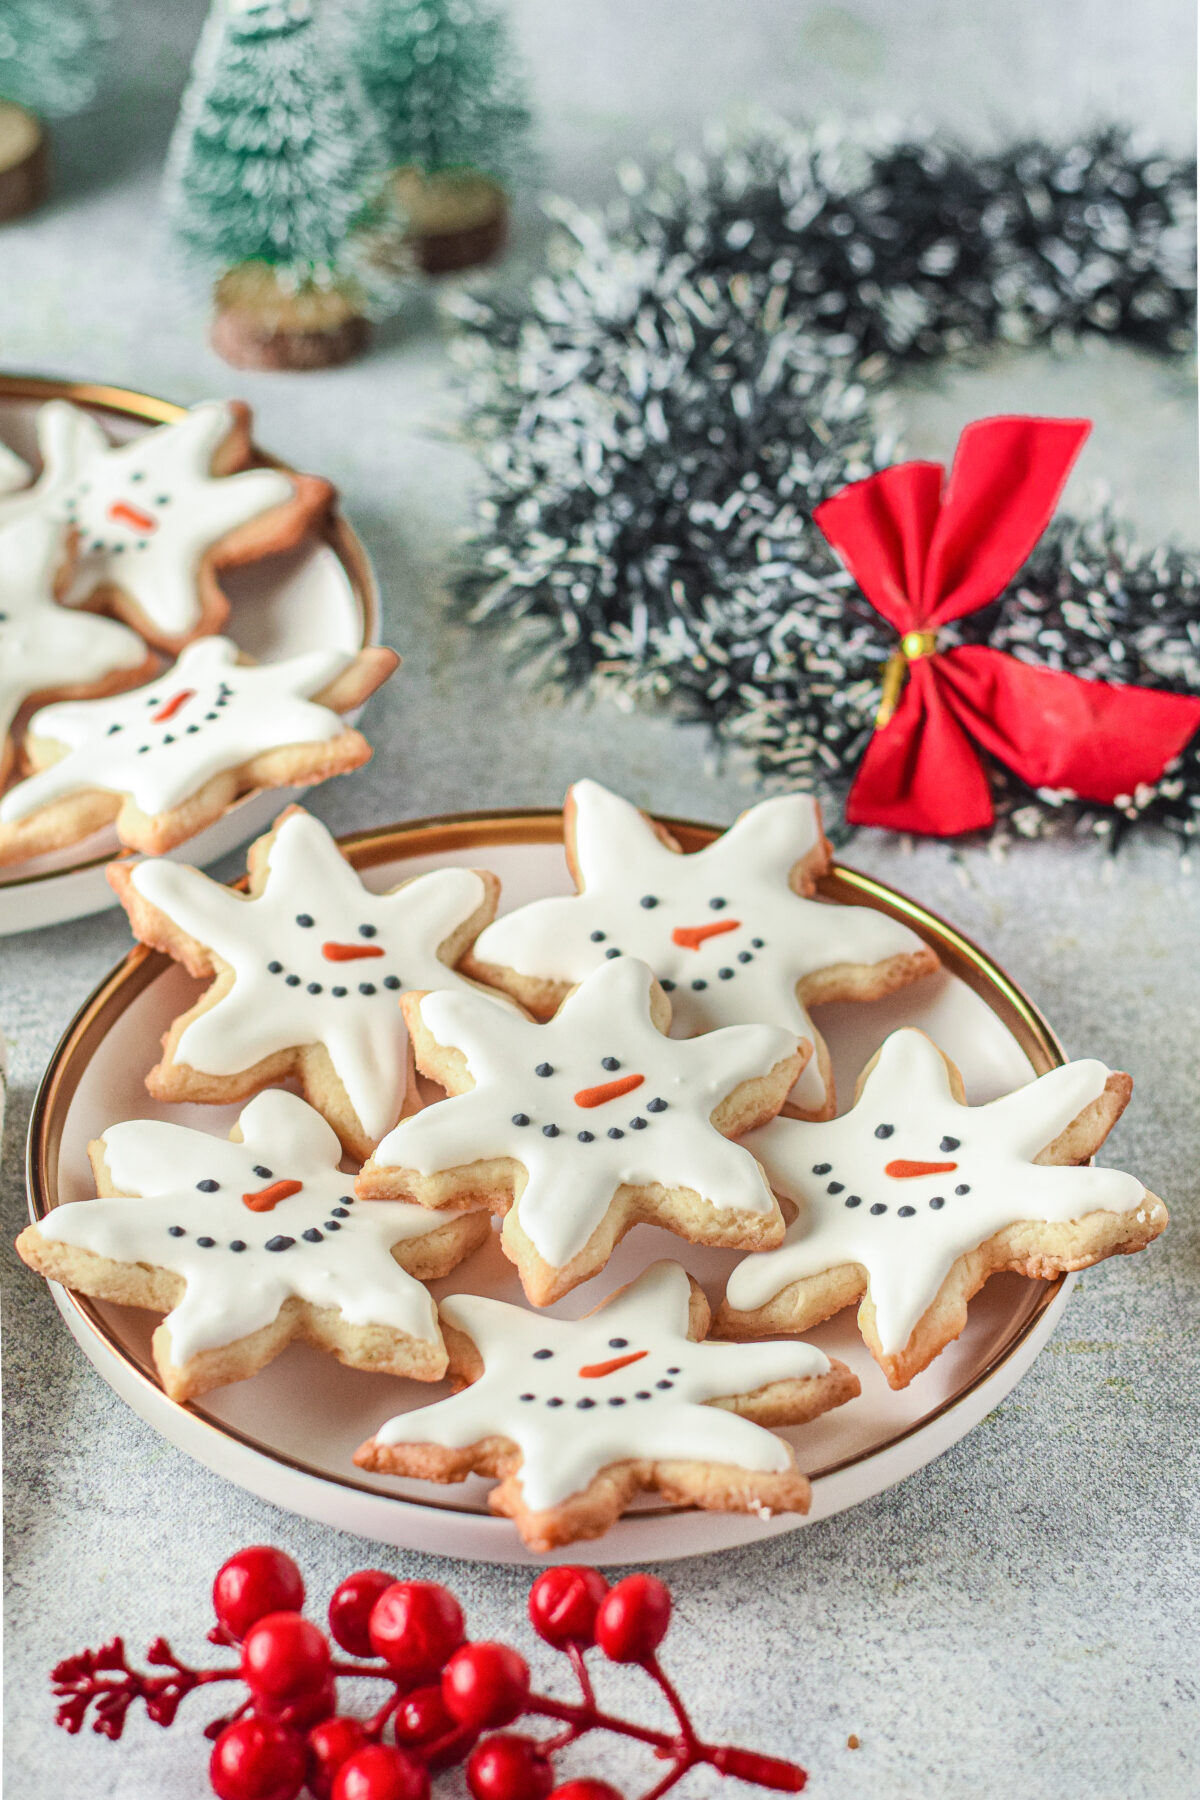
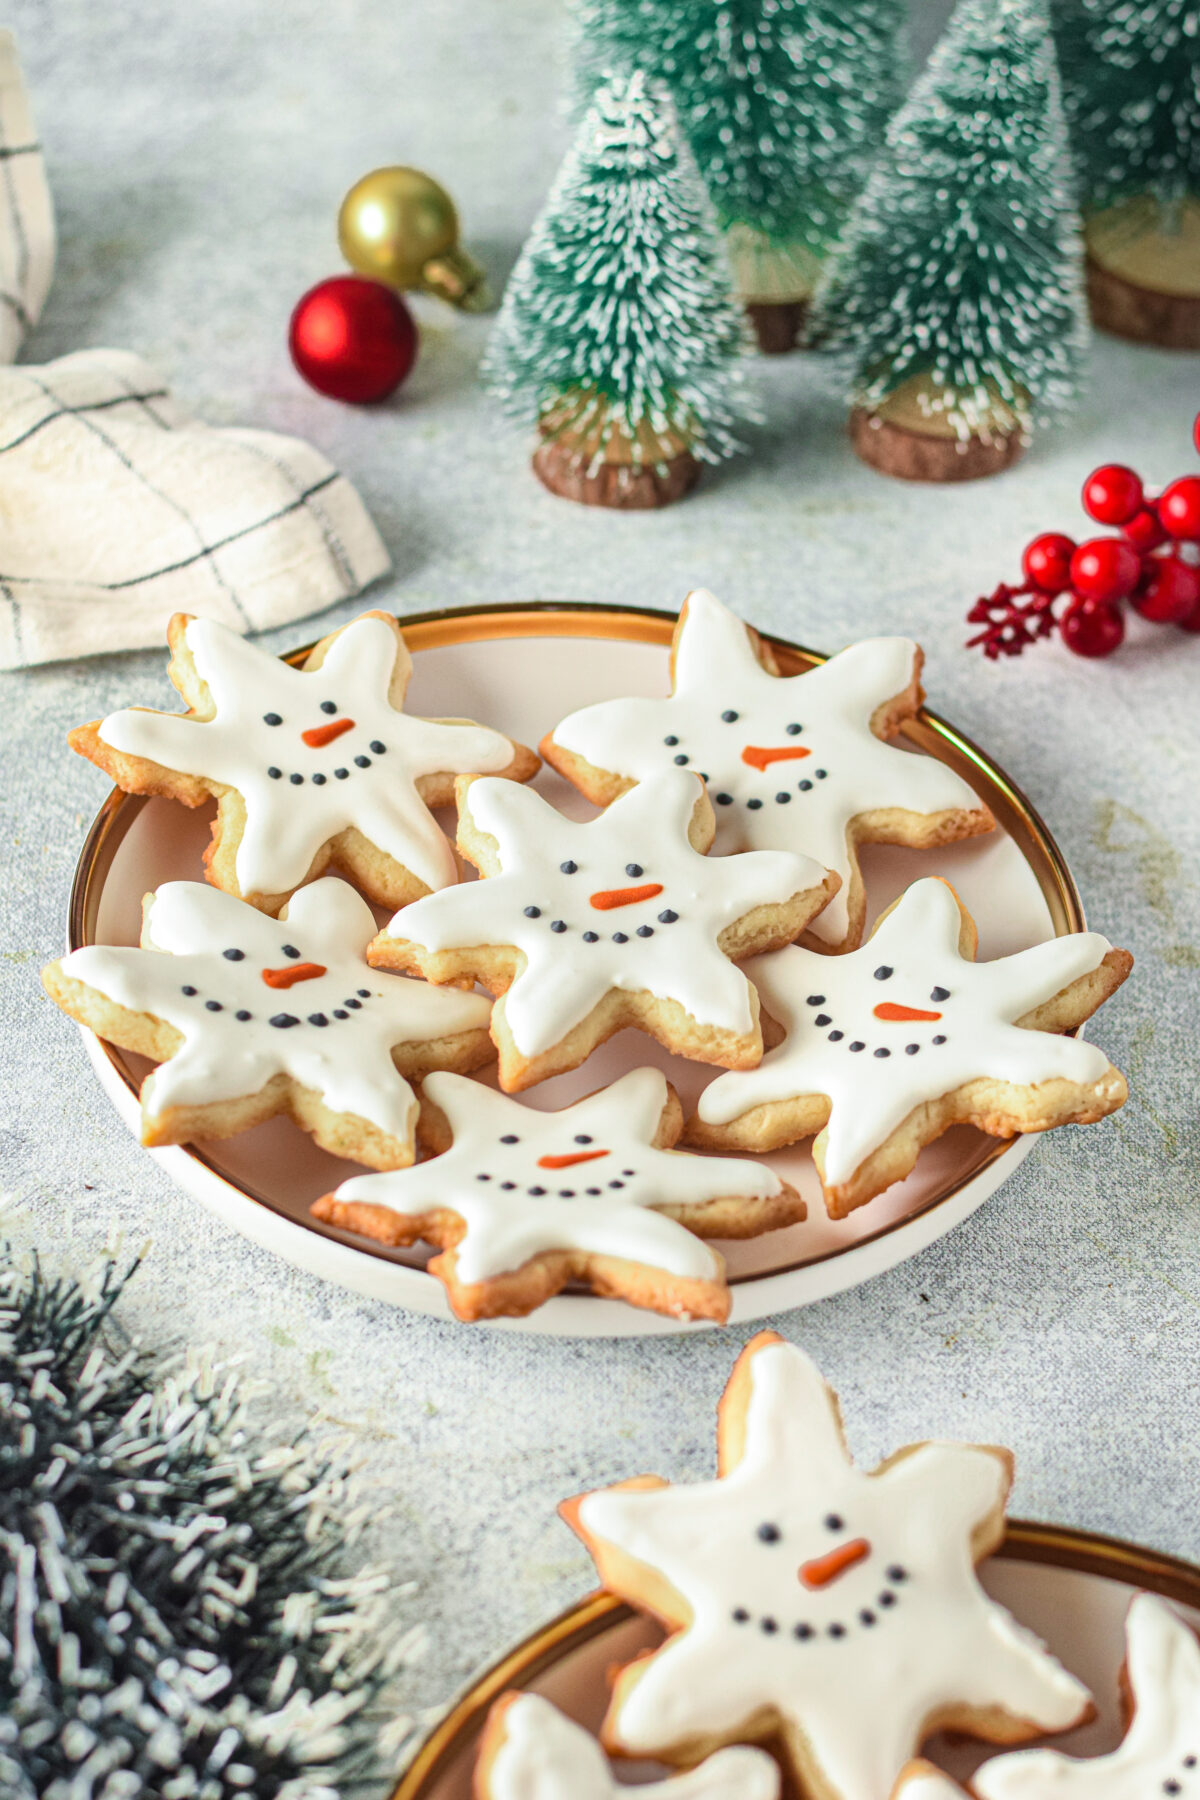
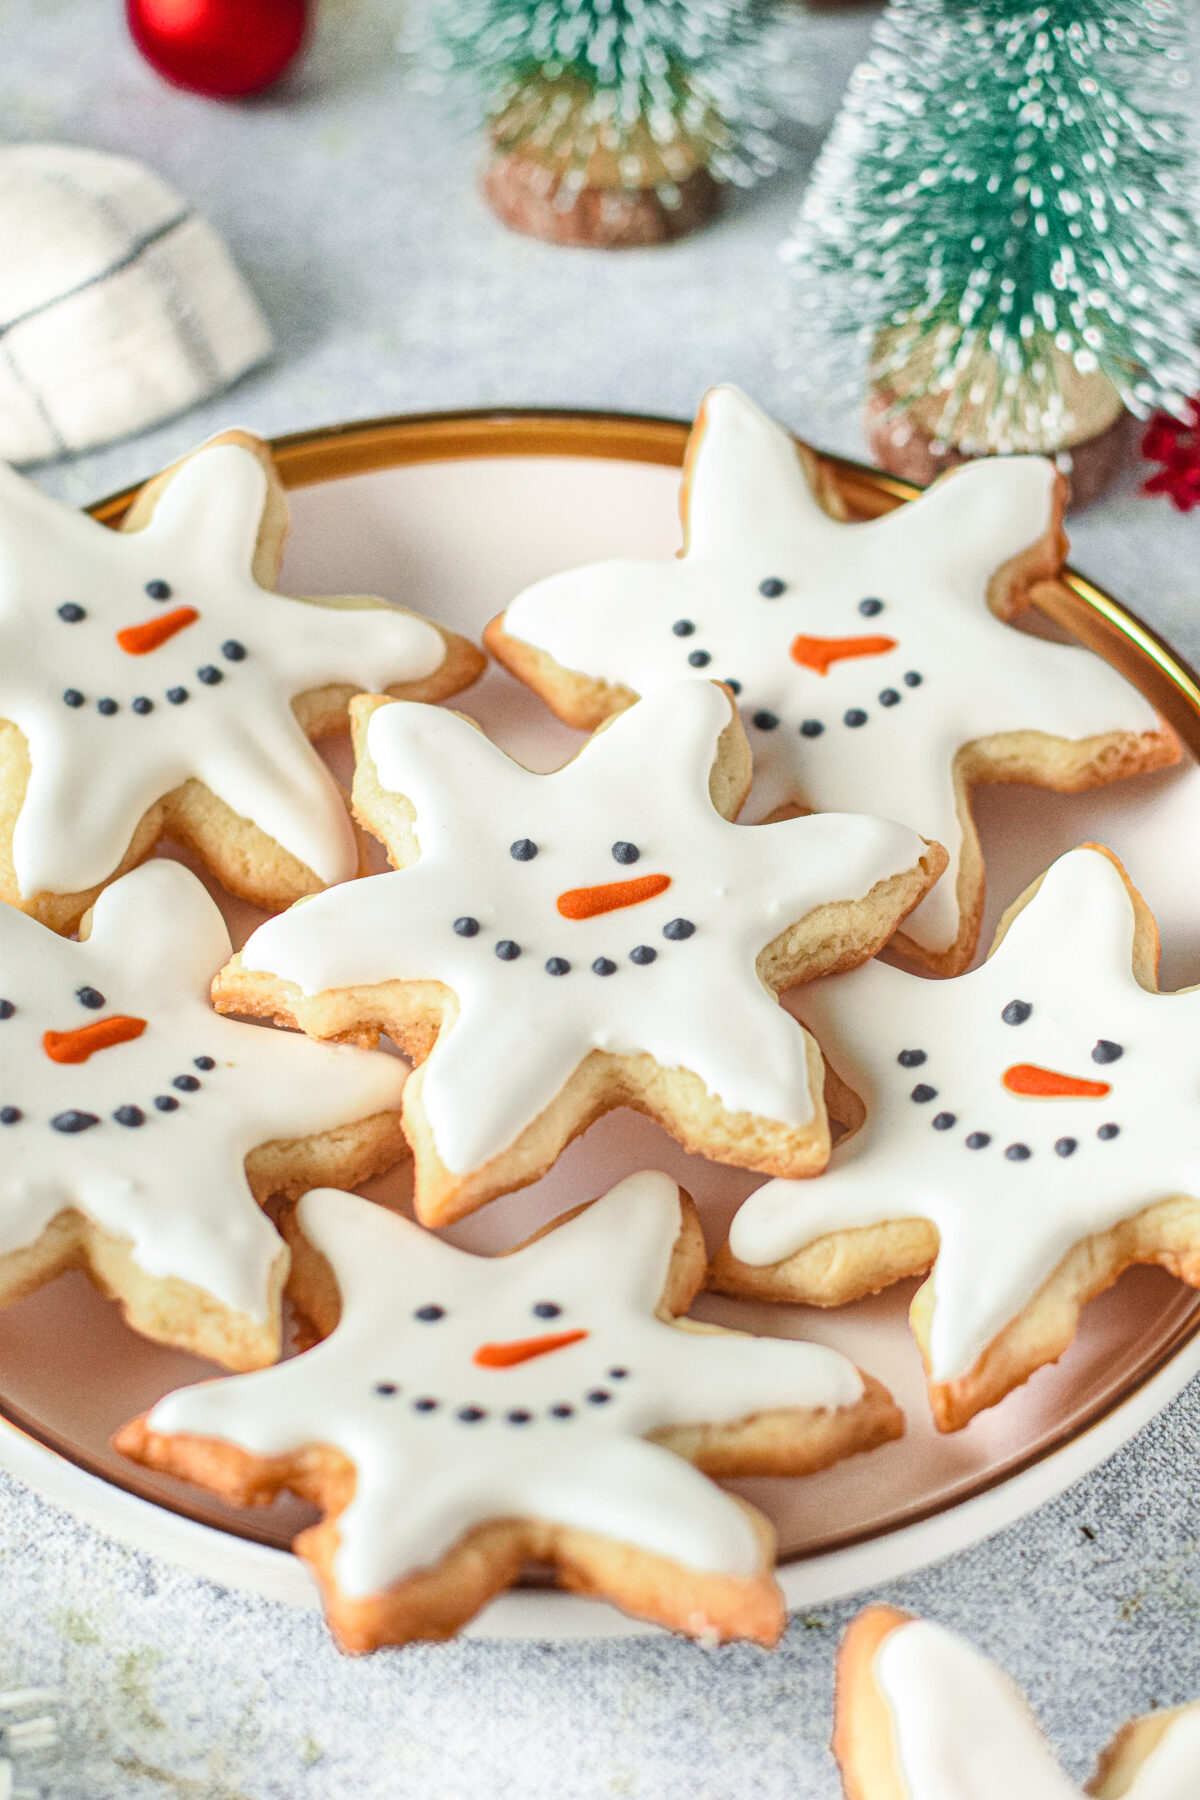
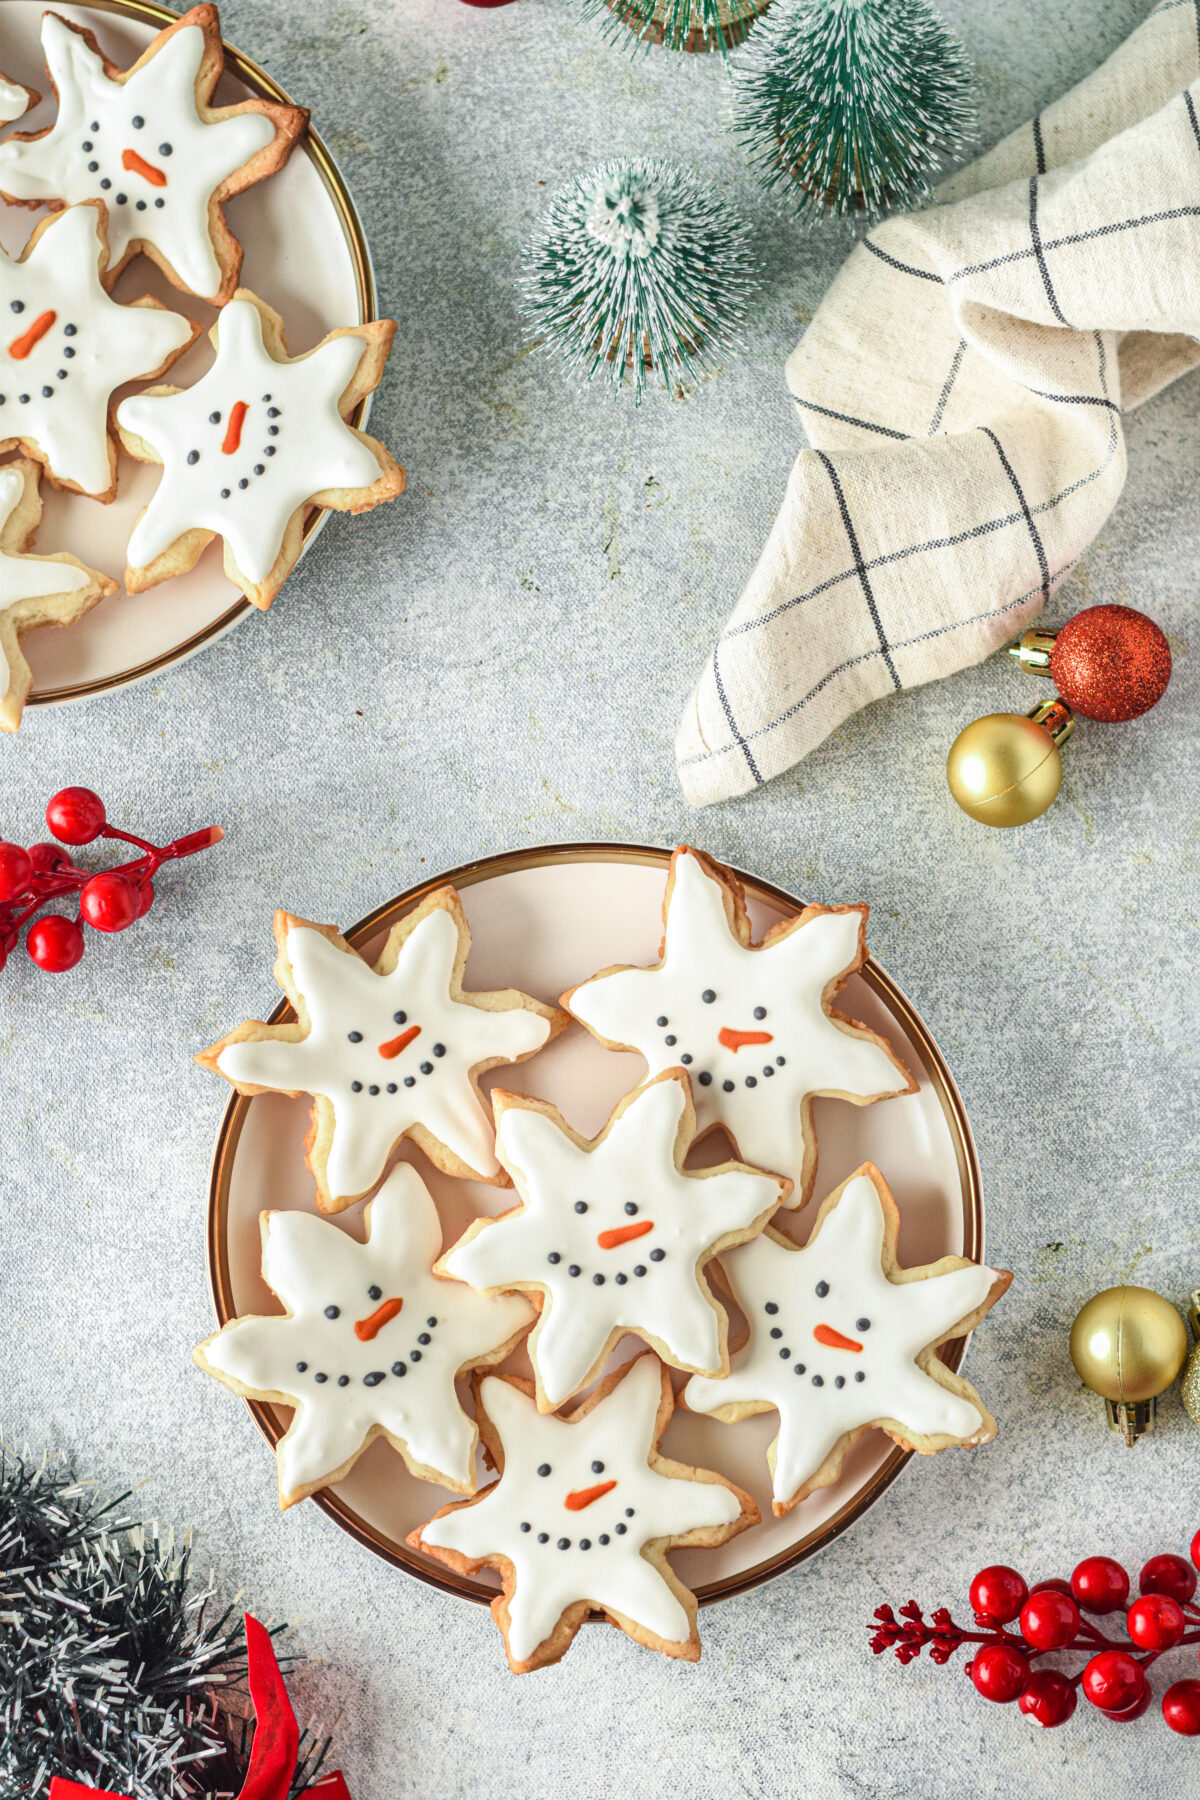
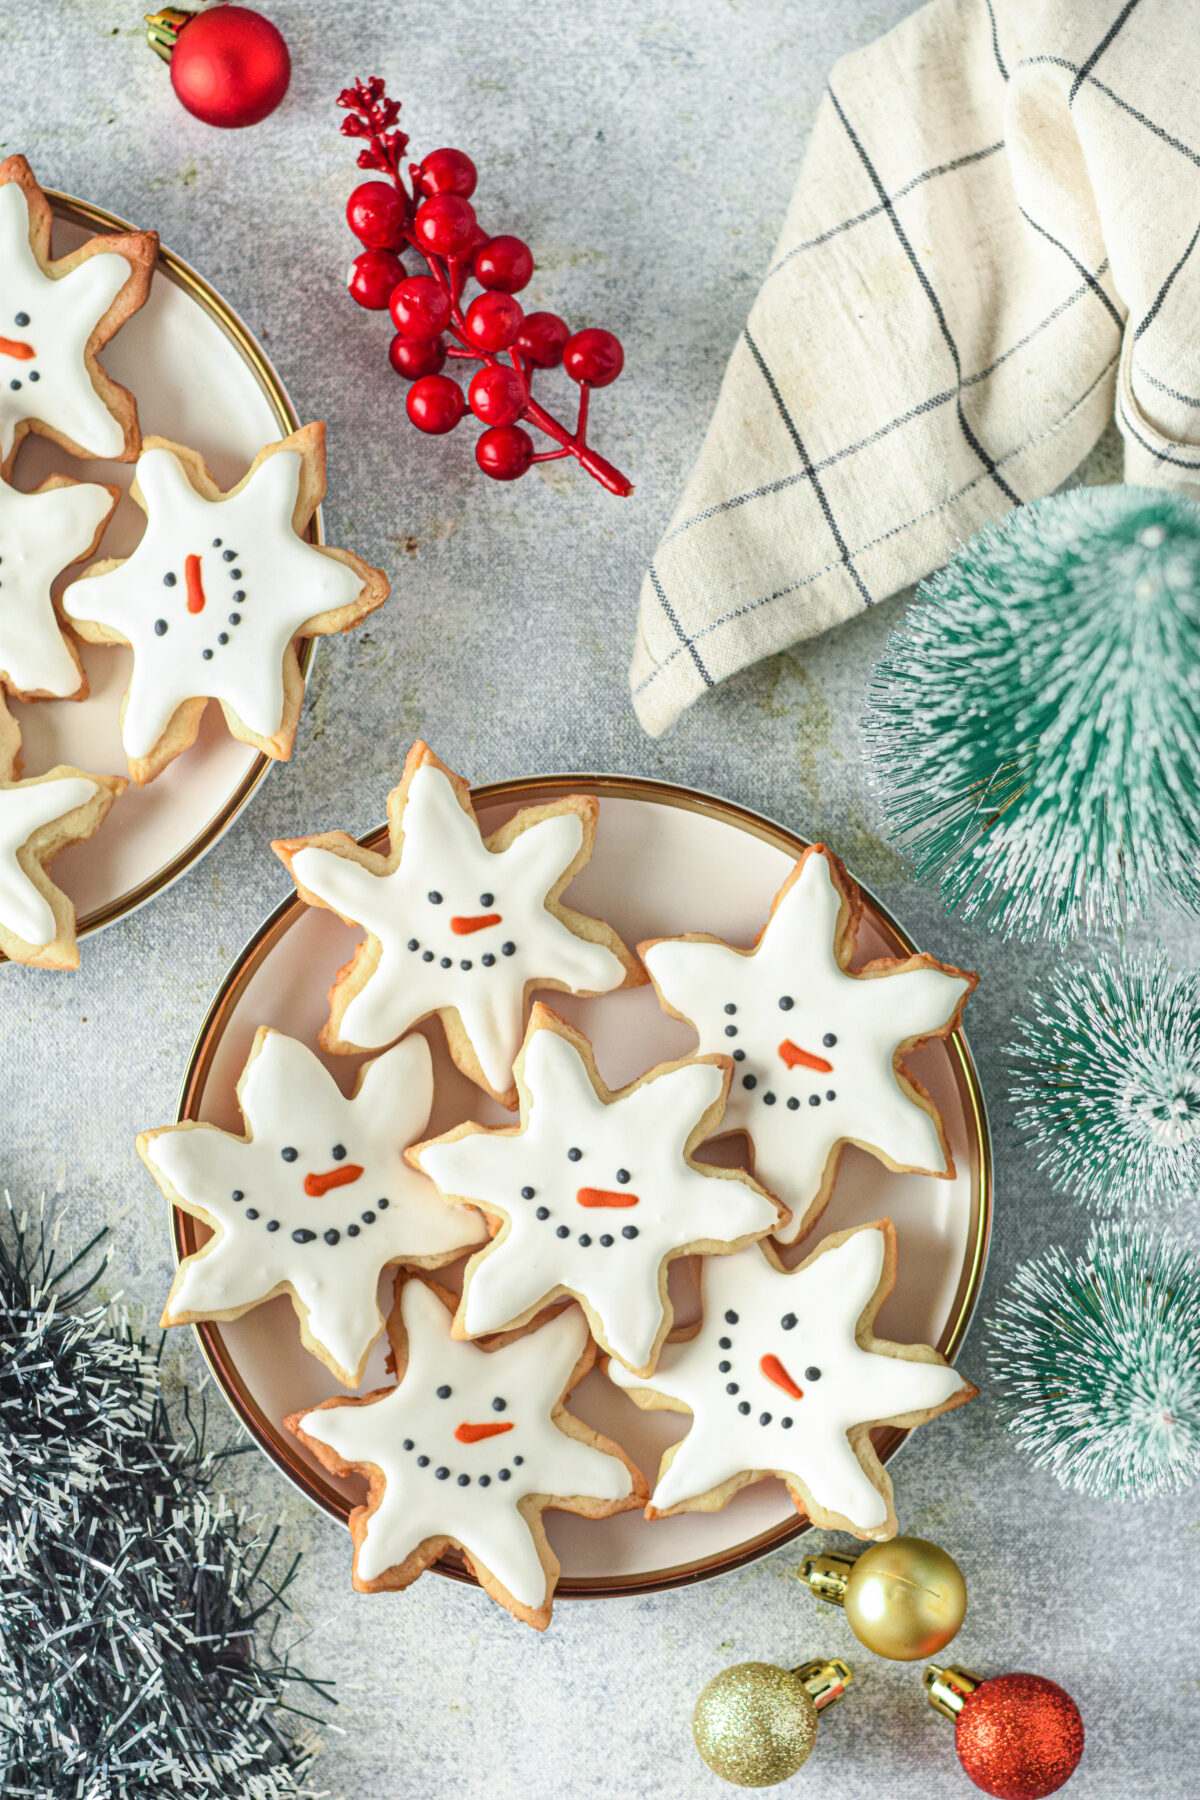
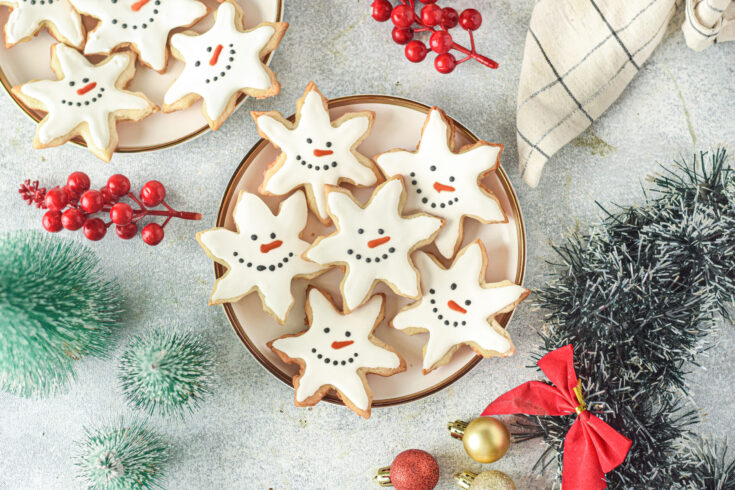
Snowman Snowflake Cookies
These adorable snowman snowflake cookies are perfect for the holidays! They are a festive addition for your Christmas cookie platter.
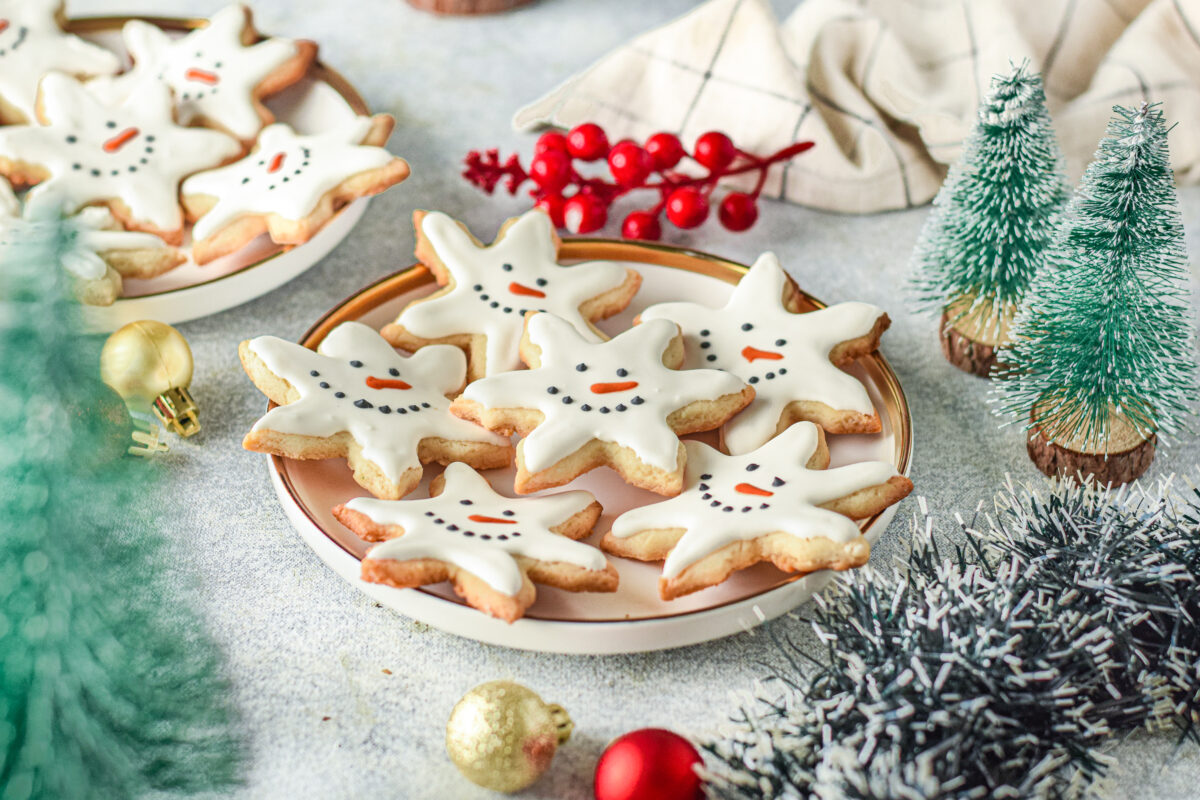
‘Tis the season for all things merry and bright, including festive cookies! These Snowman Snowflake Cookies are fun to make and will add a touch of whimsy to your holiday gathering. Aren’t they just ridiculously cute?
These simple cut out sugar cookies are decorated with royal icing, and they make perfect holiday treats.
With a soft texture, and crispy edges; these cookies are as tasty as they are pretty.
In the spirit of the winter season, why not try your hand at making some fun and festive snowman snowflake cookies? This recipe is easy to follow and yields a delicious batch of cookies that are perfect for sharing with family and friends. So what are you waiting for? Get started on these cookies today!
Why You’ll Love This Easy Sugar Cookie Recipe!
- No spreading, these cookies keep their shape!
- Soft texture, crisp edges
- Light, buttery flavour
- Absolutely adorable and fun
- Store well and can be made ahead of time
Do You Need to Chill the Dough?
Chilling your sugar cookie dough can help make it easier to work with, especially if the dough is a bit sticky. Chilled cookie dough will be firmer and less likely to spread out in the oven.
This can be especially helpful when working with intricate shapes and designs such as with these snowflake cookies.
However, keep in mind that longer chilling times can lead to a tougher cookie. So if you’re looking for a softer cookie, it’s best to avoid extended chilling times.
For the best results, chill your dough for 2 hours before rolling and cutting out shapes. Then return the cut-out shapes to the refrigerator for an additional 10 minutes before baking.
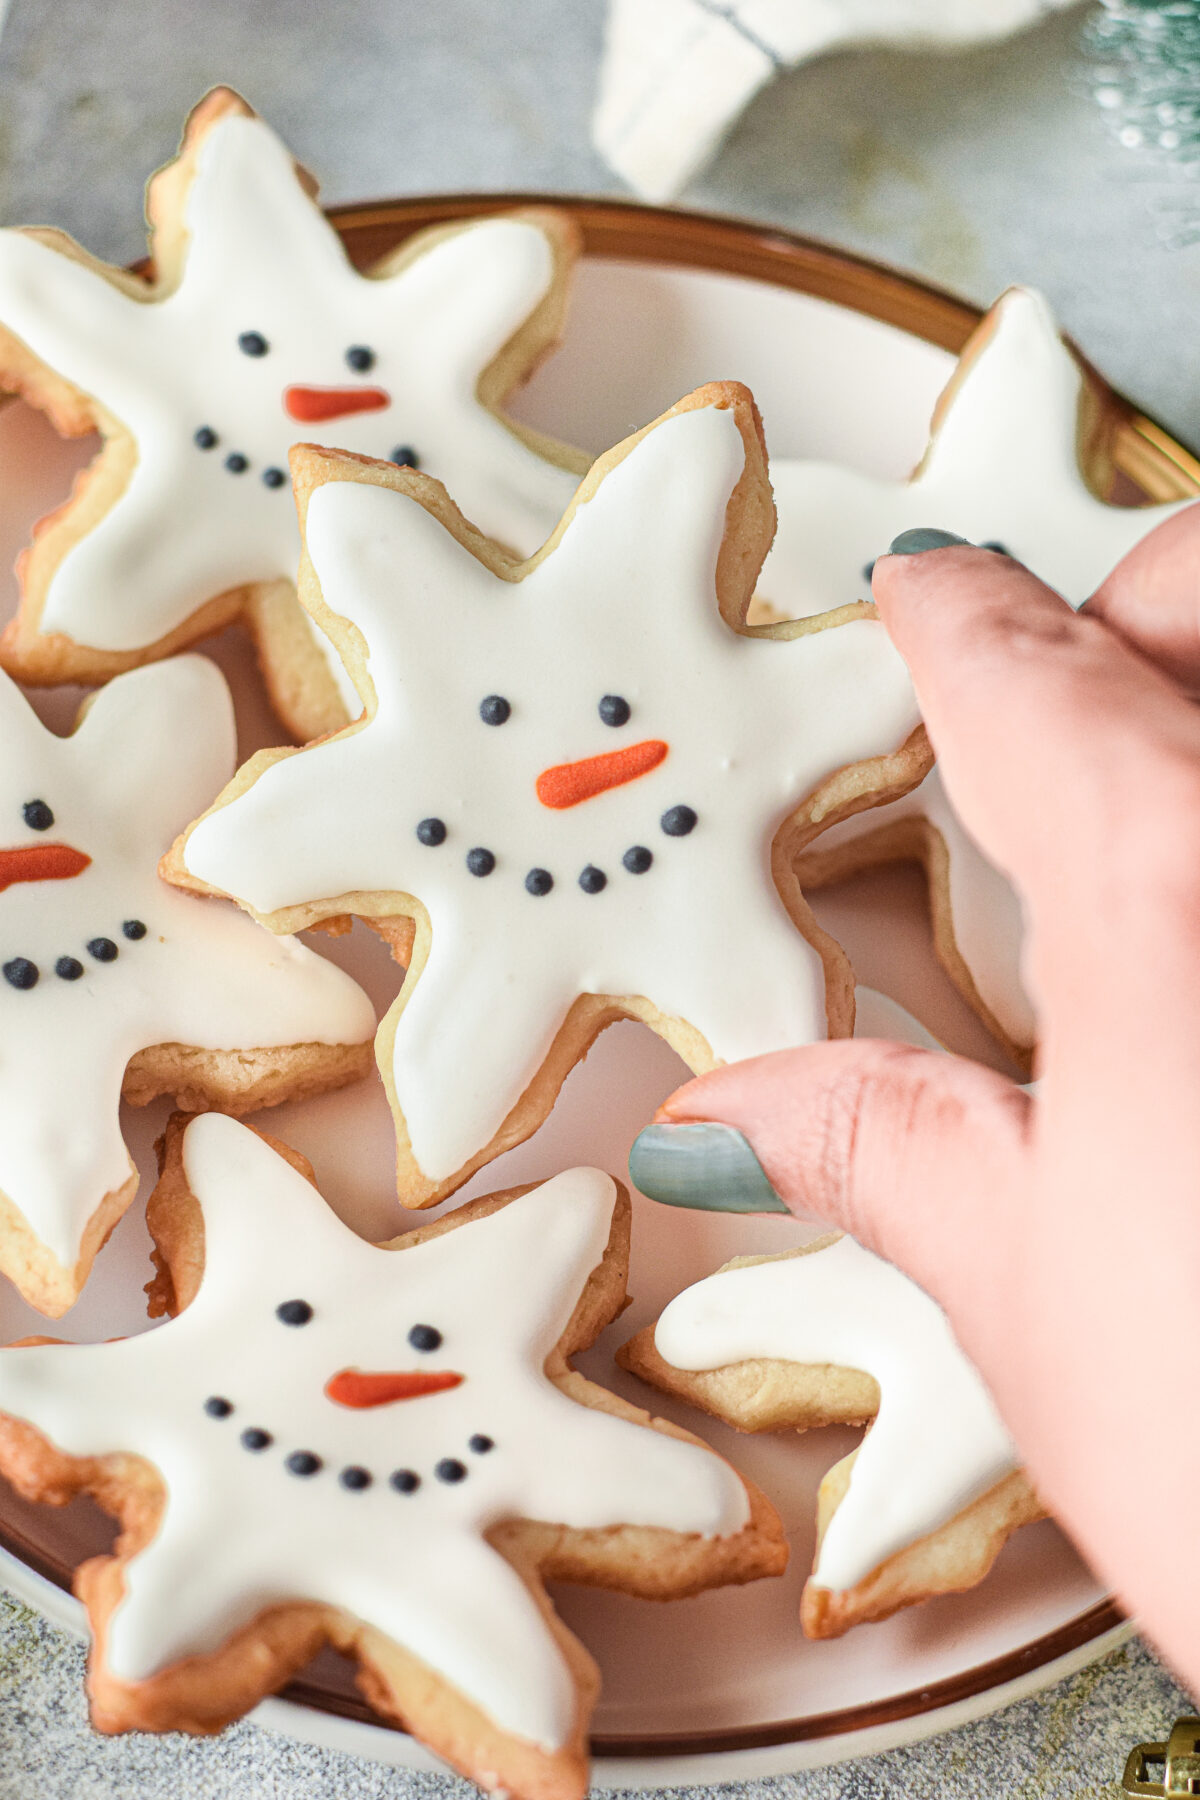
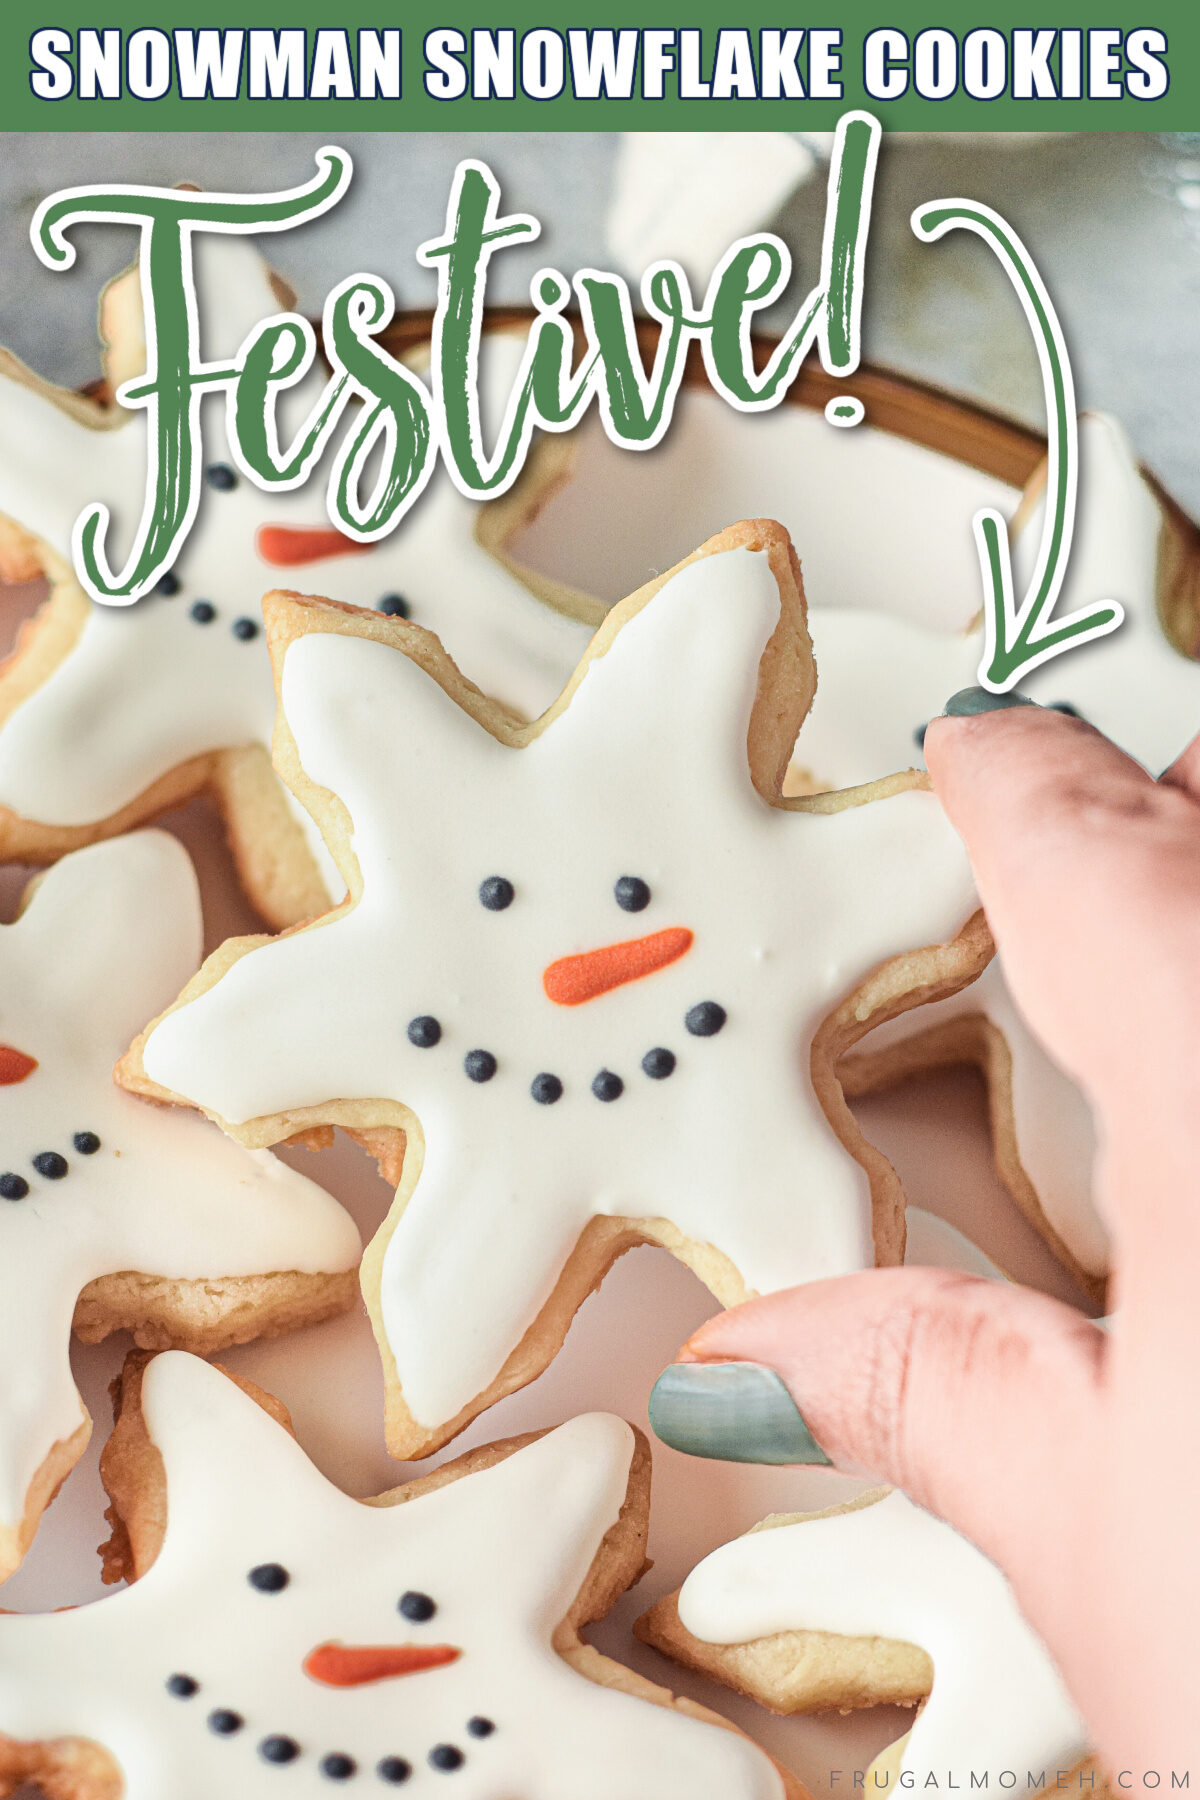
Tips for Decorating with Royal Icing
- Take your time, no need to rush decorating.
- The first tip is easier to do if you set aside enough time for the job.
- You will probably mess up. Eat the ugly ones.
- Don’t stress out, it’s just cookies!
- If the icing is too thin or too thick, simply adjust with more lemon juice or more icing sugar.
- Keep your icing covered when not in use.
- I like to keep my decorating bags filled with icing, tip side up in glasses so the icing doesn’t pour out.
- Use gel colours to tint your royal icing, never with liquid.
About Royal Icing Consistency
For the outline and details of your cookie decorations, it’s best to use a stiffer consistency icing. This will help the outline stay in place and not run off the cookie. For flooding or covering a larger area with royal icing, you’ll need to thin it down with water or lemon juice until you reach a more pour-able consistency.
It can be helpful to test the consistency of your royal icing by spooning a small amount onto parchment paper. If the icing stays in place and doesn’t spread, then it’s ready to be used for outlining. If it runs off the parchment paper too quickly, add a little more powdered sugar until you reach the desired consistency.
For flooding the cookies, you should be able to pipe a thick line and have the icing spread out evenly over the cookie in about 10-15 seconds. If it takes too long, add a few drops of water until you reach the desired consistency. Adjust as needed to achieve perfect royal icing every time!
Of course you may want to flood the cookies using the same consistency icing as you used for the outline. This can be done, but it will require more attention as you pipe the icing and spread it around with the help of a toothpick. This type of technique requires a steady hand and a little extra patience.
Piping Tips You Will Need for Decorating
I would recommend using round piping tip #2 for the outline and flooding of the white icing. You could also get away with #3 or #4 tips if that is what you have though.
For the details, #2 is best here.
You may also use a tipless piping bag and just cut away the tip close to the end. This can actually be a little easier to work with if you aren’t used to decorating with tips.

Can I Make Royal Icing Ahead of Time?
Yes! Royal icing can be made ahead of time and stored in an airtight container for up to 3 days. If you plan on using it the same day, you don’t need to store it in the refrigerator.
However, if you’re not going to use it right away, then it’s best to keep your royal icing in the refrigerator until you’re ready to use it.
When you are ready to use the icing, be sure to stir it well before using. If necessary, add a few drops of water or additional powdered sugar until you reach the desired consistency.
Always remember that royal icing will harden very quickly once made and can become difficult to work with if left for too long.
Can I Freeze Royal Icing?
Any leftover royal icing can be frozen for up to 2 months. Place leftover royal icing into seal-able freezer bags and squeeze as much air out of the bag as possible. Seal and freeze flat on a sheet pan in your freezer.
When needed you can thaw the icing overnight in the refrigerator. Be sure to bring it to room temperature before use.
Tips for Making Snowman Snowflake Cookies
- Cut your cookies close together. You absolutely want to get the most out of your dough before re-rolling. Every time you re-roll the dough you are working the dough and adding a little more flour which does affect the texture of the cookies.
- Use room temperature ingredients to make sure the dough combines well.
- Make sure you sift the flour if it is lumpy.
- Carefully spoon and level your flour – don’t pack it!
- Only just combine the batter, do not over-mix.
- Don’t forget to rotate the pan halfway through baking so that your cookies bake evenly!
- Bake on the middle rack in your oven.
- Bake one sheet pan at a time for even cooking.
- If you have time, always do a test run with one or two cookies when you first use a new recipe.
- Oven temperatures can vary, and doing a test run really helps to establish the best baking time for your oven.
- If the cookies are spreading, the dough has gotten too warm. Chill the dough for 15-20 minutes again before baking.
Why is My Sugar Cookie Dough Crumbly?
Generally the issue that causes crumbly dough is not measuring your flour correctly. Too much flour can result in a dry and crumbly dough. To ensure that the recipe is accurate, it’s best to measure your flour using the scoop and sweep method. Never back down flour.
Another reason for crumbly sugar cookie dough is too little liquid. If you find that your dough is too crumbly, try adding a tablespoon or two of milk or melted butter to the dough until it reaches a more manageable consistency.
Finally, over-mixing your sugar cookie dough can also lead to a crumbly texture. Be sure to mix the ingredients just until they come together and don’t overwork the dough. This will help keep your cookies soft and tender.
Why is My Sugar Cookie Dough Sticky?
There are a few common reasons why sugar cookie dough can be sticky. One of the most likely causes is that too much liquid has been added to the dough. If this is the case, you can try adding slightly more flour to the recipe until it reaches a more manageable consistency.
You may also need to give your dough some extra chill time. Allowing your cookie dough to rest in the fridge or freezer for a few hours can help firm up the butter and make it easier to work with. But remember, you don’t want to let it sit too long or you’ll end up with dry and crumbly cookies.
It’s also possible that your sugar cookie dough is sticky because it’s been over-mixed. If the ingredients have been blended together for too long, the cookie dough will become too soft and sticky. To avoid this problem, mix your cookie dough just until all of the ingredients are just incorporated.
Kitchen Tools Needed to Make Snowflake Cookies
Snowflake Cookie Cutter – You can use any snowflake cookie cutter you like, larger cookies are easier to decorate with the details.
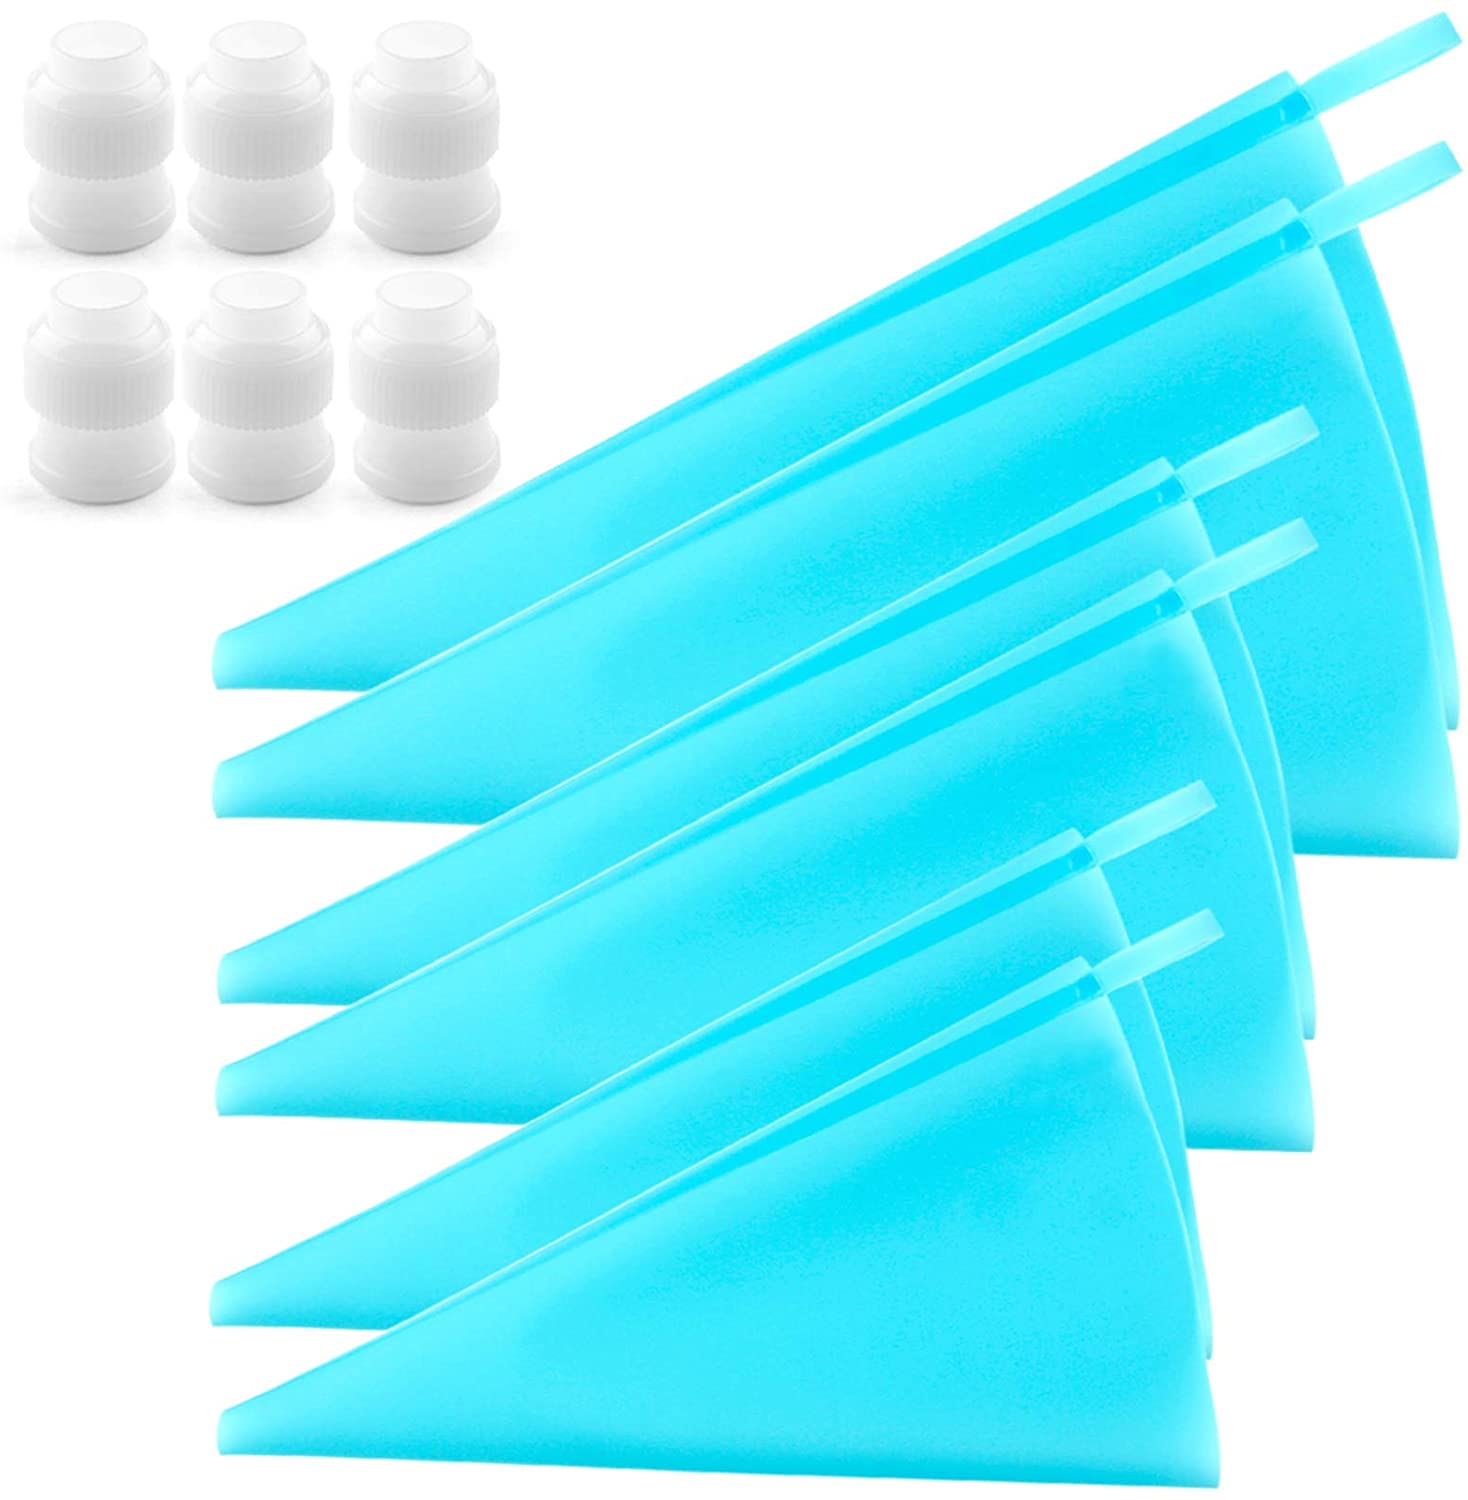
Pastry bags – You will need 3 separate piping bags.
Piping tips – If you don’t already have piping tips on hand, I would recommend this Wilton Decorating Tip Set. Read above for details about the piping tips you may need for decorating these cookies.
Toothpicks – Great tools for smoothing out the icing.
How to Store Leftover Decorated Cookies
Royal icing decorated cookies can last for many days when stored properly. To store your leftover decorated cookies, make sure they have completely cooled and dried before storing them in an airtight container or zip-top bag.
Place a piece of wax paper between each cookie to keep them from sticking together.
Store the container or zip-top bag in a cool and dry place away from direct sunlight and moisture. If stored properly, the decorated cookies will remain fresh for up to one week.
For a longer shelf life, freeze the decorated cookies after they have completely cooled and dried.
Place wax paper between each cookie before packaging them up for the freezer. You can store them in a zip-top bag, airtight container, or even an old ice cream container with a lid.
When you are ready to enjoy your decorated cookies, let them thaw out at room temperature before serving. If stored properly, the decorated cookies will remain fresh and delicious for up to three month

About the Ingredients for Cut Out Cookies
Butter – I recommend unsalted butter. If all you have is salted, omit half of the added salt.
Powdered sugar – Using powdered sugar instead of granulated sugar results in cookies that are absolutely soft and tender.
Vanilla – Use pure vanilla extract for the best flavour, but since these cookies aren’t very vanilla forward, artificial extract will work just as well.
Flour – Spoon and level the flour when measuring it, otherwise your cookies may end up too dense.
Baking Powder – To leaven your cookies, so they are nice and fluffy. Make sure it is still active for best results!
Salt – Omit half the salt if using salted butter.
Milk – Using milk results in a cookie that is lighter than one made with eggs. Yep, these are egg-free, perfect for families with egg allergies! Whole milk will give the best flavour, but any dairy-free milk is fine to use.
About the Ingredients for the Royal Icing
Egg whites – Use either the egg whites from two large eggs, or four tablespoons of pasteurised egg whites. You may also use meringue powder instead, although you may need to use a touch more lemon juice.
Lemon juice – Used as a liquid for the icing, you can substitute with water, but the lemon juice adds a nice counter-balance to the sweetness of the powdered sugar.
Powdered sugar – You must use icing sugar in order to create a nice smooth icing.
Gel food colouring – Do not substitute with liquid food colouring. Also remember that the icing will darken as it sets.
Looking for More Christmas Cookie Recipes?
These delicious chocolate peppermint kiss cookies are a perfect addition to your holiday cookie tray. They are easy to make and festive!
Kids will absolutely love seeing these Rudolph Chocolate Sugar Cookies on your Christmas cookie tray this year.
These melting snowman cookies are perfect for Christmas, New Year’s, or any other winter celebration! They are easy to make and sure to put a smile on everyone’s face.
How to Make Snowman Snowflake Cookies
Yields: 24 Cookies | Prep time: 30 Minutes | Rest time: 1 Hour | Cook time: 10 Minutes
Ingredients:
- 1 cup unsalted butter, softened
- 1 ½ cup powdered sugar
- 1 teaspoon vanilla extract
- 3 cups all-purpose flour
- 1 teaspoon baking powder
- ¼ teaspoon salt
- 5 tablespoons milk
For the Royal Icing:
- 2 large egg whites
- 2 teaspoon lemon juice
- 3 cups powdered sugar
- Orange gel food colour (2 drops)
- Black gel Food colour (2 drops)
Directions:
Line a sheet pan with parchment paper and set aside.
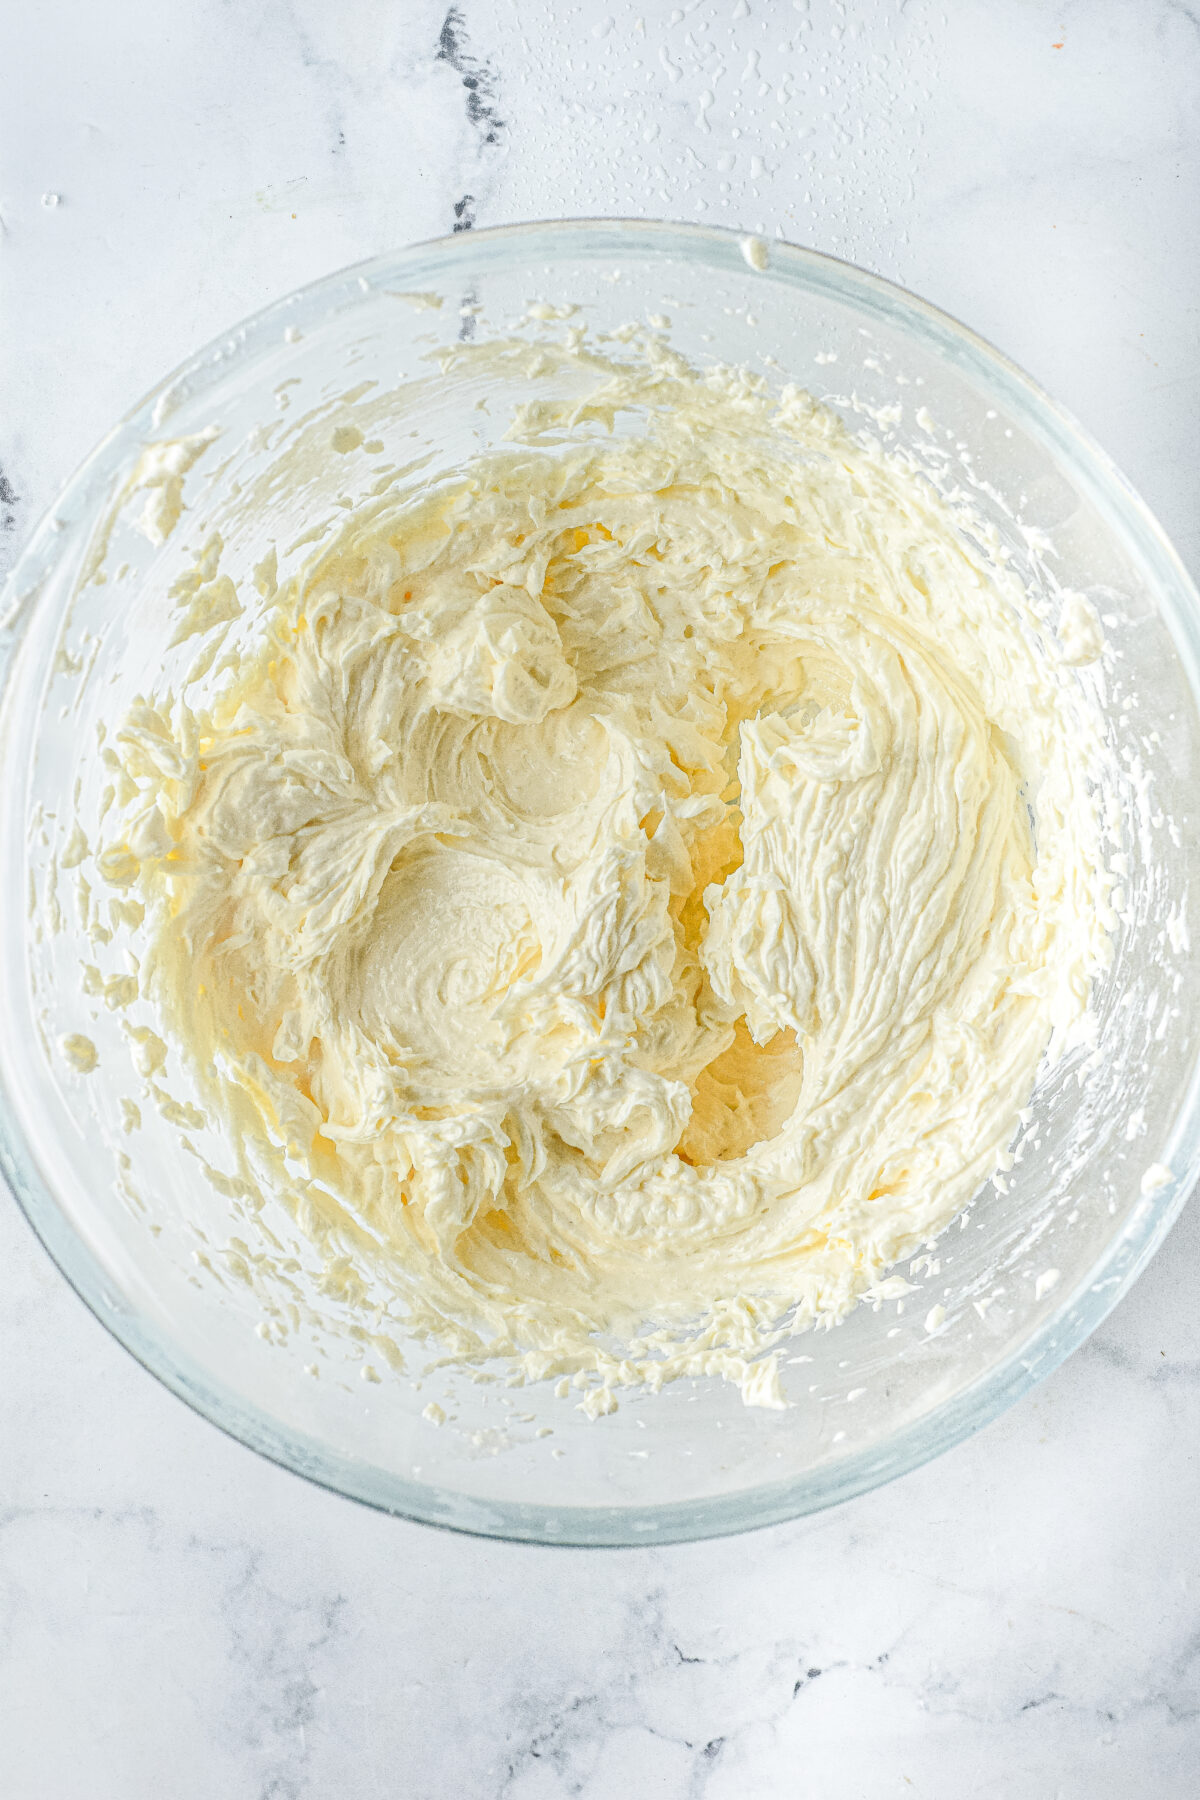
In a large bowl, beat together butter, vanilla extract, and powdered sugar until combined and creamy.
In a medium bowl whisk together the flour, salt, and baking powder.
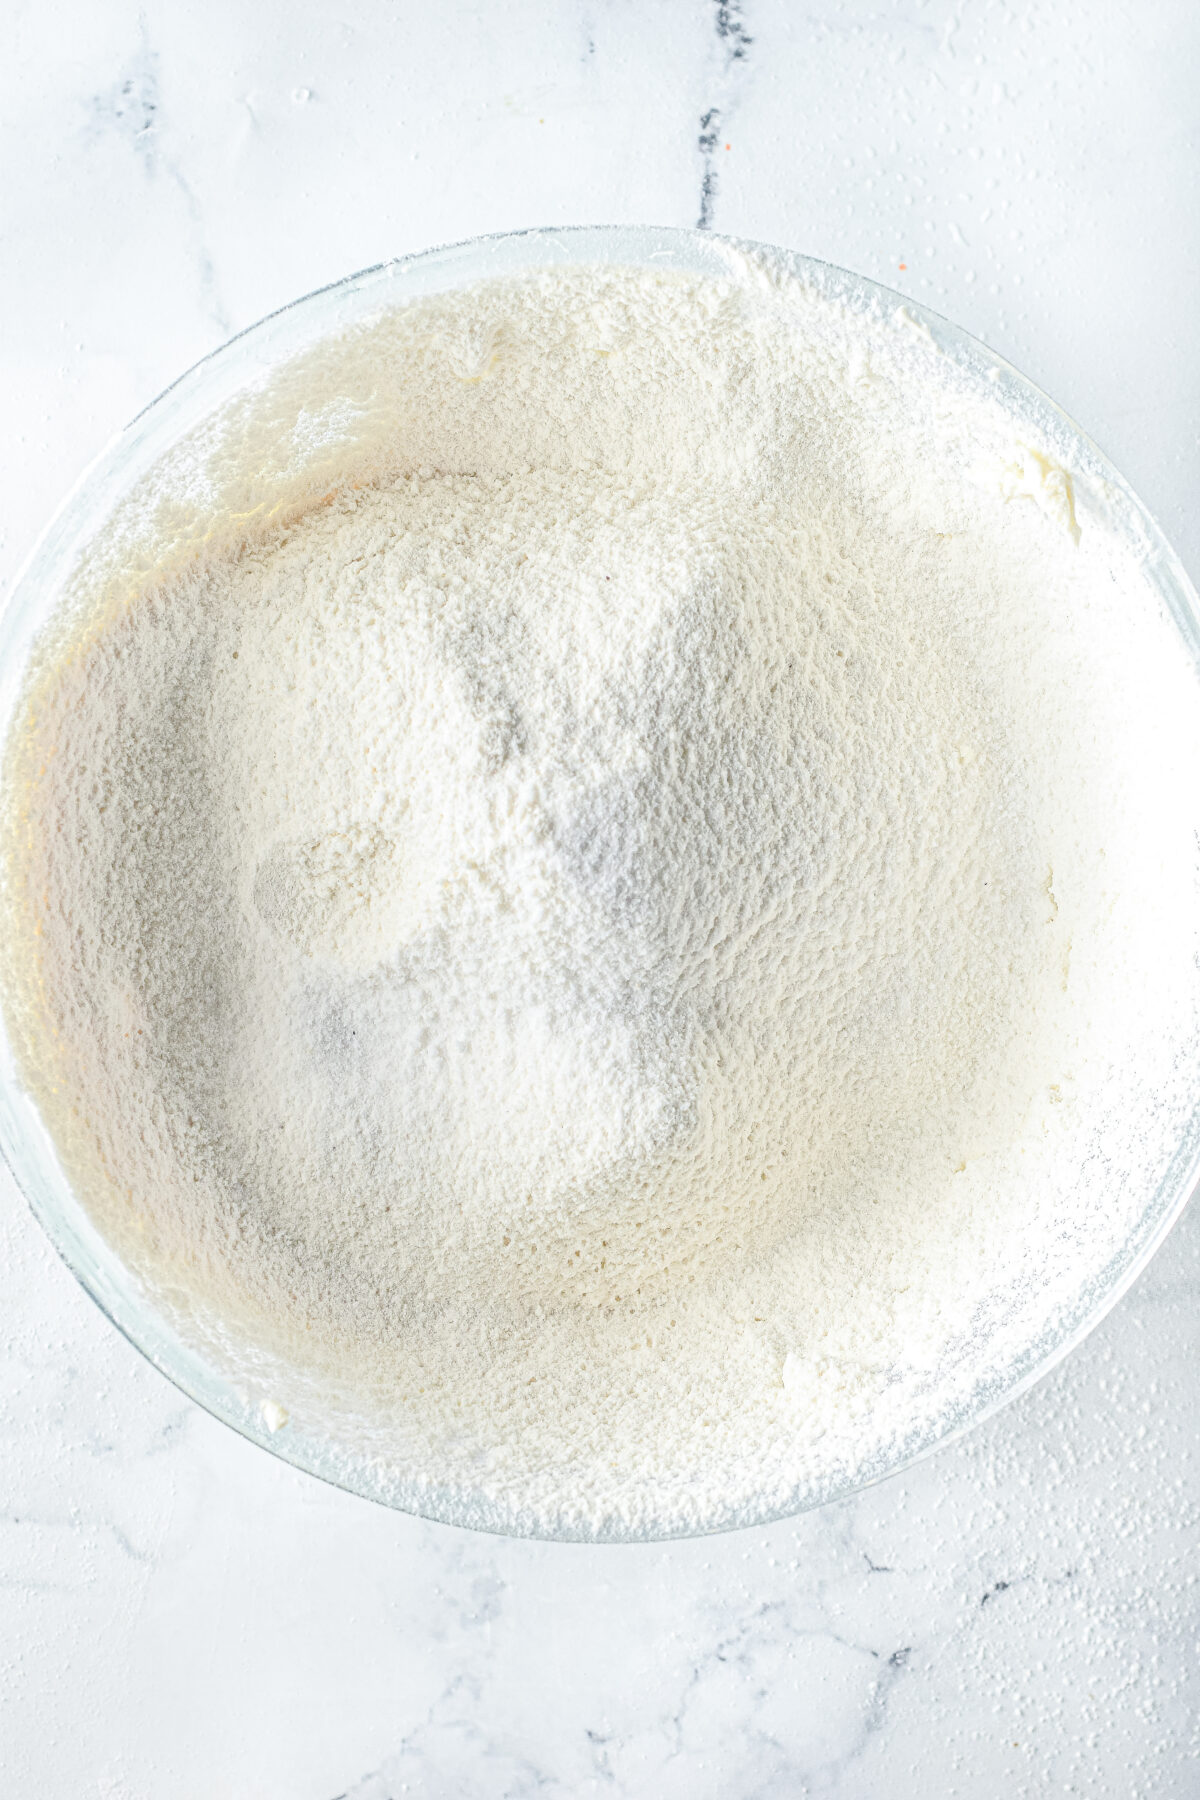
Add the dry ingredients to the creamed butter and mix until just combined. Then add the milk a tablespoon at a time, and mix together to form a dough. Do not over-mix.
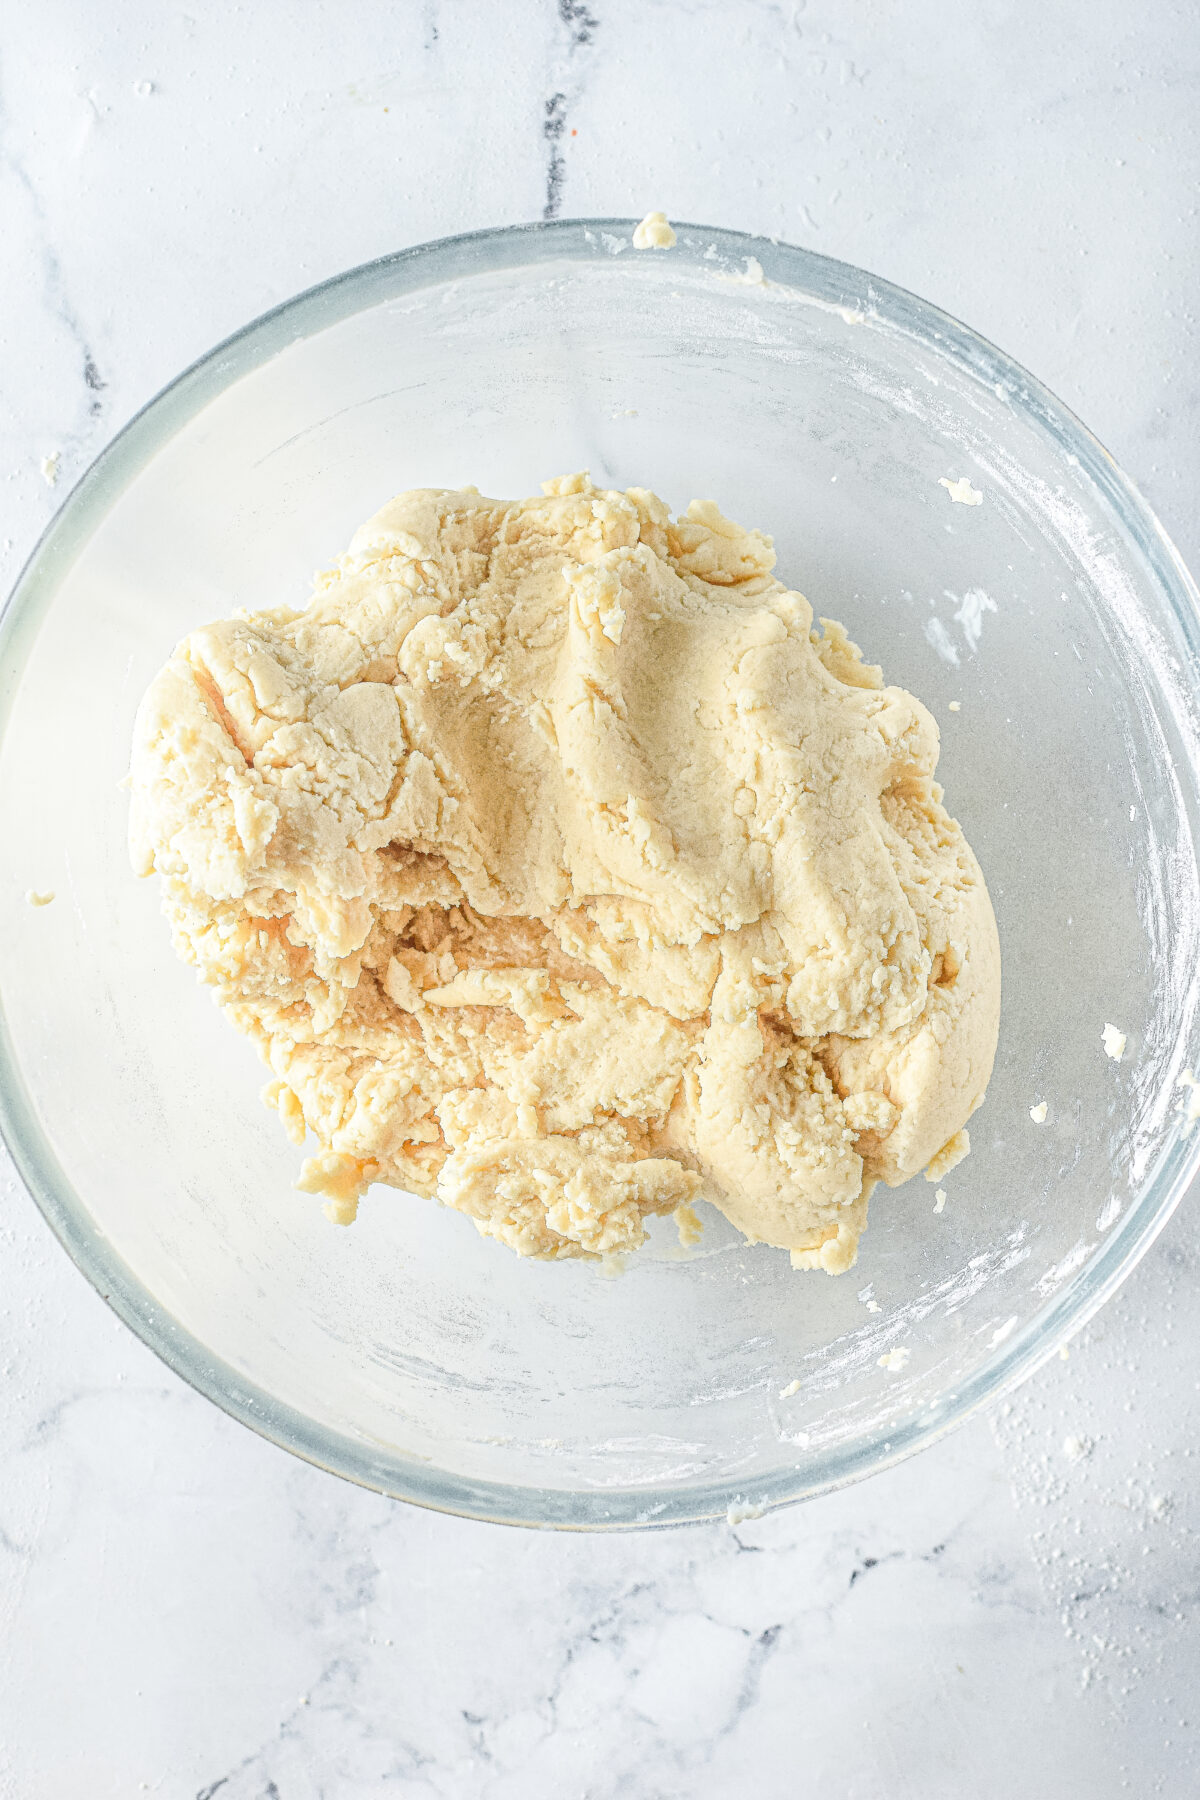
Cover dough with plastic wrap and mould into a flat disk. Wrap tightly then chill the dough in the refrigerator for at least 1 hour or overnight.
Preheat the oven to 350 degrees Fahrenheit.
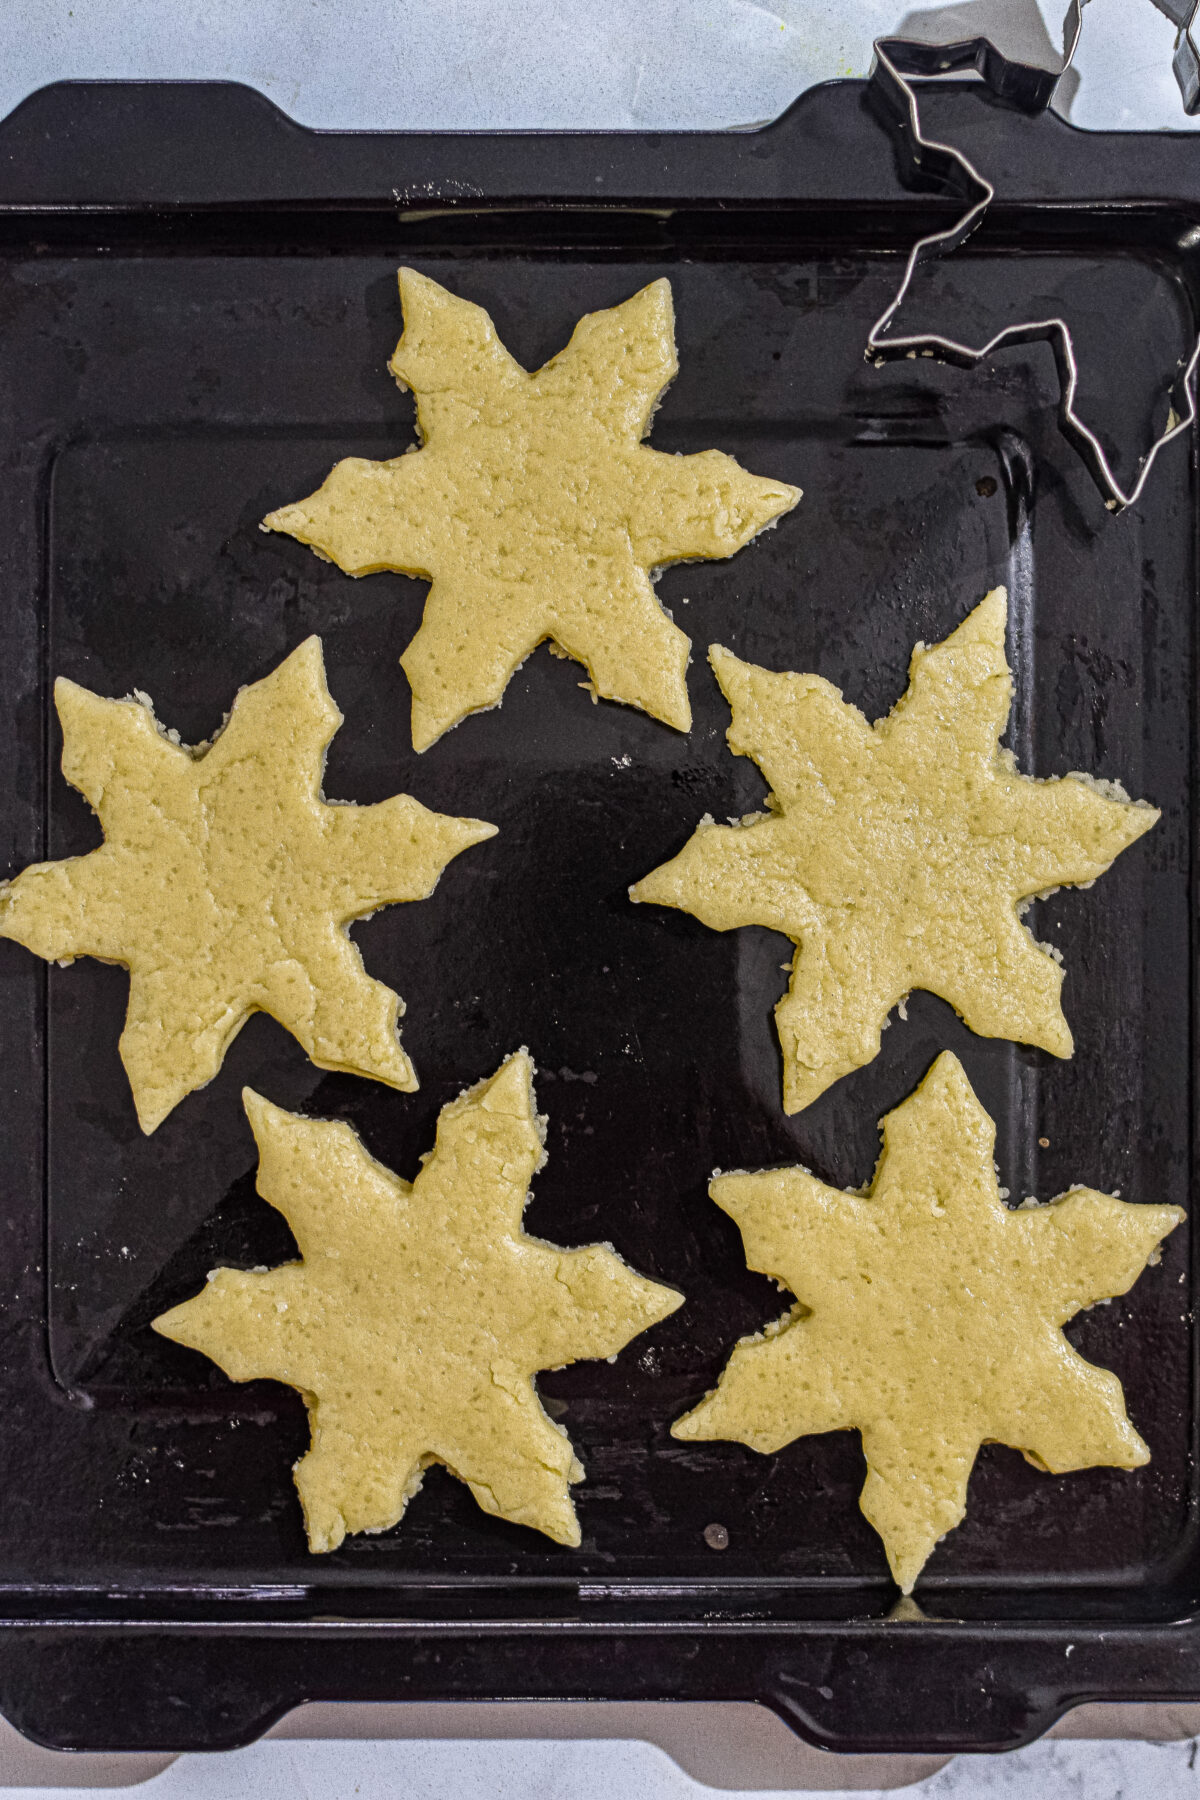
Once chilled, roll out the dough on a lightly floured surface to 1/4-inch thickness and cut out snowflake shapes using a snowflake cookie cutter. Use a spatula to transfer the snowflakes to prepared baking sheet, spacing at least 1″ apart.
Bake the cookies for about 9-10 minutes, or until edges just begin to turn lightly golden brown.
Let the cookies cool for 5 minutes in the baking tray before transferring them to a wire rack to cool completely.
For the Royal Icing:
In a large bowl, or in the bowl of a stand mixer, beat together egg whites and lemon juice on high until frothy.

Turn the mixer down to low speed and mix in the powdered sugar in batches until sugar is incorporated and the mixture looks shiny.
Turn speed up to high and continue to mix until the mixture becomes thick and starts to hold soft peaks.
Take out around 6-7 tablespoons of icing and divide it into two equal parts and tint them with orange and black gel food colours.
Spoon the icings into piping bags fitted with the desired tips and decorate your cookies.
Outline the cookies with the white icing first, keeping a little space on the edges of the cookies. Then flood the cookies with the white icing; use a toothpick to spread the icing so it’s evenly filled. Let the icing set slightly.

Once the base white icing is set make the eyes and nose of the snowman.
Allow icing to set completely before serving or storing, about 2 hours depending on the thickness.
Snowman Snowflake Cookies
These adorable snowman snowflake cookies are perfect for the holidays! They are a festive addition for your Christmas cookie platter.
Ingredients
- 1 cup unsalted butter, softened
- 1 ½ cup powdered sugar
- 1 teaspoon vanilla extract
- 3 cups all-purpose flour
- 1 teaspoon baking powder
- ¼ teaspoon salt
- 5 tablespoons milk
For the Royal Icing:
- 2 large egg whites
- 2 teaspoon lemon juice
- 3 cups powdered sugar
- Orange gel food colour (2 drops)
- Black gel Food colour (2 drops)
Instructions
- Line a sheet pan with parchment paper and set aside.
- In a large bowl, beat together butter, vanilla extract, and powdered sugar until combined and creamy.
- In a medium bowl whisk together the flour, salt, and baking powder.
- Add the dry ingredients to the creamed butter and mix until just combined. Then add the milk a tablespoon at a time, and mix together to form a dough. Do not over-mix.
- Cover dough with plastic wrap and mould into a flat disk. Wrap tightly then chill the dough in the refrigerator for at least 1 hour or overnight.
- Preheat the oven to 350 degrees Fahrenheit.
- Once chilled, roll out the dough on a lightly floured surface to 1/4-inch thickness and cut out snowflake shapes using a snowflake cookie cutter. Use a spatula to transfer the snowflakes to prepared baking sheet, spacing at least 1″ apart.
- Bake the cookies for about 9-10 minutes, or until edges just begin to turn lightly golden brown.
- Let the cookies cool for 5 minutes in the baking tray before transferring them to a wire rack to cool completely.
For the Royal Icing
- In a large bowl, or in the bowl of a stand mixer, beat together egg whites and lemon juice on high until frothy.
- Turn the mixer down to low speed and mix in the powdered sugar in batches until sugar is incorporated and the mixture looks shiny.
- Turn speed up to high and continue to mix until the mixture becomes thick and starts to hold soft peaks.
- Take out around 6-7 tablespoons of icing and divide it into two equal parts and tint them with orange and black gel food colours.
- Spoon the icings into piping bags fitted with the desired tips and decorate your cookies.
- Outline the cookies with the white icing first, keeping a little space on the edges of the cookies. Then flood the cookies with the white icing; use a toothpick to spread the icing so it’s evenly filled. Let the icing set slightly.
- Once the base white icing is set make the eyes and nose of the snowman.
- Allow icing to set completely before serving or storing, about 2 hours depending on the thickness.
Recommended Products
As an Amazon Associate and member of other affiliate programs, I earn from qualifying purchases.

Nutrition Information:
Yield:
24Serving Size:
1 CookieAmount Per Serving: Calories: 211Total Fat: 8gSaturated Fat: 5gTrans Fat: 0gUnsaturated Fat: 3gCholesterol: 21mgSodium: 50mgCarbohydrates: 34gFiber: 1gSugar: 21gProtein: 2g
This information is provided as a courtesy and for entertainment purposes only. This information comes from online calculators. Although frugalmomeh.com attempts to provide accurate nutritional information, these figures are only estimates.