
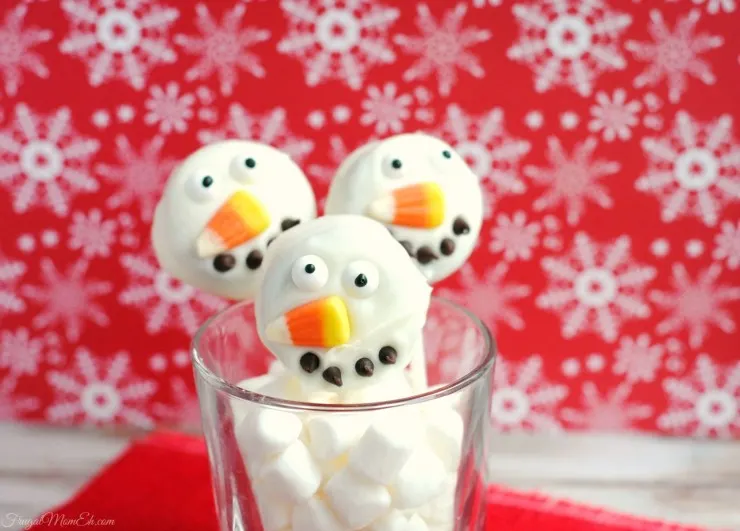
These Snowman Oreo Pops are a fun Christmas Cookie treat with a simple recipe that is a piece of cake to pull off!
If you are looking for more seasonal ideas check out my Christmas section!
Snowman Oreo Pops –
12-15 black & white sandwich cookies, any brand
12 oz. Wilton white candy melts
1 package of Wilton candy sticks
candy corn (perfect for leftover fall candy!)
mini chocolate chips (snowman’s mouth)
Candy eyes (you could also get away with using the mini chocolate chips)
Directions –
#1. Carefully remove the tops of each black & white sandwich cookie and set aside. Next, line a baking sheet with foil (prevent sticking and makes for easy clean up).
#2. Pour the Wilton candy melts into a microwavable safe dish. Microwave in 30 second increments stirring every 30 second until melted. My microwave took about 2-3 minutes. Allow the chocolate to cool a few minutes before working with it.
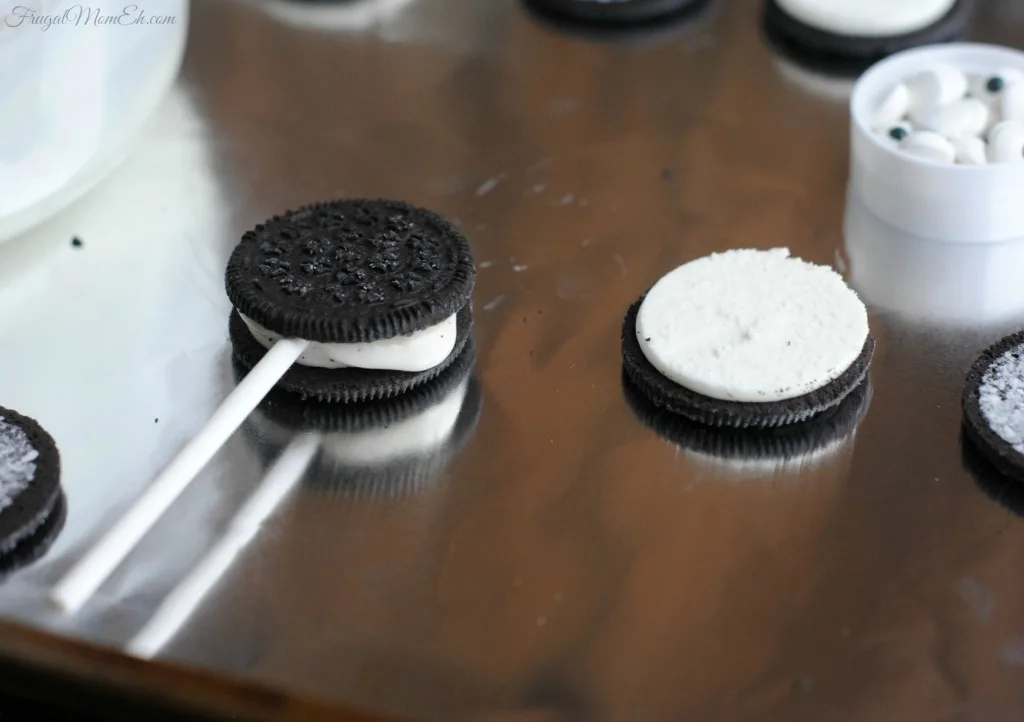
#3. Place the cookie halves, filling side up on the foil lined baking sheet. Using a small spoon, place a small dollop of melted chocolate right on white sandwich cookie filling. Place the stick in the chocolate and then replace the top (see photo).
Repeat this step with the rest of your cookies. The melted chocolate will set and act like glue. Trust me, you’ll be happy you did it this way and they stick!
#4. Once all the cookies have a stick and a top, place the baking sheet in the fridge for 15 minutes so the chocolate fully sets.
#5. By this time, you may want to place the melted chocolate dish back in the microwave. If the chocolate has started to set simply microwave again for 20-30 seconds, stirring until melted.
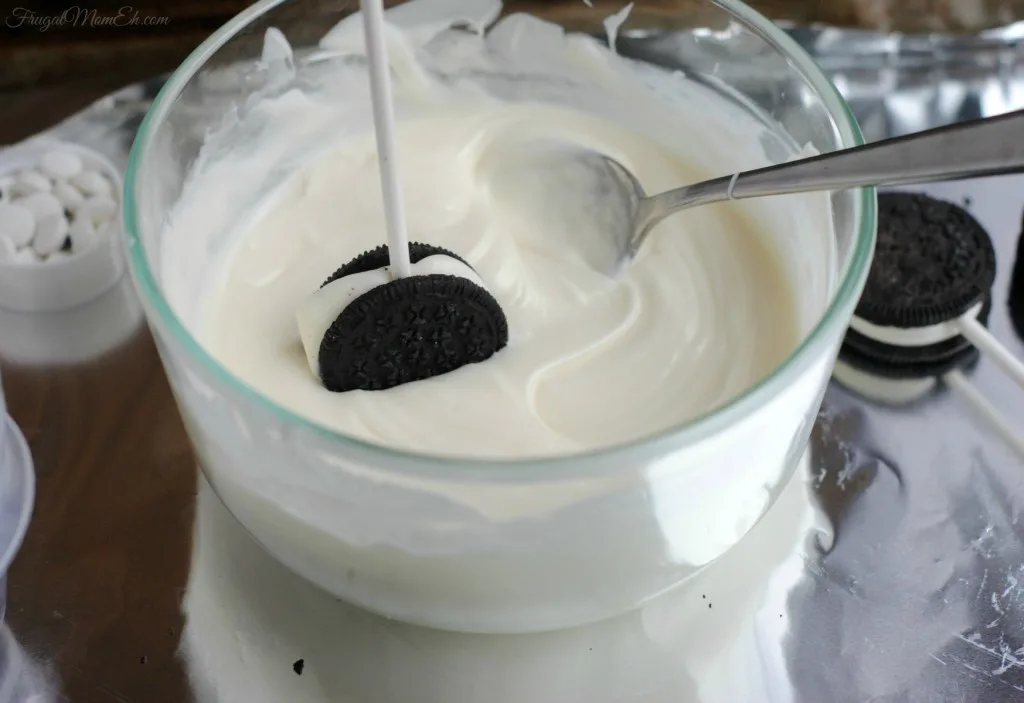
#6. Remove the baking sheet from the fridge and dip each cookie into the chocolate. Use a spoon to help coat the cookie and allow the excess chocolate drip back into the bowl (see photo).
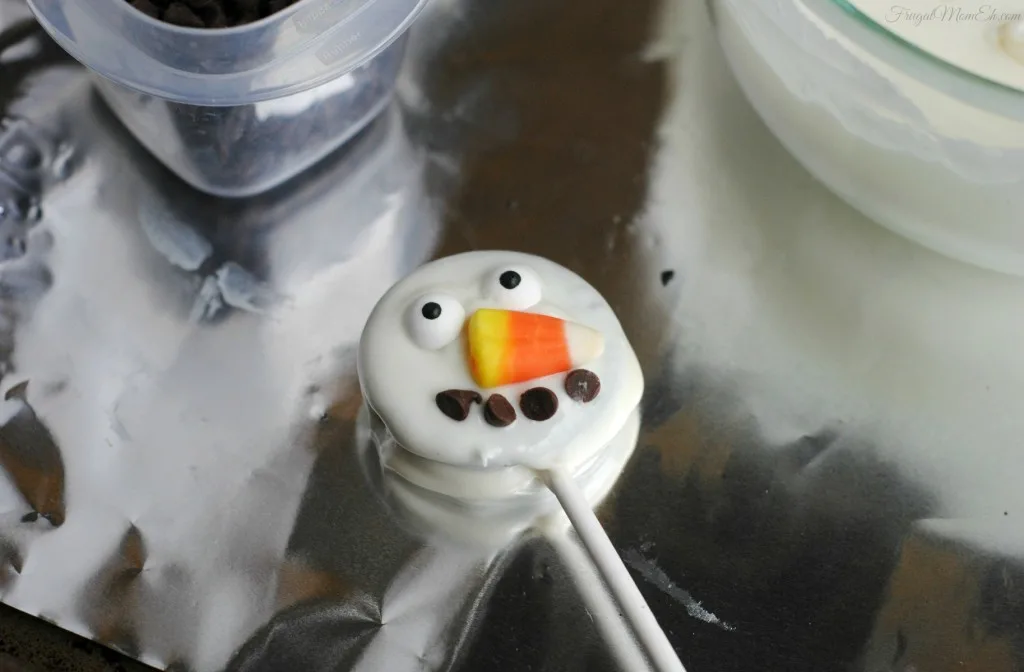
Lay the chocolate dipped cookie back onto the baking sheet and give your snowman a face using the candy eyes, candy corn and mini chocolate chips.
#7. Repeat the dipping process with the rest of the cookies and giving each one a face.
#8. Once all the cookies are dipped, place the baking sheet back in the fridge for about 20 minutes so the cookies set.
If not serving immediately, store in a cool dry area (or the fridge).
*Makes approximately 12-15 cookies. 2 Chocolate Dipped Cookies = 1 Serving
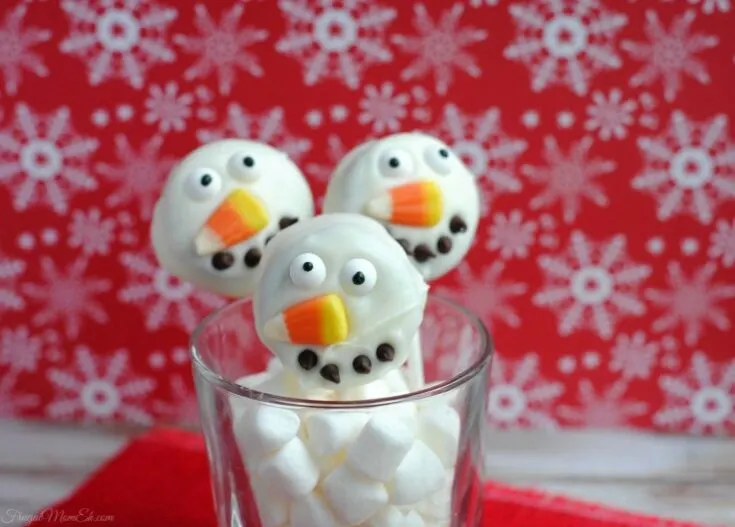
Snowman Oreo Pops
Ingredients
- 12-15 black & white sandwich cookies, any brand
- 12 oz . Wilton white candy melts
- 1 package of Wilton candy sticks
- candy corn, perfect for leftover fall candy!
- mini chocolate chips, snowman's mouth
- Candy eyes, you could also get away with using the mini chocolate chips
Instructions
- #1. Carefully remove the tops of each black & white sandwich cookie and set aside. Next, line a baking sheet with foil (prevent sticking and makes for easy clean up).
- #2. Pour the Wilton candy melts into a microwavable safe dish. Microwave in 30 second increments stirring every 30 second until melted. My microwave took about 2-3 minutes. Allow the chocolate to cool a few minutes before working with it.
- #3. Place the cookie halves, filling side up on the foil lined baking sheet. Using a small spoon, place a small dollop of melted chocolate right on white sandwich cookie filling. Place the stick in the chocolate and then replace the top (see photos).
- Repeat this step with the rest of your cookies. The melted chocolate will set and act like glue. Trust me, you'll be happy you did it this way and they stick!
- #4. Once all the cookies have a stick and a top, place the baking sheet in the fridge for 15 minutes so the chocolate fully sets.
- #5. By this time, you may want to place the melted chocolate dish back in the microwave. If the chocolate has started to set simply microwave again for 20-30 seconds, stirring until melted.
- #6. Remove the baking sheet from the fridge and dip each cookie into the chocolate. Use a spoon to help coat the cookie and allow the excess chocolate drip back into the bowl (see photo).
- Lay the chocolate dipped cookie back onto the baking sheet and give your snowman a face using the candy eyes, candy corn and mini chocolate chips.
- #7. Repeat the dipping process with the rest of the cookies and giving each one a face.
- #8. Once all the cookies are dipped, place the baking sheet back in the fridge for about 20 minutes so the cookies set.
- If not serving immediately, store in a cool dry area (or the fridge).
Nutrition Information:
Yield:
6Serving Size:
1 gramsAmount Per Serving: Unsaturated Fat: 0g
Photos and Recipe created by Jill S. for FrugalMomEh.com

Elizabeth Lampman is a coffee-fuelled Mom of 2 girls and lives in Hamilton, Ontario. She enjoys travelling, developing easy recipes, crafting, taking on diy projects, travelling and saving money!




Susan Patterson
Thursday 19th of November 2015
These look like so much fun and the kids would love them!
Peady @ Tempered with Kindness
Sunday 7th of December 2014
SO CUTE!
What a fun idea!
Great tip about adding some of the melting wafer chocolate inside the cookie sandwich. There's nothing worse than sliding pops.
I think I'll add this to the upcoming activities with the Things and their friends!
Stephanie LaPlante
Thursday 4th of December 2014
These sound delicious and they're sooo cute!
kathy downey
Wednesday 3rd of December 2014
I am going to try these they are the cutest thing yet
DARLENE W
Monday 1st of December 2014
You have so many great ideas for interesting and fun edibles, thank you