Owl Smash Cake "How To" Guide
Check out the updated Owl Smash Cake Tutorial with brand new photos!

I decided a few months ago that I wanted to have an owl themed Birthday for my daughter and so the daily Pinterest searches began while I looked for the perfect everything. I came across an adorable Owl cake on Socially Circled and fell in love.
My only complaint is the lack of clear instructions so I thought I would put together a how-to guide for this cute cake. You can find the original information at the above link.
Ingredients:
- 2 cakes baked in 1-quart Pyrex bowls
- 2 Oreo cookies
- 2 orange starburts
- Chocolate Icing
- Coloured Icing
- 2 brown candies (Junior mints, M&Ms, Smarties etc…)

To start I baked two cakes in a 1 qt pyrex glass bowl according to my cake recipe. Make sure you grease the bowl either with butter or Pam so the cake comes out easily. I forgot that step on the first cake and it got a little messy.
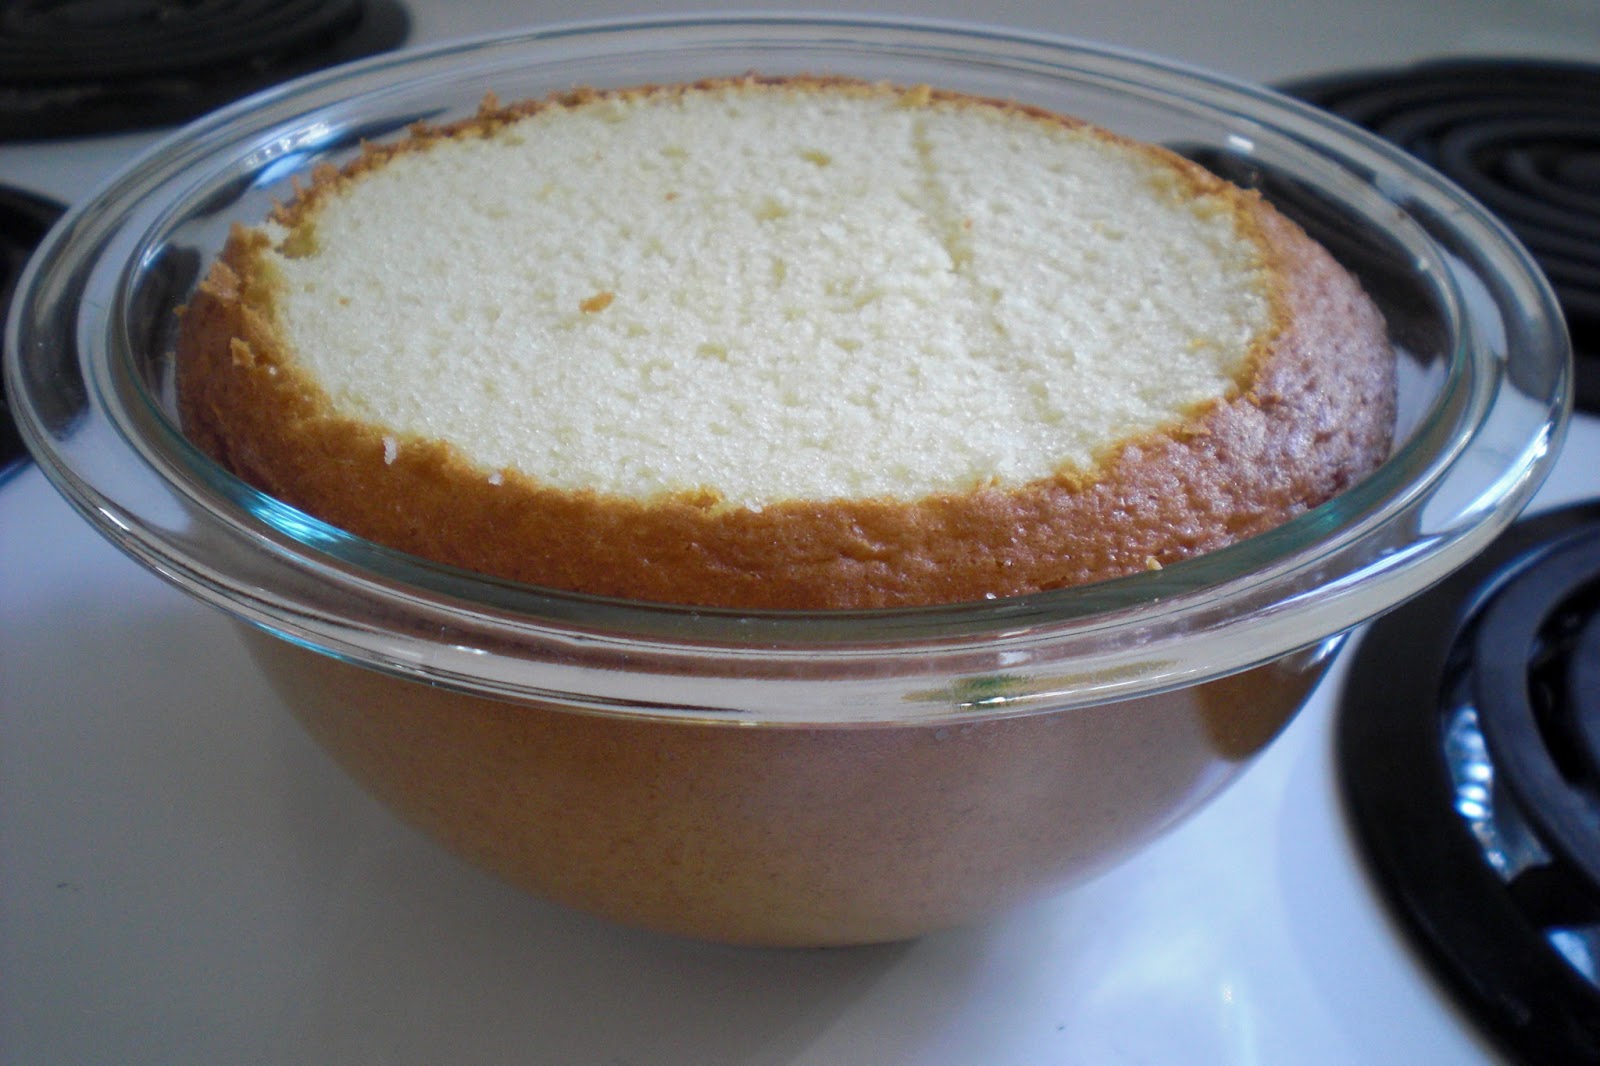
Allow the cakes to cool, then cut off the top so it is level before removing the cake from the bowl.
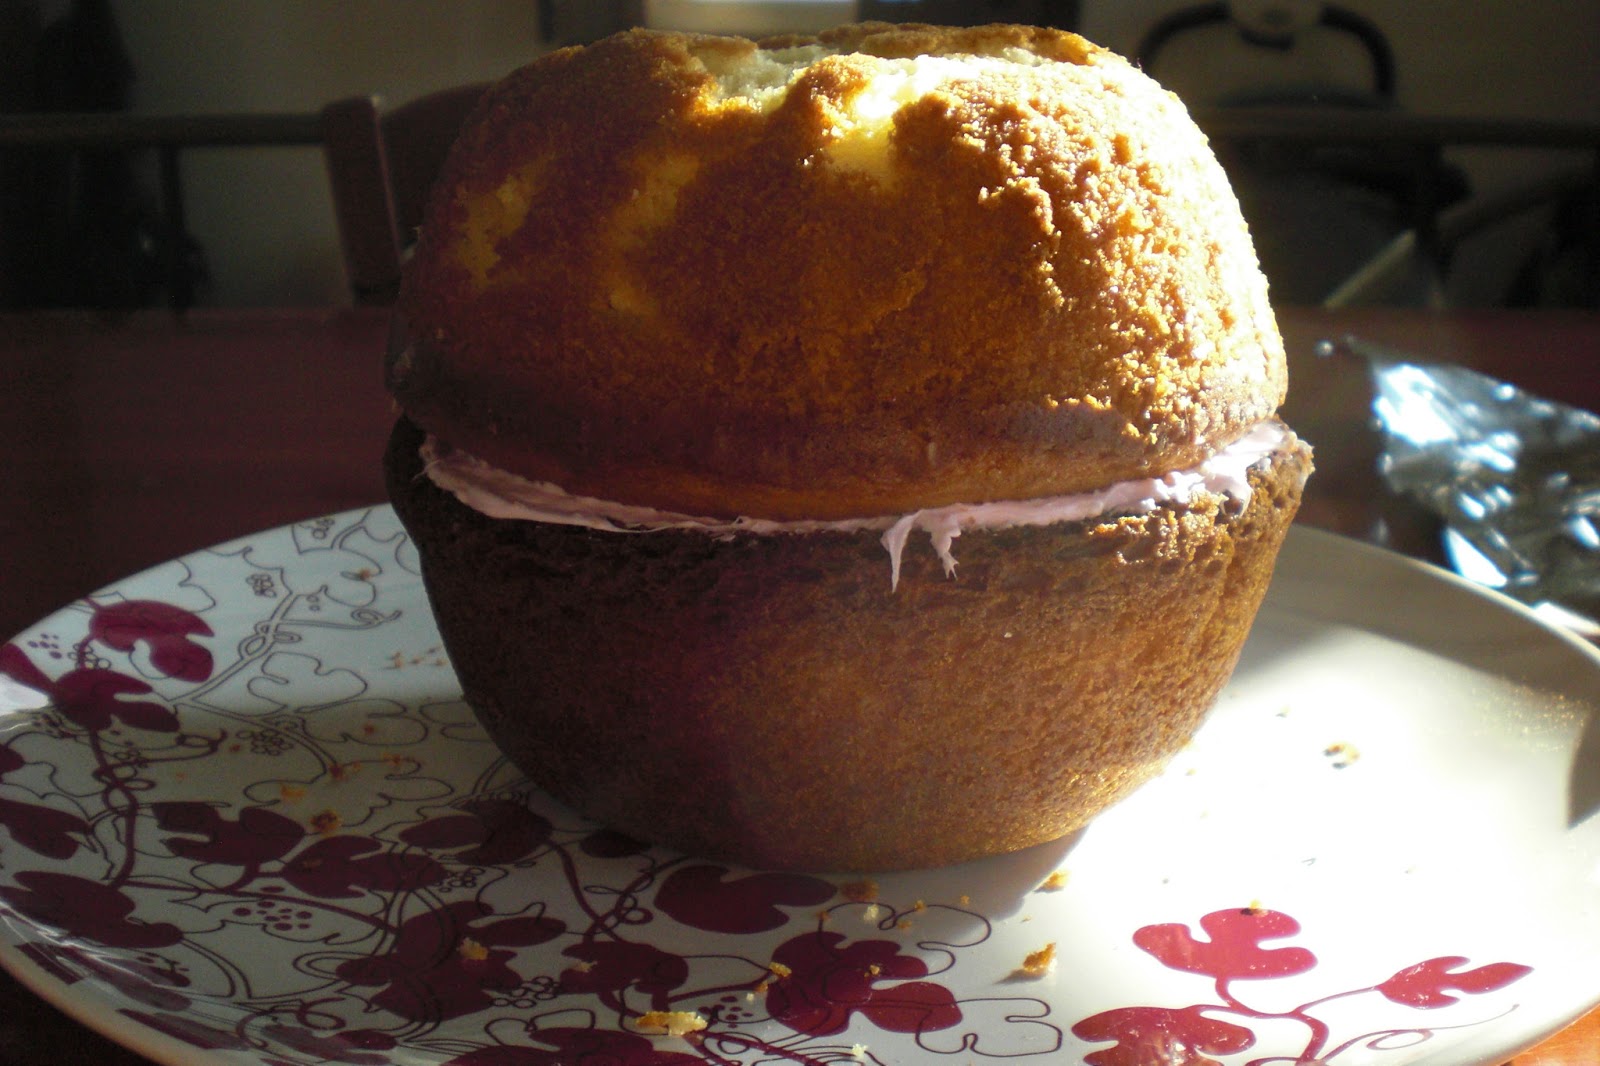
Figure out which cake should go on top first. One of my cakes were slightly bigger than the other so I used that for the bottom. Spread icing on the top of the bottom cake and layer the top cake on top creating a “ball”.
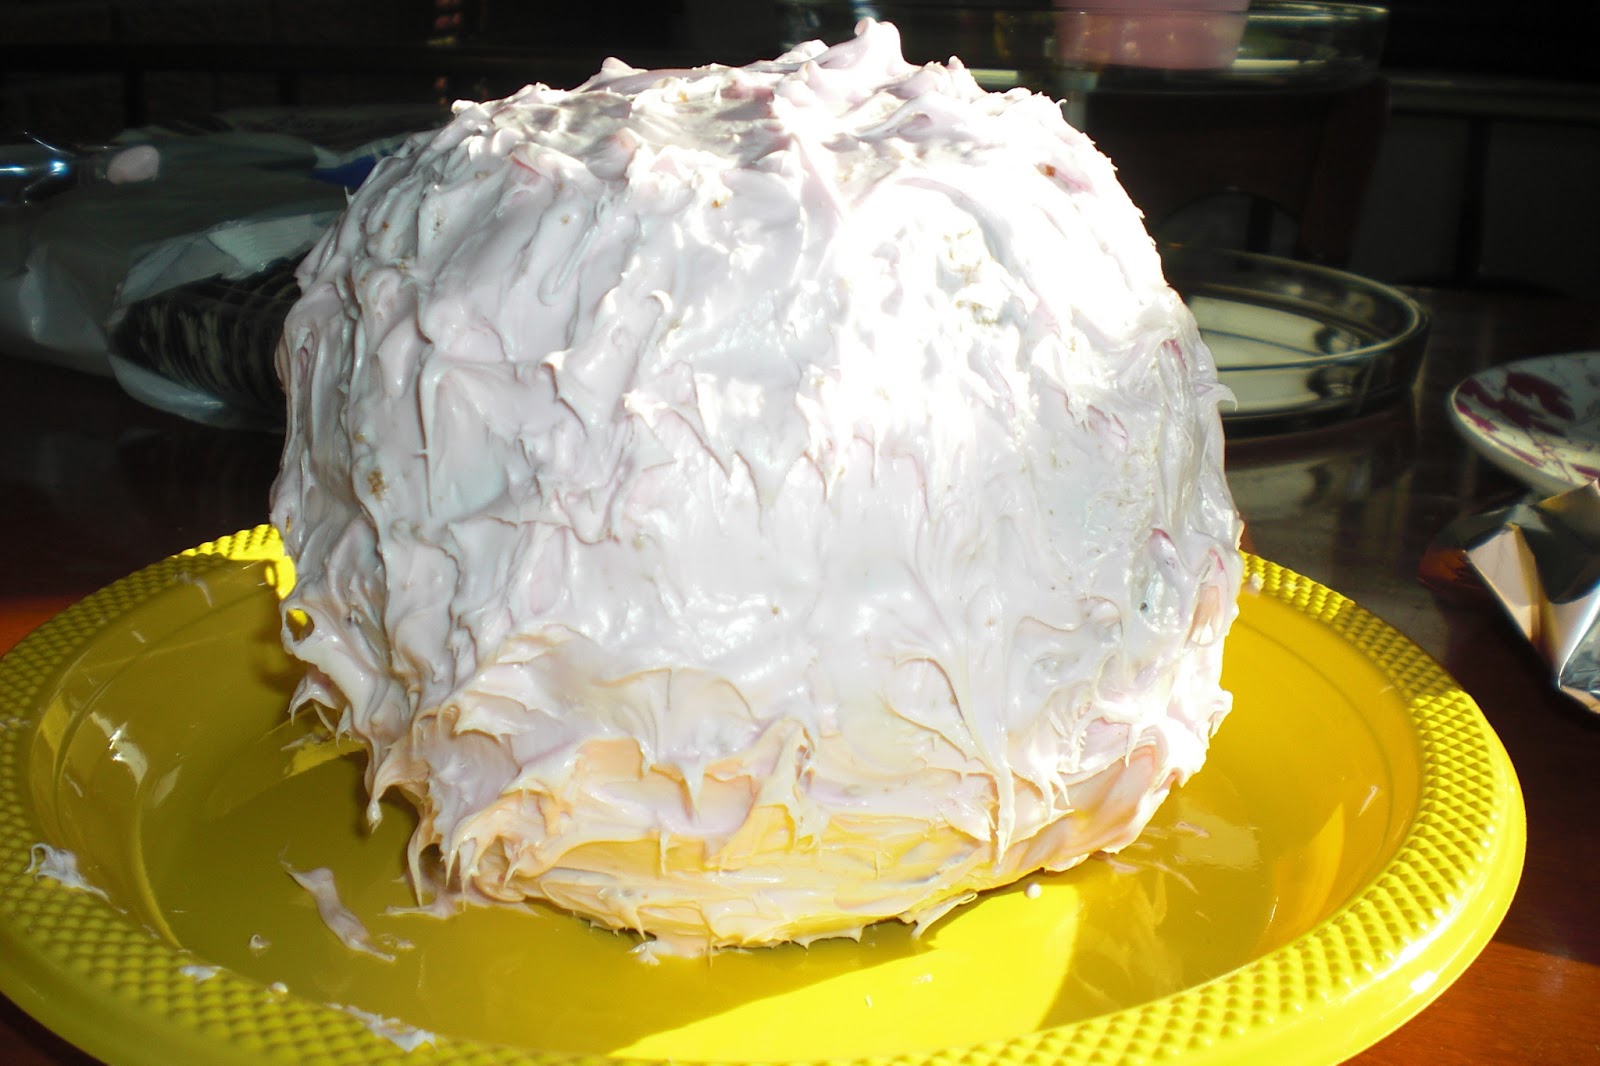
Next cover the body in icing, I used the knife I was applying the icing with to create a feathered look by pulling at it a bit

Separate the two Oreo cookies, leaving the cream on one side of the cookies for the eyes. Place on cake. Cut one of the plain cookies in half and insert into cake for the ears.
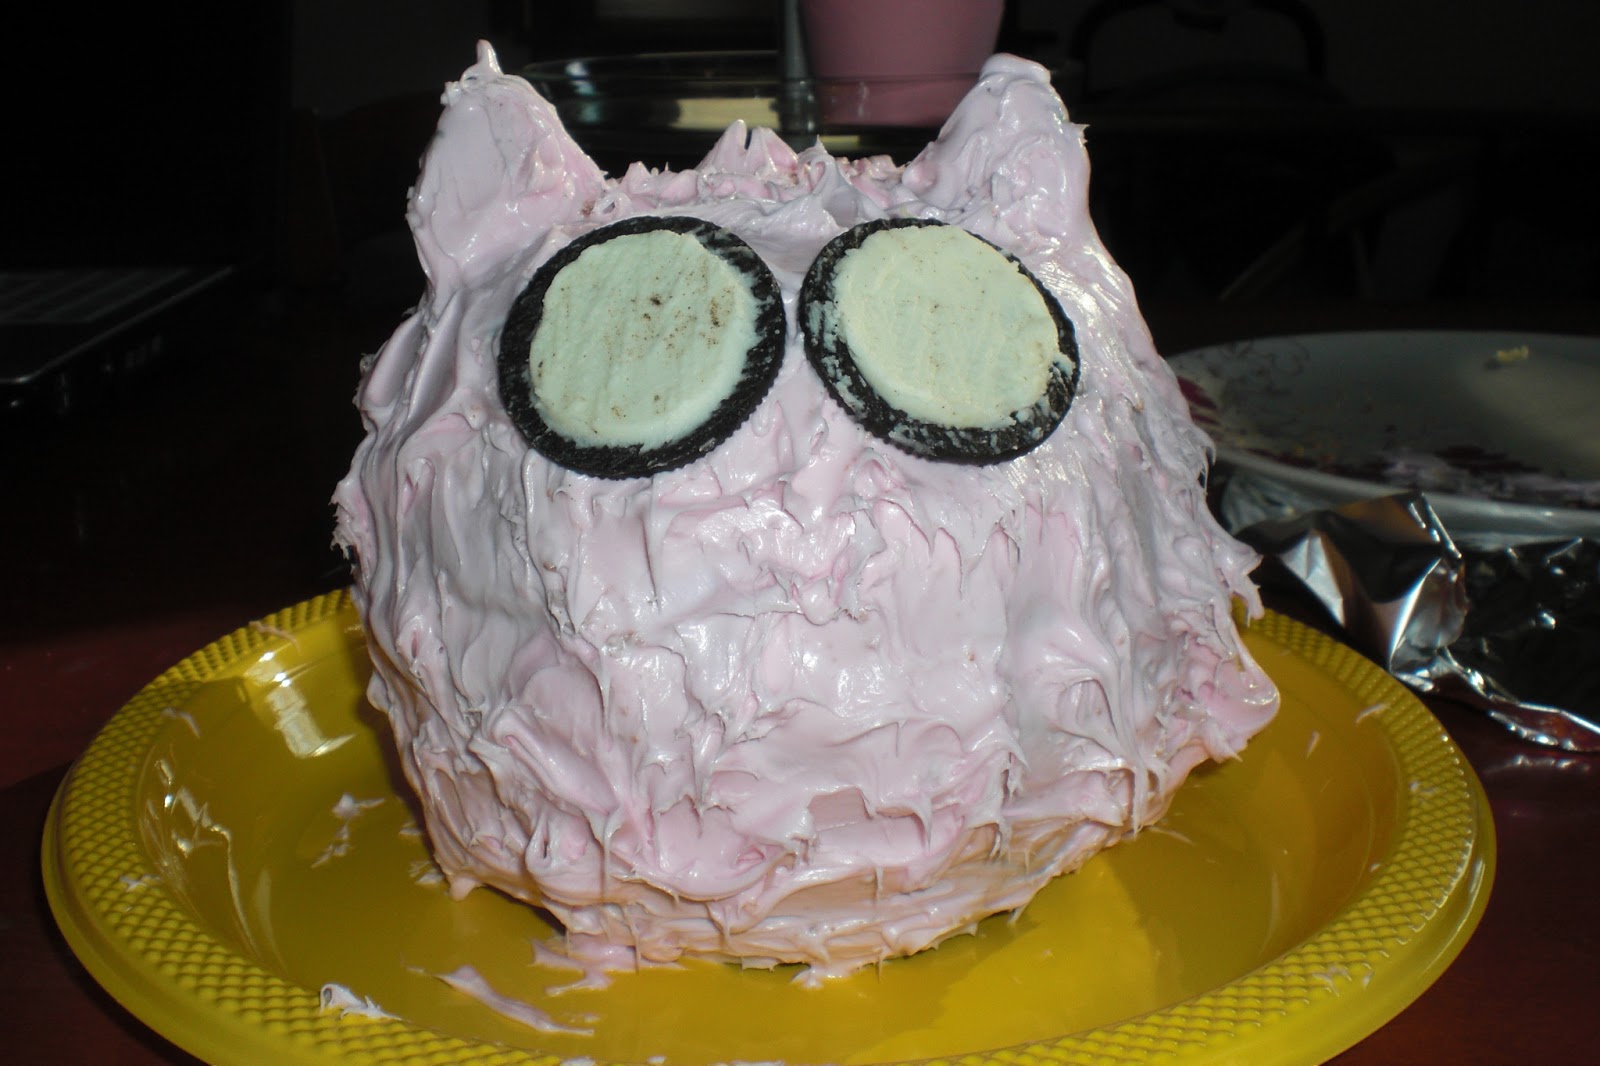
Cover the Oreo “ears” with the coloured icing.

Next shape one of the starbursts into a small triangle for the nose and press into the icing. Dot the back of your brown candy with icing and press into the white of the Oreos.
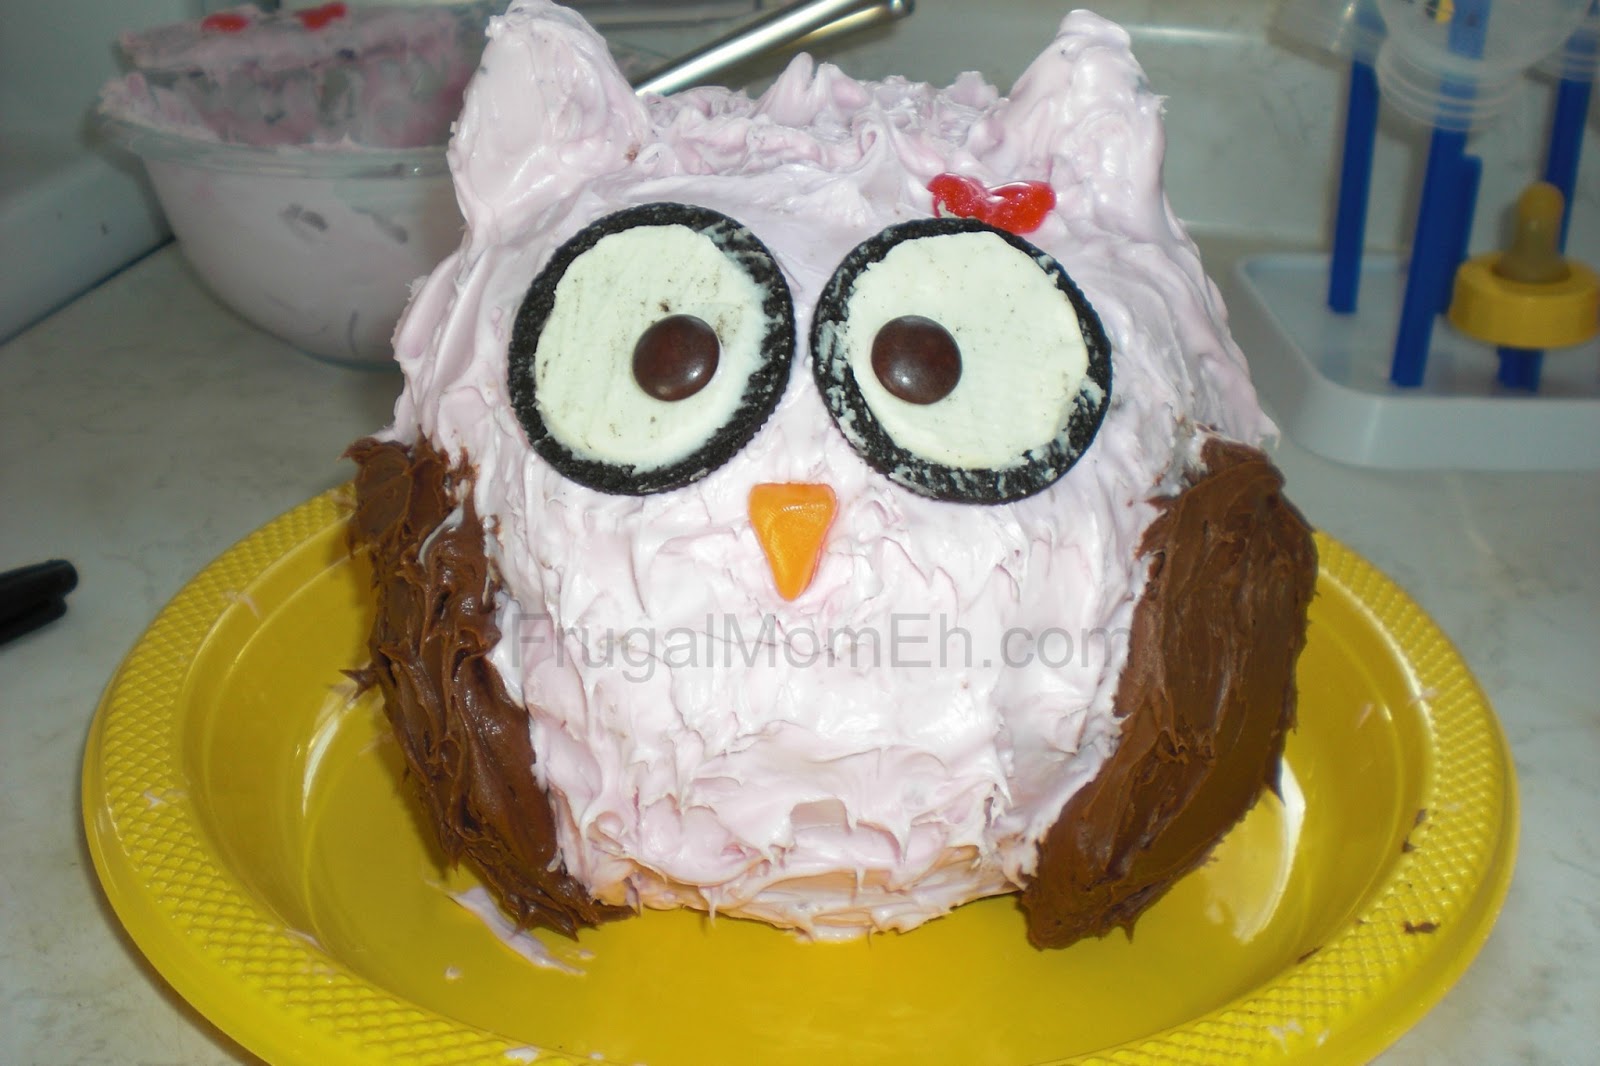
Pipe chocolate icing onto the cake to create wings. I used pink sparkle gel icing from Wilton to place a heart above the one eye.

I used more of the gel icing to try and create dots on the wings but found it drooped thanks to gravity. I ended up really liking the effect anyway but I think I prefer Socially Circled’s use of white chocolate chips pressed into the wings to create the dot pattern. It isn’t pictured but I cut the other starburst into four “strips” to form feet.


Hi i was wondering what brand of icing that you use can you show me a picture.thank you
I’ve used both homemade buttercream and Betty Crocker.
I love this! Just pinned it to my Food Art board but I think I need to add it to my Preschool board too. What a great cake for O is for Owl, don’t you think?
I would be so honored if you’d come by my Wonderful Wednesday Blog Hop and share this post.
PLEASE ?????
Super cute cake!!!My daughter loves owls!!!I’m making one,thanks for sharing:)
Did you make your own cake and icing or use betty crocker? I am toying with the idea of making a little bit healthier cake, but not sure how it will hold up in the shape of an owl.
I used box mix and prepared icing. I had considered trying this with a carrot cake but knew Keira wouldn’t be interested in actually eating the cake so didn’t bother and went with quick and easy.
I did make this again with a homemade vanilla cake though just to eventually update the pics and it didn’t hold up quite as well. It still looked great once I was finished though so it’s worth trying with your own recipe.
OMG!! I love it, I should try making this, but I have a feeling mine is not going to look as good as yours…lol
That is so cute! I love the big eyes!
This is so cute! I’m going to make this for my niece’s next birthday, she’s crazy for owls!
oh how adorable is that!! My daughter just found out she’s having a girl, she’s chosen owls for her theme… I’m super excited about this now, cause I can whip up some of these for the baby shower! So wonderful! Thank you <3
That is just adorable! I am impressed…. I would never be able to come up with anything that clever
This is cute and hilarious! I have a niece that loves owls and I am sure she would faint if she walked in, knowing this owl cake was for her. Also, I never thought of using these bowls for this. Thanks!
This is the best cake EVER lol I love this cake and I love how easy it is to make! My grandkids will get a kick out of making this!
Thanks for the recipe and instructions!
Oh my goodness that is just the cutest thing! Love it!
Oh my goodness!!!! I have to make this for my daughters birthday! She is obsessed with owls right now!
a lovely cake, I’m sure my grandchildren would enjoy this.
yum! Looks soo cool!
This is so cute! Owls are great. 🙂
How cute ! My daughter loves owls – this would be a perfect birthday cake.
oh my gosh! this is ADORABLE 🙂 will definitely be on my short-list of cakes for babe’s 1st!
I love your idea on how to make this adorable cake.I take care of two little special girls who are 2 and 3 years old and they will love this.Thanks.
Very cute Elizabeth, did Kiera just love it??
She had been awake for about 8hrs by the time the cake was put in front of her. She was too tired to care 🙁
lol! My sis in law has a owl fetish. She’d love this!
I just love this! I will have to make it now…. just too cute! Thank you so very much for sharing 🙂
Awesome – Would love to make it as nice as yours. I can try.
I love it! It’s adorable. I want it for my birthday actually. 😉
http://www.womaninreallife.blogspot.ca/
That is SO cute! I love owls! It doesn’t look all that difficult either! I wonder if it would be easier to ice the bottom part before turning it over and attaching the top part? You could ice it (not the middle section), put a plate on the bottom, carefully turn it over, and then ice the middle to attach the top. Then ice the top and smooth the joining section.
I love this! I am going to try it for my 2 year old’s birthday this spring:)
Oh My!I wish I would have seen this two weeks ago! I would have made this for my daughter’s birthday! She loves owls. That is just too cute! I’ll try to make this for her any hoo. Thanks again! =D
OH MY GOODNESS! That is so cute! I love owl stuff for my new baby girl. This is great. 🙂
Just adorable! Thanks for the step-by-step instructions! Right before dinner now & I’m starving because of your owl cake!
Jenna
http://www.snymed.blogspot.ca
Love it!
That is so cute. Too bad our pyrex aren’t bowls, they’re for loaf. I’m going to look for what I can make up with rounded rectangular ones. maybe a ferret! thanks for the idea!
Love it! Almost looks too pretty to smash lol, very creative, thanks for sharing!
I love this idea!! Very cute.
I love this! I have been looking for something cute to make for my tween daughter’s upcoming birthday!