

This Quilled Pig Craft for kids is a fun Paper Quilling Project that is appropriate for any skill level. Use the directions to jump start their imaginations and let them have fun quilling pigs.
Kids will love making these cute little Quilled Paper Pigs as their next craft project.
Use them on cards, glue them onto popsicle sticks to make bookmarks, turn them into magnets… the possibilities for these little cuties are endless!
This quilled pig project would be great to accompany reading The Three Little Pigs!


Quilled Pig Craft for Kids
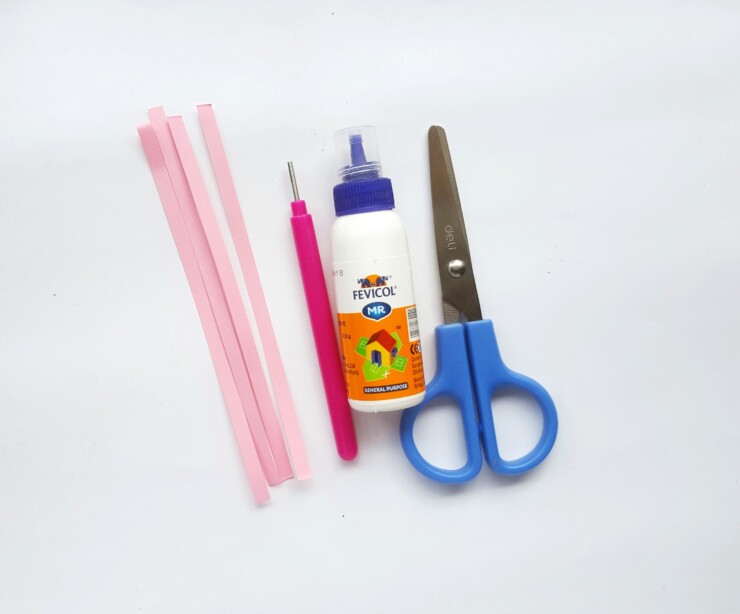
List of Supplies:
Quilling paper strips
Craft paper
Scissors
Slotted quilling tool
Craft glue

Instructions:
Step -1:
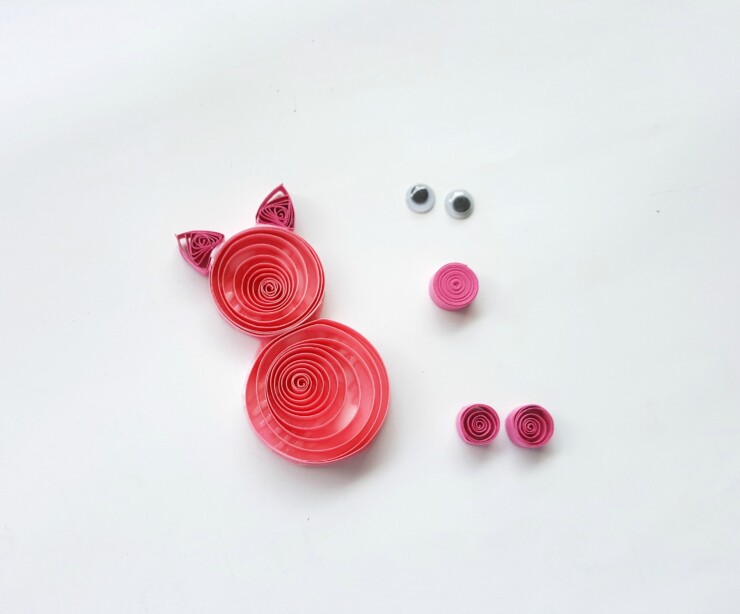
Select pink colored quilling paper strips for this craft. Take a 12 inch long strip and create a loose coil with it. (Scroll below for embedded video showing how to make the different shapes needed.)
Step -2:
Take another 12 inches long strip but this time; make a relatively smaller loose coil with it.
Step – 3:
Make 2 loose coils using 5 inches long strips; 1 tight coil from 20 inches long strip and 2 triangles from 8 inches long strip.


Step – 4: is
The big loose coil is the body, small loose is the head, the 2 triangles are the ears, 2 small loose coils are the front legs and the tight coil is the nose of the quilled pig.
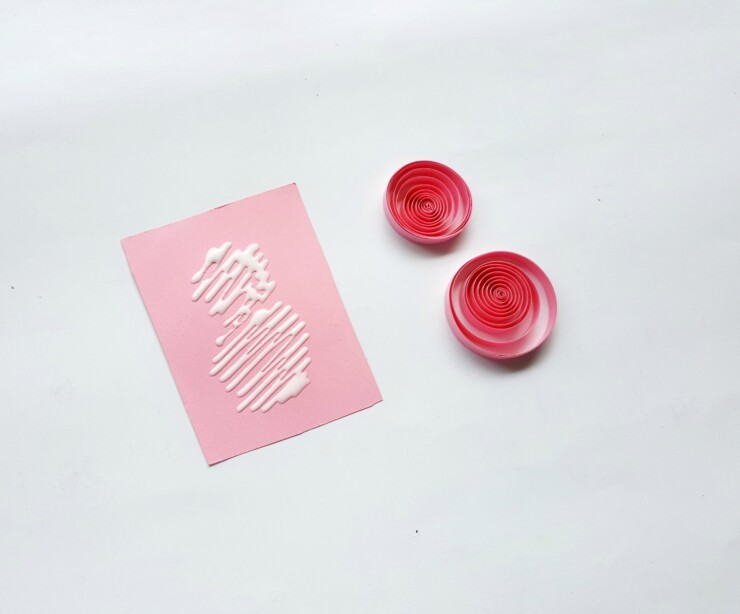

Step – 5:
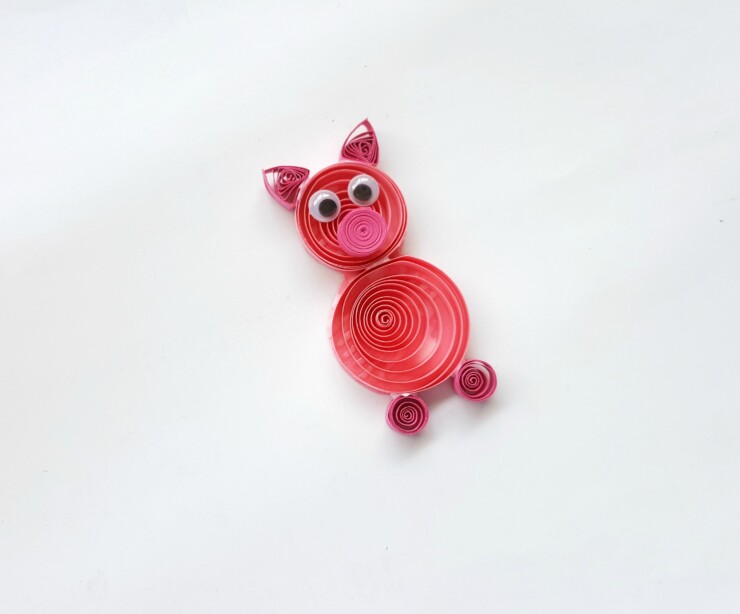
Cut a rectangle out of pink colored craft paper. Apply glue on the paper by tracing the size of the 2 big loose coils, if placed side by side on the paper.

Step – 6:
Place the 2 big loose coils on the glued part of the pink craft paper. Allow the glue to dry.

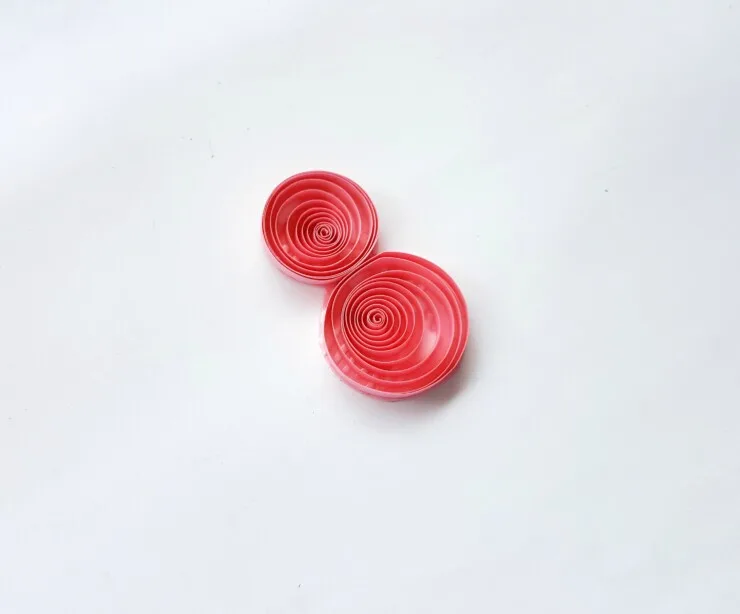
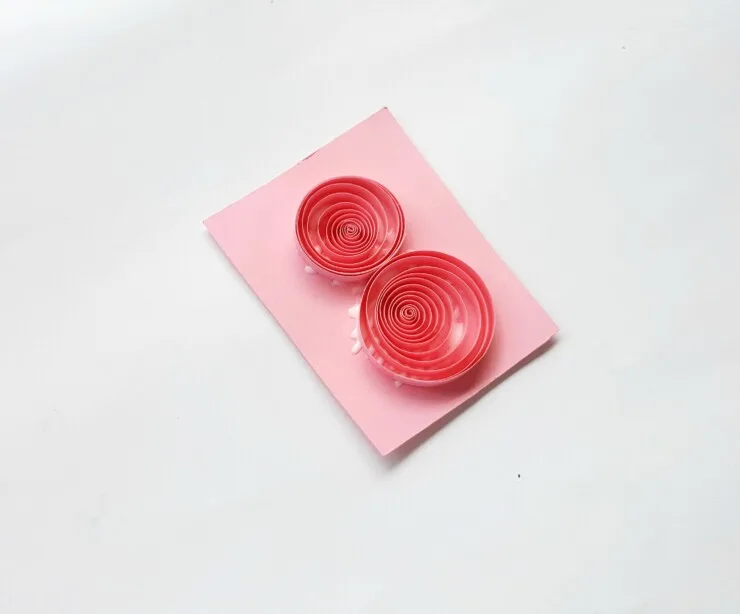
Step – 7:
Cut out the craft paper around the outer border of the quilled papers.

Step – 8:
Glue the 2 quilled triangles on the top side of the small loose coil.
Step – 9:
Then, glue the tight coil (the nose) and the 2 small loose coils (the front legs) to complete the quilled pig.

Step – 10:
Glue some googley eyes to the face. Draw on nostril details with a sharpie.


Elizabeth Lampman is a coffee-fuelled Mom of 2 girls and lives in Hamilton, Ontario. She enjoys travelling, developing easy recipes, crafting, taking on diy projects, travelling and saving money!